

This guide is the fourth in a new series of new guides brought to you by
While processes like enrollment rules and groups make it easy to mass enroll users into Courses or Learning Plans, there is no great method at our disposal for unenrolling users. Most admins I talk to end up using the front end and selecting users one by one, which is a tedious, time consuming, and error prone task. Being able to perform this via CSV upload is a highly requested feature, but while we wait for improvements to this area of the platform, you can use the bulk enrollment API endpoint to your advantage.
To keep things simple here, we are going to assume you are only unenrolling users from Learning Plans or Courses and not both, and that all the users you are identifying per removal run are to be removed from the same Courses or Learning Plans.
Important Note: The API endpoint we will be using is a DELETE endpoint, meaning it will remove and change information in your system. It is highly recommended to test in a sandbox environment before doing this in a production setting. This way, you can be confident in the changes you are making. Additionally, it is always advisable to download a backup report of all current statuses, especially completions, for safety prior to performing this API call.
Table of Contents
Getting the Information Together
In order to leverage this endpoint, you will need to gather a few pieces of information—some easy, others not quite as easy. Some of this information can be gathered in a few ways, so choose your preferred method for doing so.
Docebo User IDs
First and foremost, if you are going to be unenrolling a large amount of users, you need to know which users those are. Ultimately we need this to be a comma separated list of the User Unique IDs.
Note: Due to performance considerations, this operation will be capped at 1,000 users per call. You can easily make batches of users and swap them out to quickly unenroll more than 1,000 users.
While there are several methods for retrieving these IDs, in this particular case I highly recommend simply making a ‘Users – Courses’ or a ‘Users – Learning Plans’ report, whichever is appropriate. When defining your report, make sure to check the box ‘User Unique ID’ under the User Fields selection area:
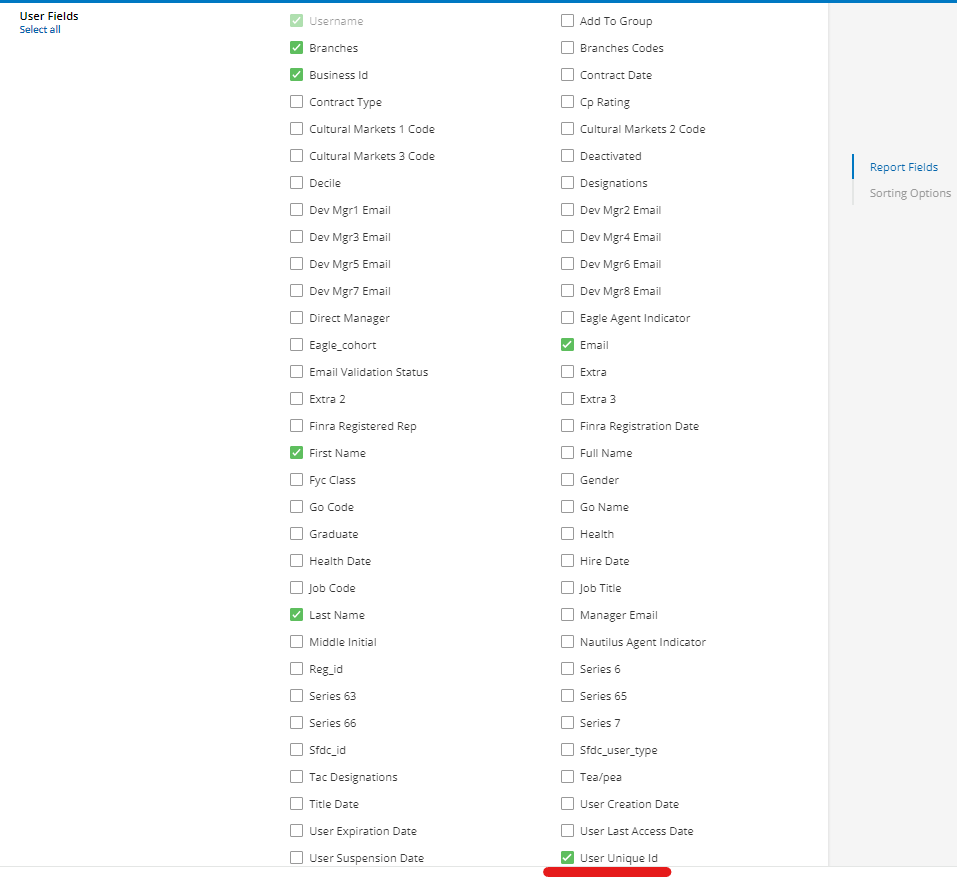
This will add a column of the exact IDs we need. Use the report to sort/filter/organize your data to identify the users.
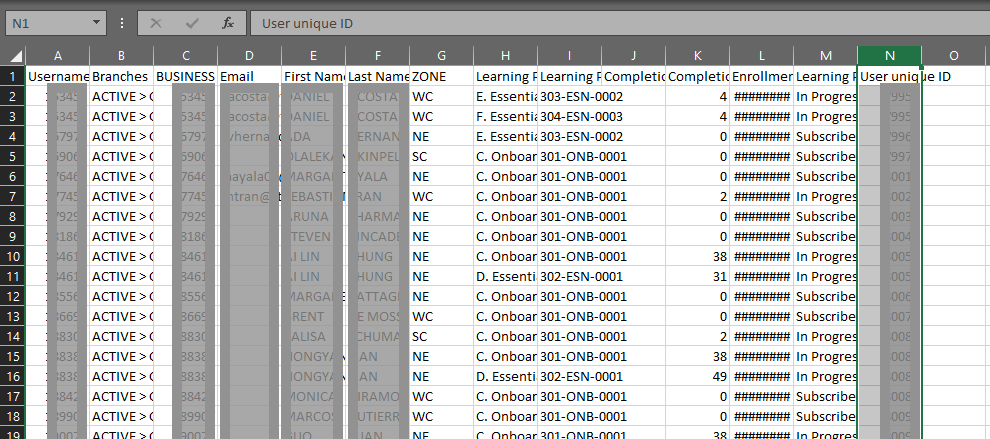
When you are ready, we need to convert the column of ‘User Unique IDs’ to a block of comma separated values. There are many ways to do this, so feel free to use your own preference (i.e. concatenating a comma to the end of each row, using TEXTJOIN to merge a defined range, etc.). If you do not have a good or fast way to do this, the easiest is to:
-
Copy the column of ‘User Unique IDs’ that you want to use to your clipboard.
Note: Skip the heading, we only want the User ID numbers.
-
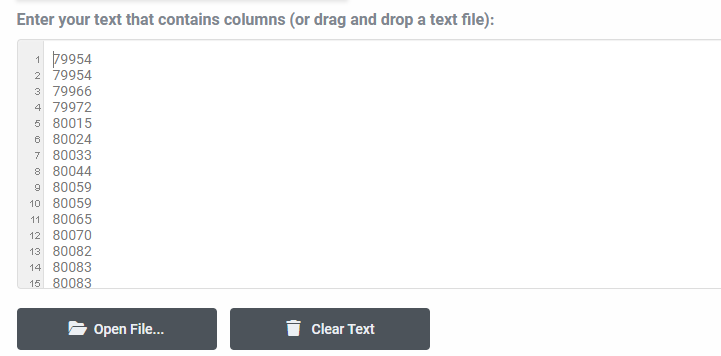
In the top box, paste the User IDs into it:
-
Scroll down to the bottom box and you will find all the IDs separated by a comma, which is exactly what we want. Copy and paste this in a place you can refer to later (or just leave this webpage open for the time being).

Learning Plan IDs
If you are removing the users from a Learning Plan, you need to know the Docebo Unique ID of that Learning Plan. Unfortunately, these are not the easiest to get. There are two main ways to find these IDs:
In the Front End
-
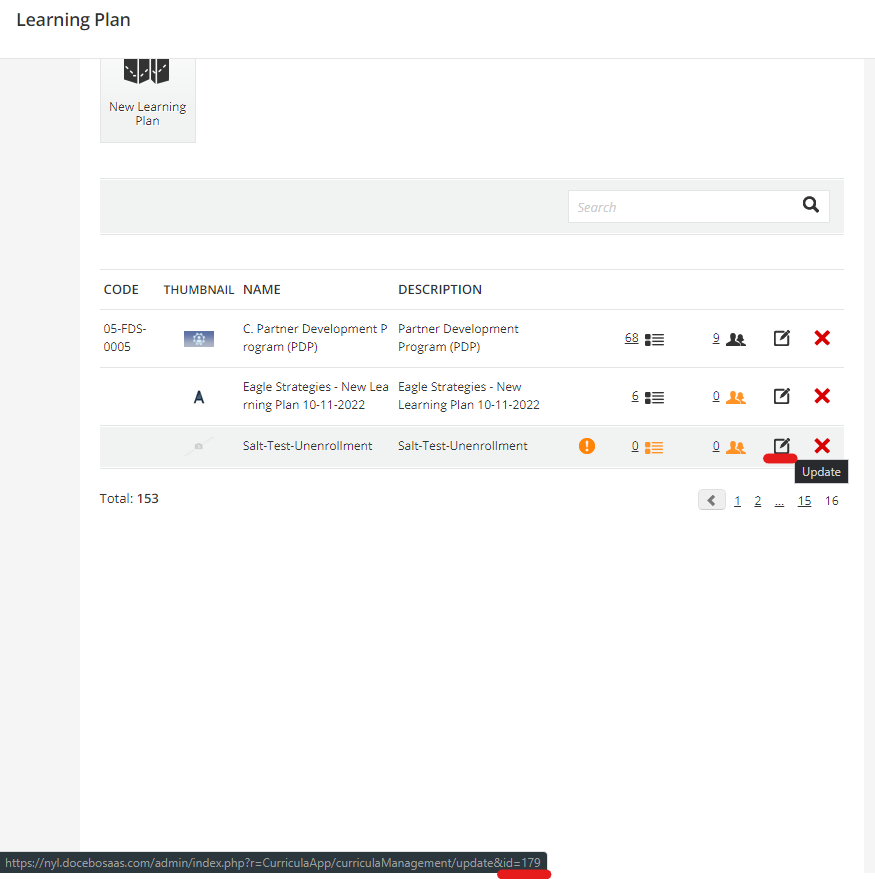
Navigate to the ‘Learning Plan’ area in the Admin Menu.
-
Find the Learning Plan you wish to identify the ID of.
-
Hover your mouse over the edit icon and look at the bottom of your screen. In the URL preview, at the end you should see ‘&id=’ followed by a number. The number is that Learning Plan’s Unique ID, so make a note of it.
Using the API Browser
If you need to find the IDs of many Learning Plans, you may be better to use the API Browser. (Plus, since this series is all about learning to use the API Browser to get information, consider this a ‘two for the price of one’ learning opportunity.)
-
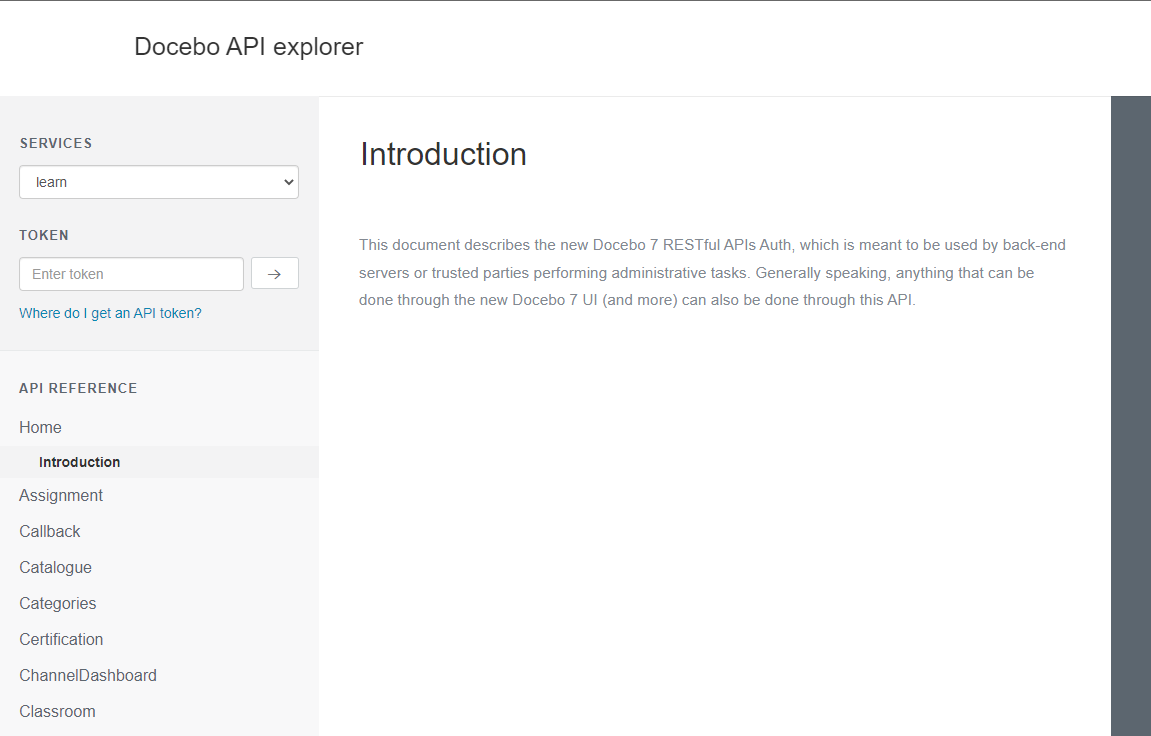
Log into your Docebo instance’s API Browser by going to: https://<yoursubdomain.docebosaas.com>/api-browser/

-
On the ‘Services’ menu, make sure ‘learn’ is selected if it is not already.
-
Scroll down the left side to find and select the ‘LP’ category.
-
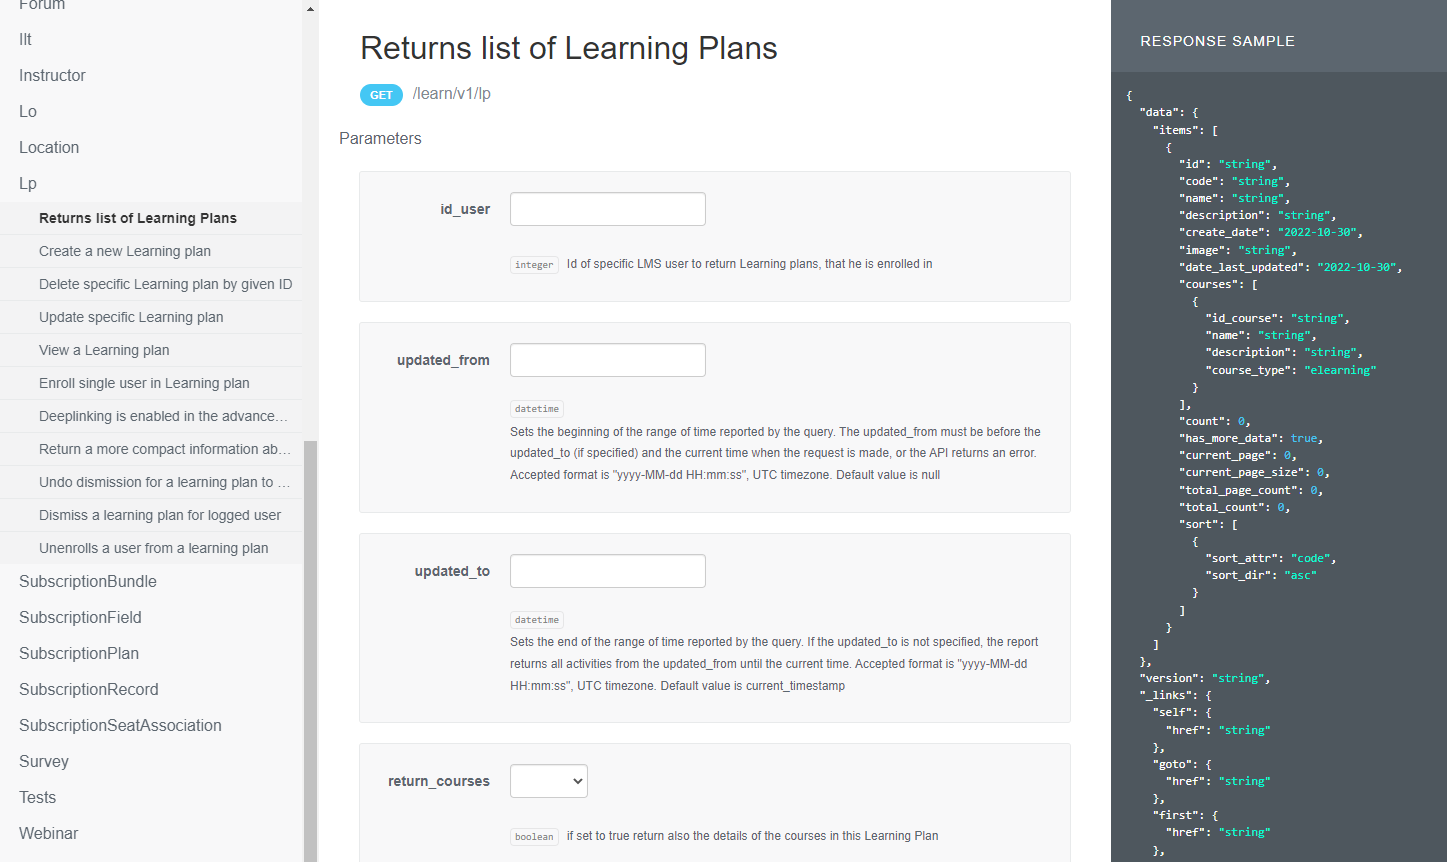
Select the ‘Returns list of Learning Plans’ option.
-
You can adjust the parameter fields as much or as little as you want to help find the plans you are interested in. There are a few I would recommend paying attention to:
-
page_size: This endpoint can have very long lists. To avoid performance issues it will make pages of results. This lets you set how many items show up on a page. By default it is 10 items. The maximum size is 200 items. Enter an appropriate number for your needs here.
-
page: This endpoint can have very long lists. To avoid performance issues it will make pages of results. This field lets you choose which of those pages you view in the output. For example, if you have 50 learning plans and the page size was set to 20, 3 pages would be generated. When you initially run the endpoint you will see items 1-20. If you put a 2 in this field you will then get items 21-40, a 3 and you’ll get 41-50, etc.
-
search_text: Enter text to search the learning plan name and code fields. Only the plans that match the search text you enter. This is useful to narrow down the plans.
-
-
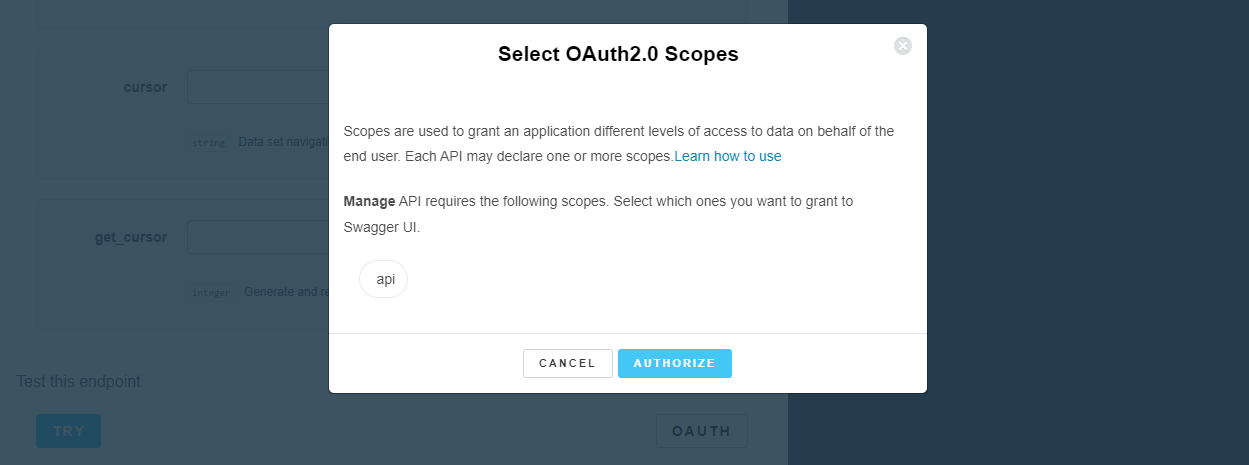
Select the ‘OAUTH’ button underneath the options and sign in if you have not done so already.
-
Select the ‘Try’ button.

-
The request and response should open in the middle of your screen. Scroll down to find the Learning Plans you need and make note of the number in the ‘id’ line:
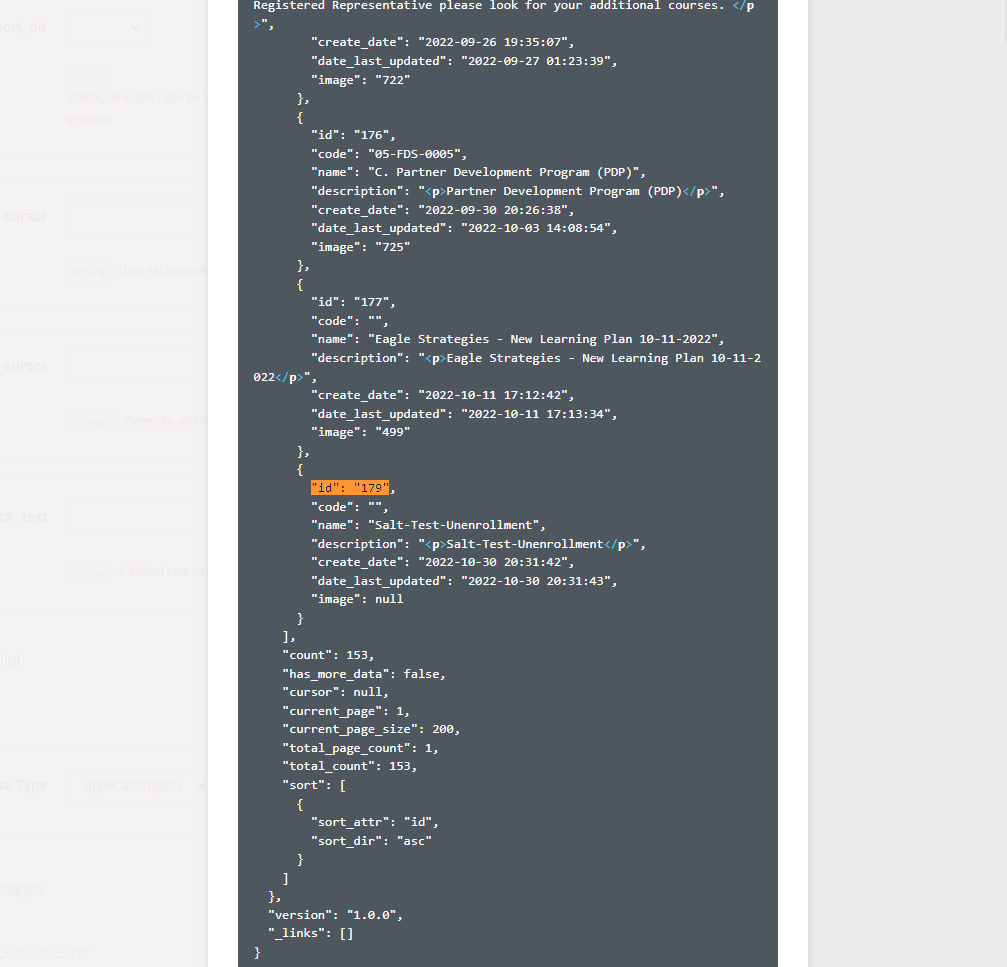
Note: If you are planning to enter more than one learning plan at a time, you will need the IDs in a list separated by commas (similar to the user IDs). It is easy enough to do this while you are collecting the IDs.
Course IDs
If you are removing the users from a Course, you need to know the Docebo Unique ID of the Course. There are three main ways to find this:
Using Reports
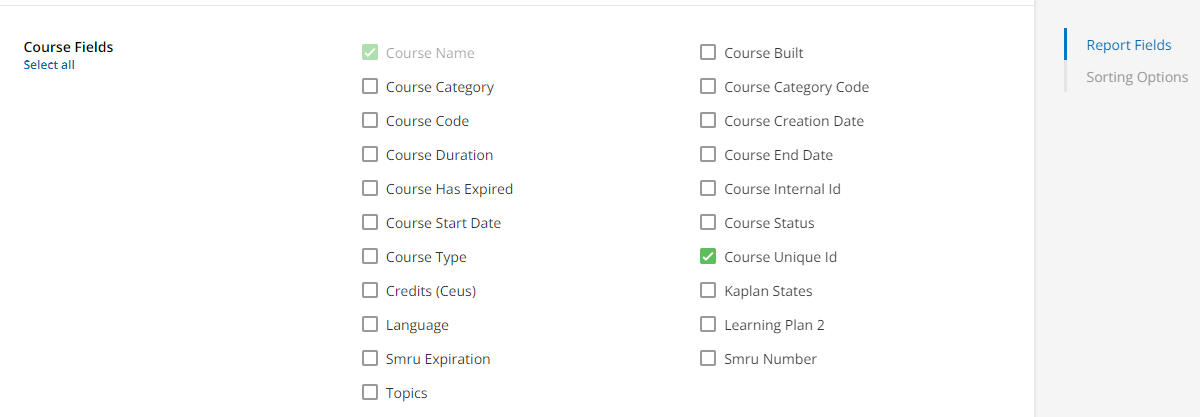
Unlike Learning Plans, the Course Unique ID is available to select under the ‘Course Fields’ area. Simply make sure to select this option when crafting your report and the ID will be easily available to you:
In the Front End
You can also identify individual course IDs directly via the course management area.
-
Navigate to the ‘Course Management’ area in the Admin Menu.
-
Search for and select the course you need the ID of.
-
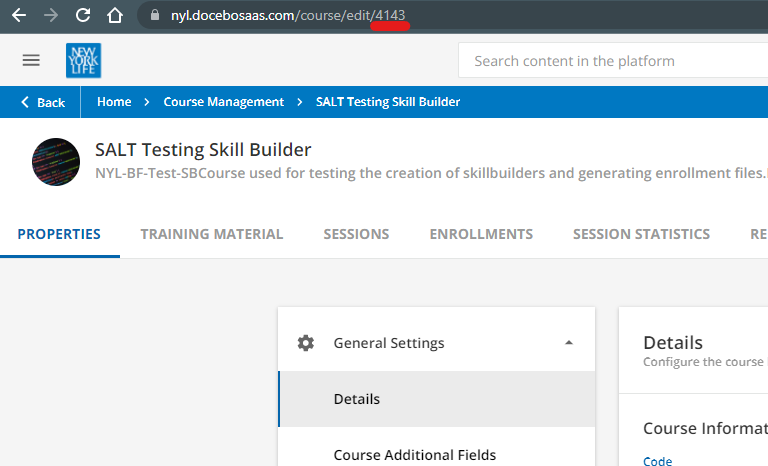
Look at the URL in the address bar of your browser and the course ID will be found at the end of it:
Using the API Browser
-
Log into your Docebo instances API Browser by going to: https://<yoursubdomain.docebosaas.com>/api-browser/

-
On the ‘Services’ menu, select ‘course’.
-
Scroll down the left side to find and select the ‘Courses’ category.
-
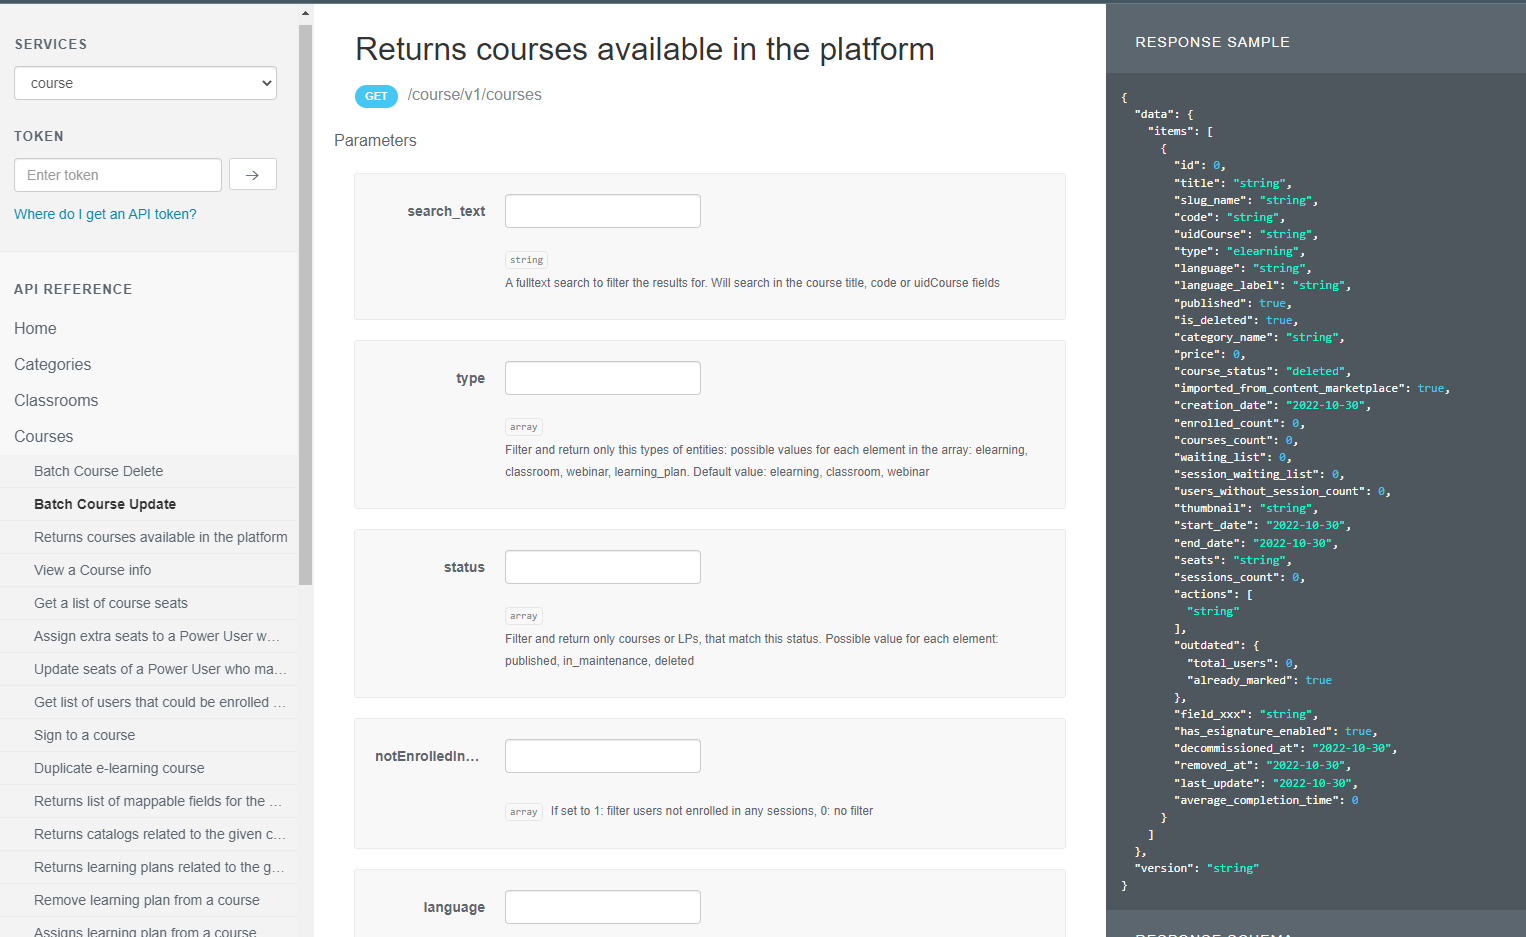
Select the ‘Returns courses available in the platform’ option.
-
You can adjust the parameter fields as much or as little as you want to help find the courses you are interested in. There are a few I would recommend paying attention to:
-
search_text: Enter text to search the course title and code fields. Only the courses that match the search text you enter will be returned. This is useful to narrow down the plans.
-
type: If you have courses with similar names but are different types, this is useful to make sure you don’t mix them up. I typically use either ‘elearning’ or ‘classroom’ in this field to distinguish between them.
-
status: Similar to the ‘type’ parameter listed above, I like to set this to ‘published’ so that only those courses are returned, but you may want to use different values to distinguish courses.
-
page_size: This endpoint can have very long lists. To avoid performance issues it will make pages of results. This lets you set how many items show up on a page. By default it is 10 items. The maximum size is 200 items. Enter an appropriate number for your needs here.
-
page: This endpoint can have very long lists. To avoid performance issues it will make pages of results. This field lets you choose which of those pages you view in the output. For example, if you have 50 courses and the page size was set to 20, 3 pages would be generated. When you initially run the endpoint you will see items 1-20. If you put a 2 in this field you will then get items 21-40, a 3 and you’ll get 41-50, etc.
-
-
Select the ‘OAUTH’ button underneath the options and sign in if you have not done so already.

-
Select the ‘Try’ button.

-
The results will be shown in the middle of the page. The relevant information will be found in the ‘Response Body’ box. The line ‘id’ for each course shown is the ID you are looking for, so make a note of it:
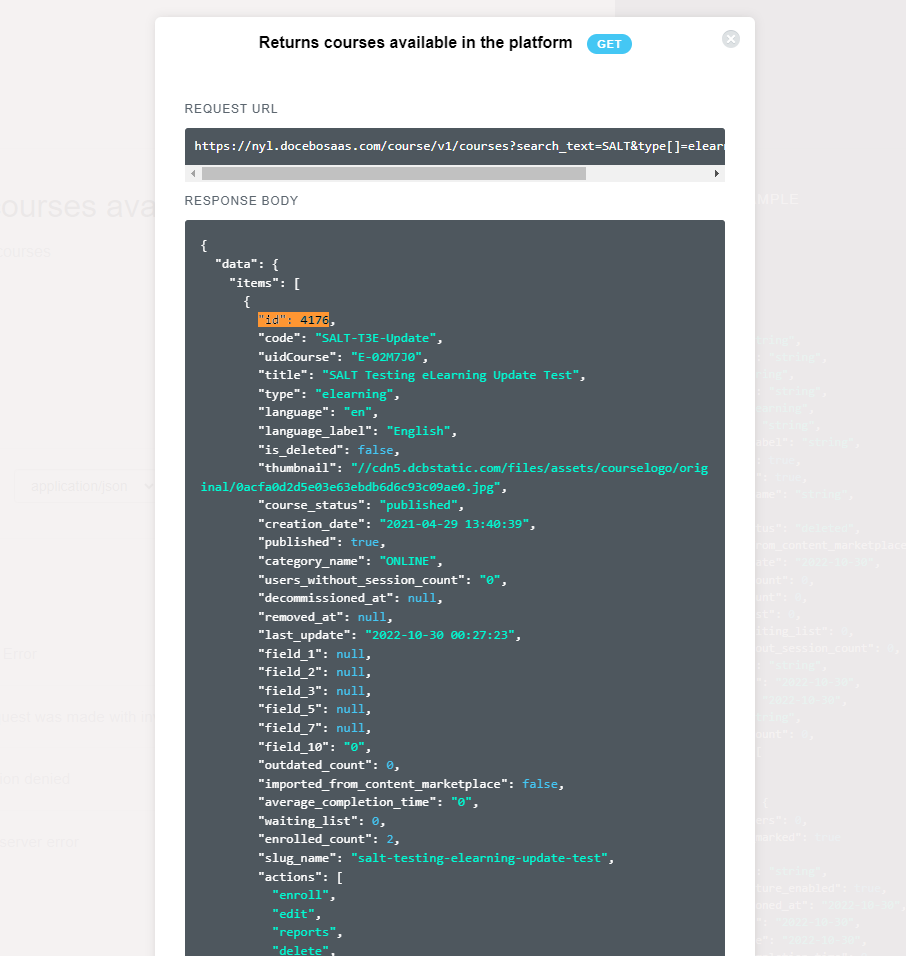
Note: If you are planning to enter more than one course at a time, you will need the IDs in a list separated by commas (similar to the user IDs). It is easy enough to do this while you are collecting the IDs or, if you used the report technique, you can simply enter them into the conversion website like you did with the user IDs.
Unenrolling
OK, you have now gathered all the needed information—User IDs and Course or Learning Plan IDs. Now it is time to format the information correctly to do the actual call using the API Browser.
-
Log into your Docebo instances API Browser by going to: https://<yoursubdomain.docebosaas.com>/api-browser/
-
On the ‘Services’ menu, make sure ‘learn’ is selected if it is not already.
-
Scroll down the left side to find and select the ‘Enrollment’ category.
-
Select the ‘Un - Enroll users in course/s’ option.

-
Copy the following into the ‘body’ box:
{

  "user_ids": [

    0

  ],

  "course_ids": [

    0

  ],

  "learningplan_ids": [

    0

  ],

  "reset_tracks": false,

  "cascade_unenroll_from_courses_in_selected_learning_plan": false,

  "delete_issued_certificates": false

}
-
Copy your block of User IDs from above and replace the ‘0’ in the ‘user_ids’ section.
Note: Make sure only 1,000 IDs are placed in here at a maximum. You can easily swap batches of 1,000 users after each call. Also make sure there is no comma at the end of the last ID, otherwise you may receive a format error.
-
If you are removing the users from Courses, replace the ‘0’ under ‘course_ids’ with the course(s) you wish.
If you are removing the users from Learning Plans, replace the ‘0’ under ‘learningplan_ids’ with the Learning Plan(s) you wish.Note: One of the two areas should still have the ‘0’ in it as we are only removing from either Courses or Learning Plans right now.
-
Adjust the reset settings as you want. By default the three settings below are set to ‘false’, so they will not perform any actions without you altering them. If you want to use them, switch each setting to ‘true’:
-
reset_tracks: This will reset all the learner’s tracked data related to the Course(s)/Learning Plan(s) if set to ‘true’.
-
cascade_unenroll_from_courses_in_selected_learning_plan: This one applies to Learning Plans and if set to ‘true’ will unenroll the user from the Learning Plan and any Courses within the Learning Plan. If ‘reset_tracks’ is set to ‘true’ then their tracking in all these courses is also reset.
-
delete_issued_certificates: This will delete any previously issued certificates for the users (within the Courses in question).
-
-
Your setup should look similar to the example below, where I have 3 users being unenrolled from one Learning Plan:
-
Select the ‘OAUTH’ button underneath the options and sign in if you have not done so already.

-
Select the ‘Try’ button.
-
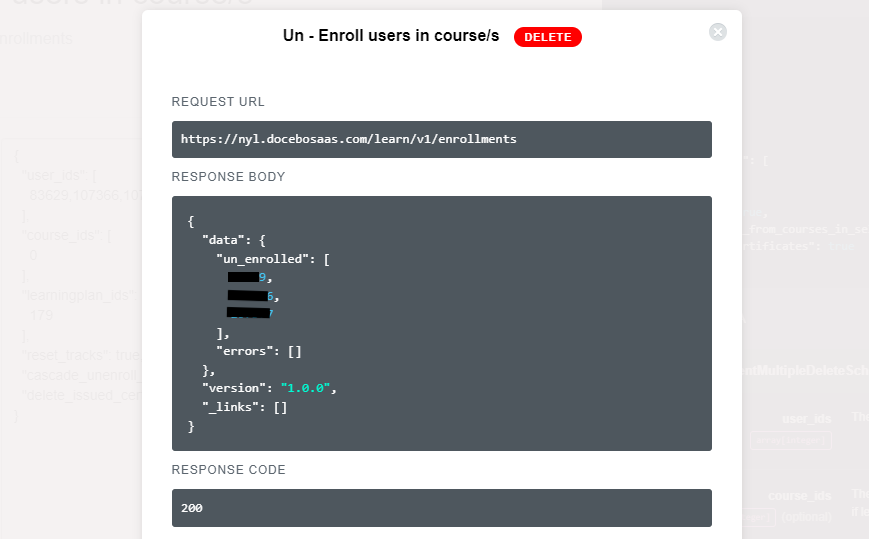
The result will show in the middle of the screen in the ‘Response Body’ box. Make sure to review it for potential errors. Each successful unenroll should be noted:
If there is an error, it will be noted in the response. In the example below, one of the users was not enrolled in the Learning Plan to begin with: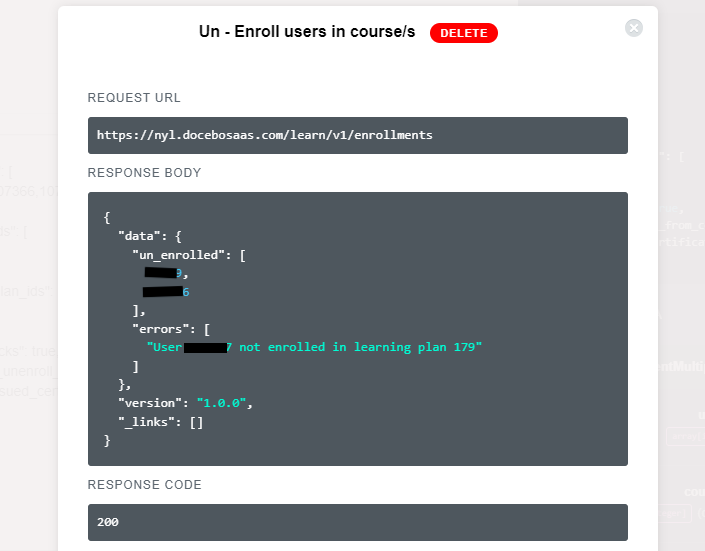
That’s it! You just successfully unenrolled a bunch of users from a bunch of Courses or Learning Plans in one shot. If you had to break your users into batches, simply swap the block of users in the ‘user_ids’ area and click ‘Try’ again.
Remember, you are actively removing users and potentially removing their progress and certificates. Make sure you are positive you want to do this before doing so. I highly recommend practicing on a sandbox environment and having a historical backup report saved somewhere prior to doing this—it never hurts to have a backup.
More API Browser Quick Grabs:
Bulk Update Course information
Bulk Update User’s Enrollment to a Completion
Bulk Enroll and Mark User Complete in a Course
Bulk Remove Power User Level from Users
How do you use the API Browser? Are there any endpoints you don’t understand or use cases you’re looking for input on? Comment below!


