

This guide is the sixth in a new series of new guides brought to you by
Last time we looked at how to update a bunch of enrollments in a course to make them complete. That works great if your users are already enrolled in the course, but when you want to enroll and immediately mark the user complete, you often do not have the user enrolled into the course already. Fortunately there is a different API endpoint we can leverage to easily enroll users and mark them complete at the same time: POST - /learn/v1/enrollment/batch
Important Note: The API endpoint we will be using is a POST endpoint, meaning it will add information to your system. It is highly recommended to test on a sandbox environment to make sure you are ok with the changes you are making first before doing this in a production setting.
Getting the Information Together
In order to leverage this endpoint, you will need to gather a few pieces of information—some easy, others not quite as easy. Some of these items have a few retrieval methods, so choose your preferred one for doing so.
Docebo User IDs
First and foremost, if you are going to be enrolling a large amount of users, you need to know which users those are. Ultimately we need this to be a comma separated list of the User Unique IDs.
Note: Due to performance considerations, this operation will be capped at 300 users per call. You can easily make batches of users and swap them out to quickly unenroll more than 300 users.
While there are several methods for retrieving these IDs, in this case I recommend simply making a ‘Users’ report (though you can use most of the user based reports). When defining your report, make sure to check the box ‘User Unique ID’ under the User Fields section:
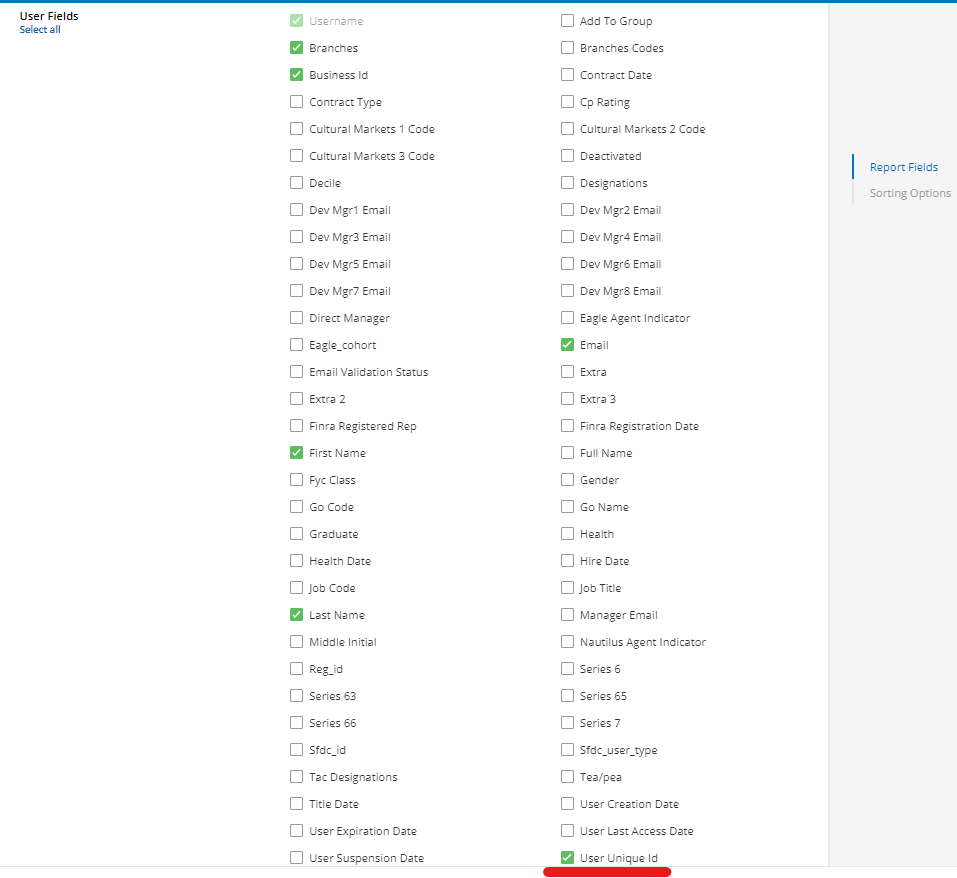
This will add a column of the exact IDs we need. Use the report to sort/filter/organize your data to identify the users.
Course IDs
If you are updating the User’s within a Course, you need to know the Docebo Unique ID of the Course. There are three main ways to find this:
Using Reports
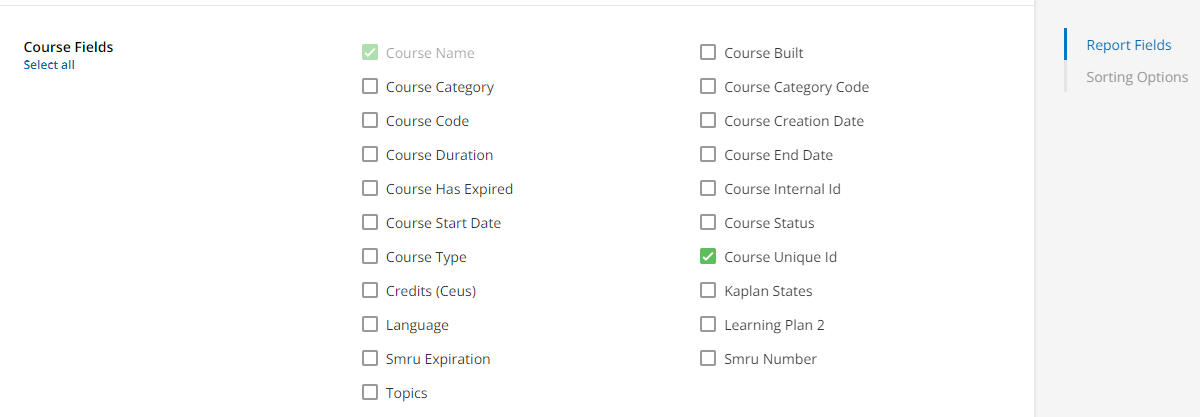
The Course Unique ID is available to select under the ‘Course Fields’ area. Simply make sure to select this option when crafting your report and the ID will be easily available to you:
In the Front End
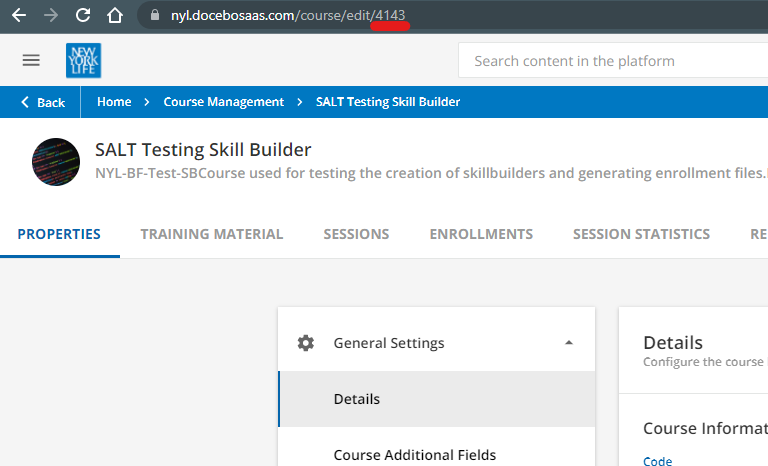
You can also identify individual course IDs directly via the course management area.
-
Navigate to the ‘Course Management’ area in the Admin Menu.
-
Search for and select the course you need the ID of.
-
Look at the URL in the address bar of your browser and the course ID will be found at the end of it:
Using the API Browser
-
Log into your Docebo instances API Browser by going to: https://<yoursubdomain.docebosaas.com>/api-browser/

-
On the ‘Services’ menu, select ‘course’.
-
Scroll down the left side to find and select the ‘Courses’ category.
-
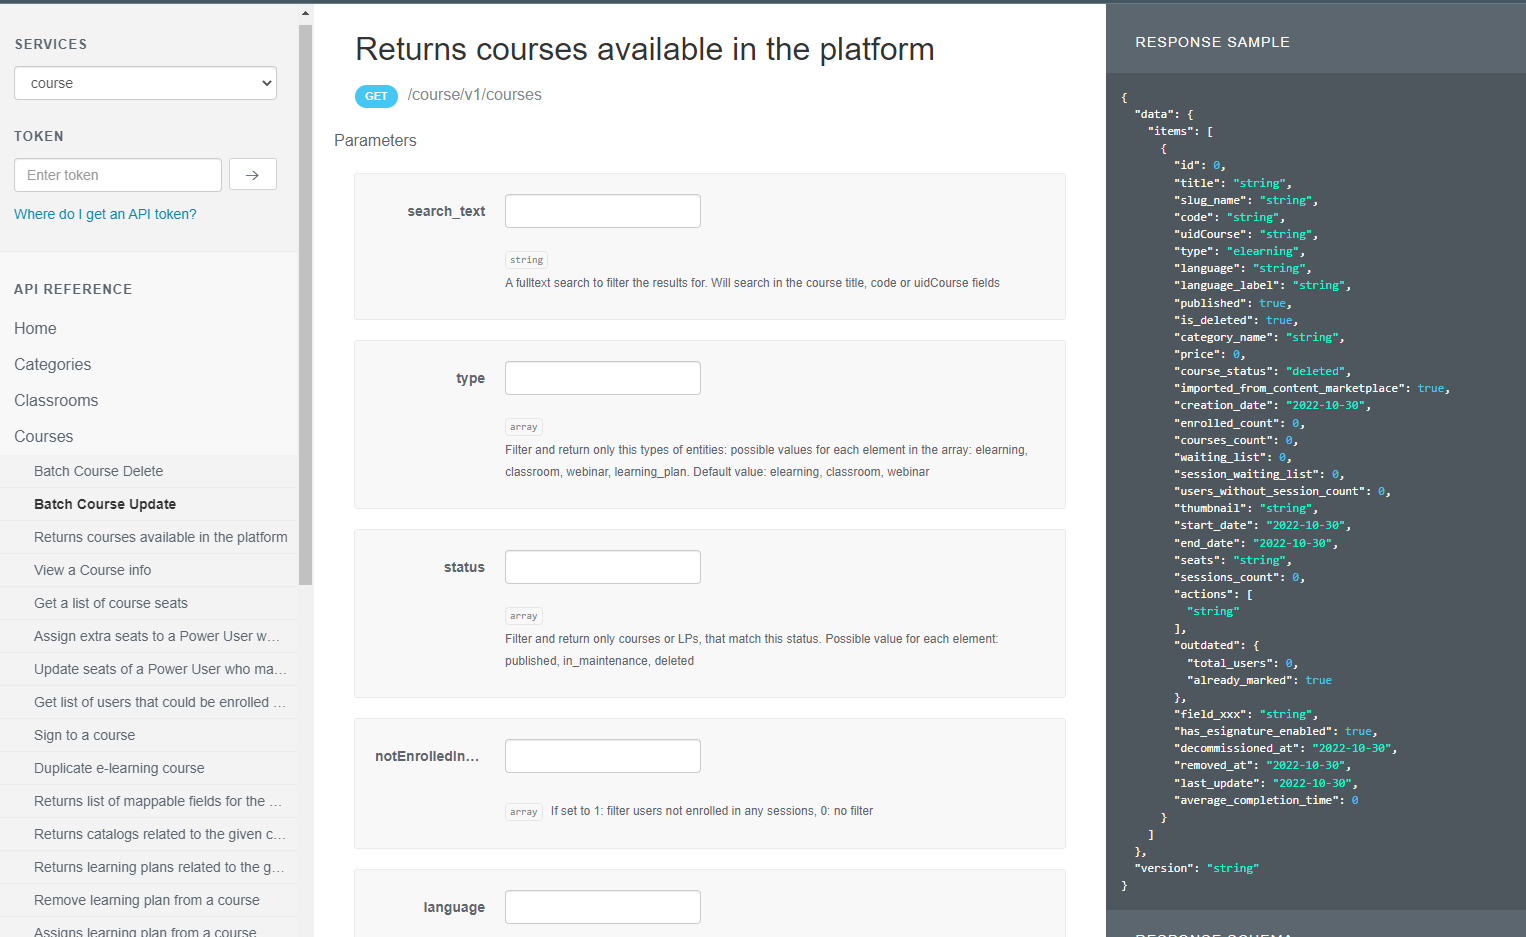
Select the ‘Returns courses available in the platform’ option.
-
You can adjust the parameter fields as much or as little as you want to help find the courses you are interested in. There are a few I would recommend paying attention to:
-
search_text: Enter text to search the course title and code fields. Only the courses that match the search text you enter will be returned. This is useful to narrow down the plans.
-
type: If you have courses with similar names but are different types, this is useful to make sure you don’t mix them up. I typically use either ‘elearning’ or ‘classroom’ in this field to distinguish between them.
-
status: Similar to the ‘type’ parameter listed above, I like to set this to ‘published’ so that only those courses are returned, but you may want to use different values to distinguish courses.
-
page_size: This endpoint can have very long lists. To avoid performance issues it will make pages of results. This lets you set how many items show up on a page. By default it is 10 items. The maximum size is 200 items. Enter an appropriate number for your needs here.
-
page: This endpoint can have very long lists. To avoid performance issues it will make pages of results. This field lets you choose which of those pages you view in the output. For example, if you have 50 courses and the page size was set to 20, 3 pages would be generated. When you initially run the endpoint you will see items 1-20. If you put a 2 in this field you will then get items 21-40, a 3 and you’ll get 41-50, etc.
-
-
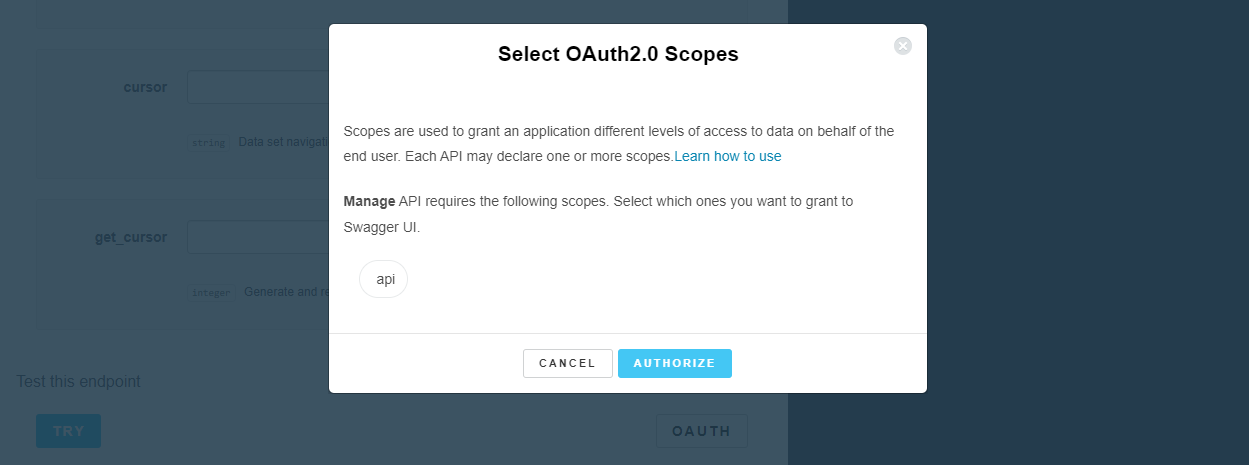
Select the ‘OAUTH’ button underneath the options and sign in if you have not done so already.
-
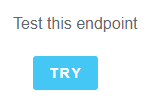
Select the ‘Try’ button.
-
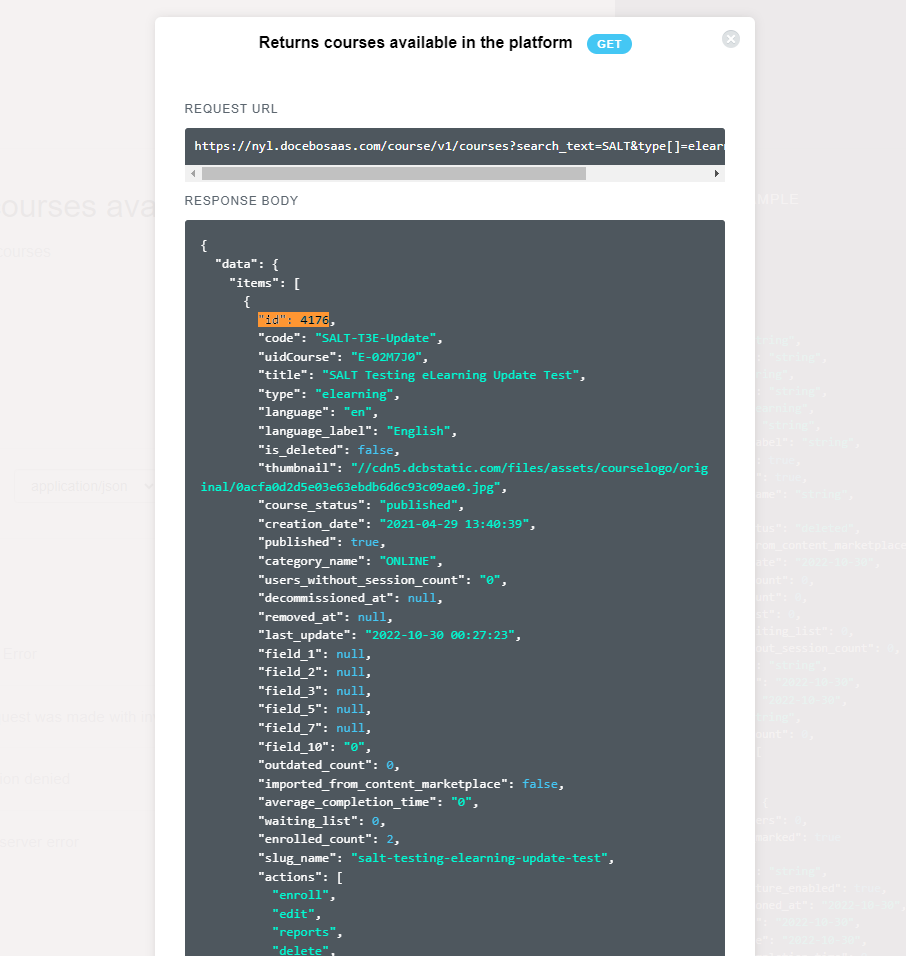
The results will be shown in the middle of the page. The relevant information will be found in the ‘Response Body’ box. The line ‘id’ for each course shown is the ID you are looking for, so make a note of it:
Enrolling and Marking Complete
OK, you have now gathered all the needed information, User IDs and Course IDs. Now it is time to format the information to do the actual call using the API Browser.
- Open the Excel or Google Sheets file below. (They work the same but are available in different formats for personal preference or allowable programs on work computers):
- Access ‘API-BulkEnrollwithCompletion_CreateJSON’ on Google Sheets.
- Download ‘API-BulkEnrollwithCompletion_CreateJSON’ for Excel at the end of this guide.
- On the first tab, ‘User_Input’, there is a table of 300 rows for you to enter the users you want to have enrolled and marked complete:

- Enter the User ID, Course ID, and the date/time you want to use as the completion date:
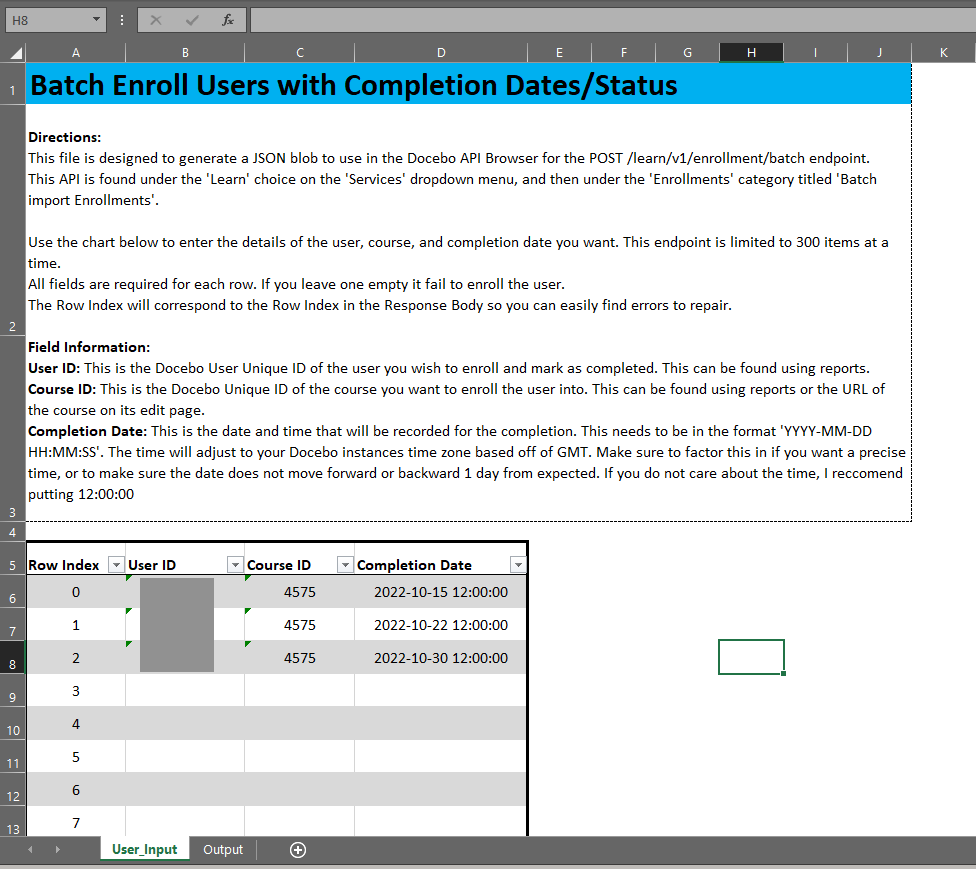
Note: The date/time format must be in the format ‘YYYY-MM-DD HH:MM:SS’. The date will translate to your instance’s time zone based on GMT, which means you could have a date shift if you enter a time near midnight. If you care about the time, make sure to factor this in. Otherwise I recommend using 12:00:00.
- When you have all the users you want loaded, or have filled the table, switch to the ‘Output’ tab at the bottom of the screen:
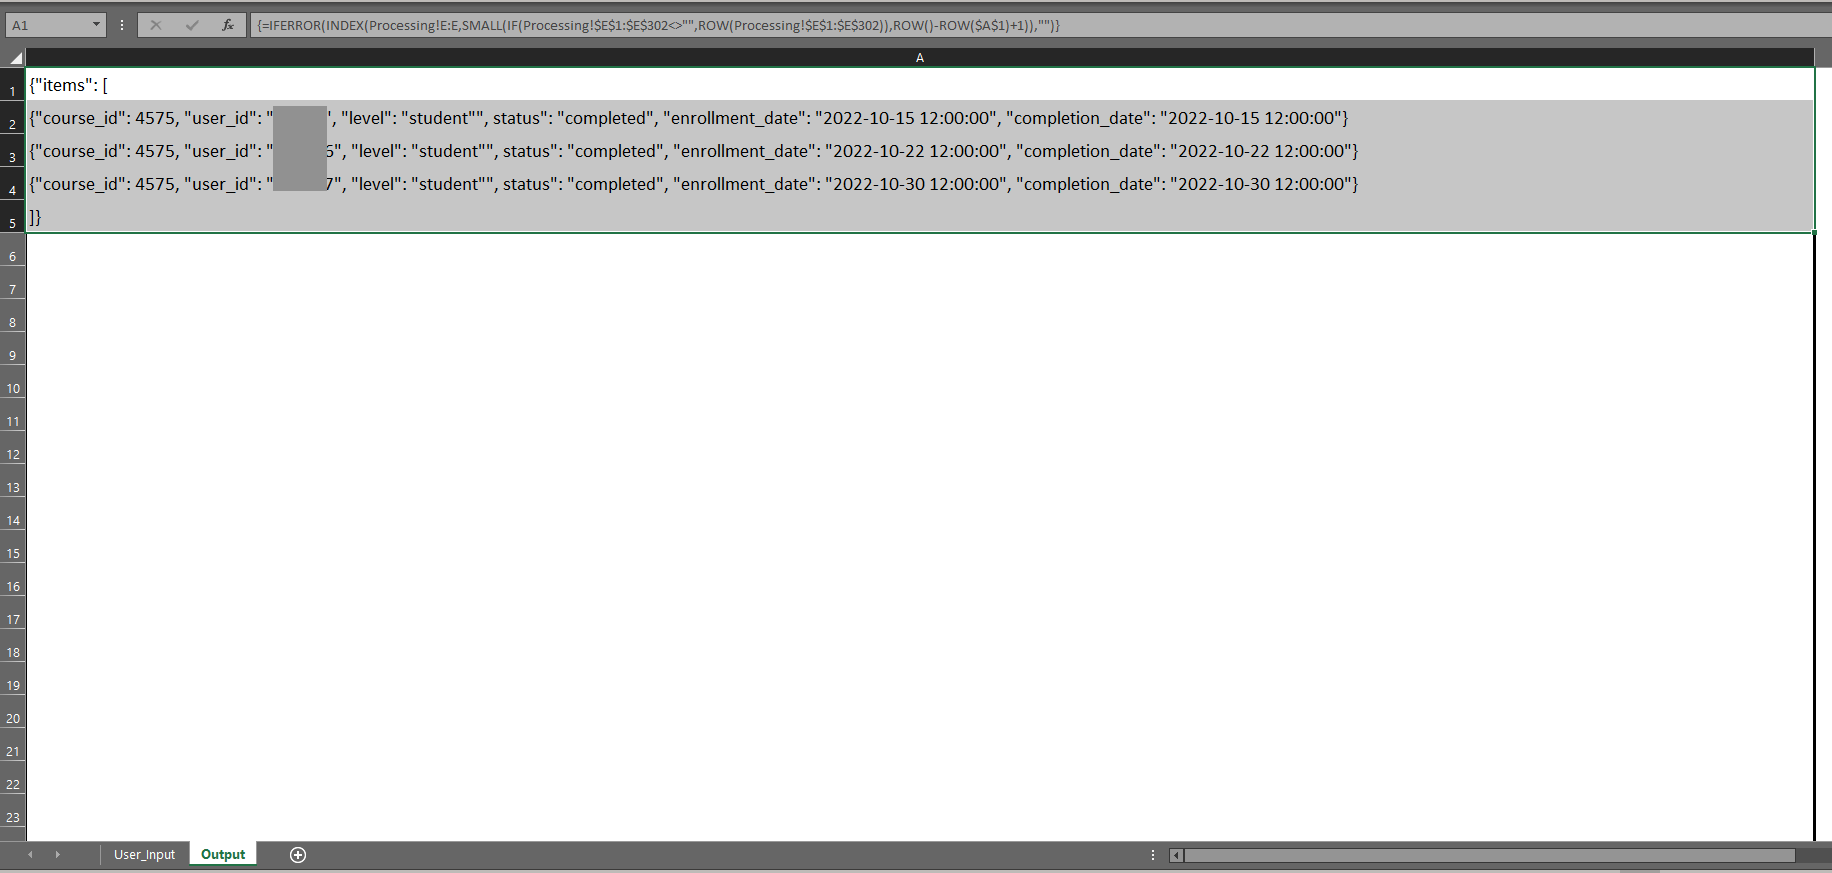
- Highlight and copy to your clipboard the cells in column A.
- Log into your Docebo instance’s API Browser by going to: https://<yoursubdomain.docebosaas.com>/api-browser/
- On the ‘Services’ menu, make sure ‘learn’ is selected if it is not already.
- Scroll down the left side to find and select the ‘Enrollment’ category.
- Select the ‘Batch import Enrollments’ option.
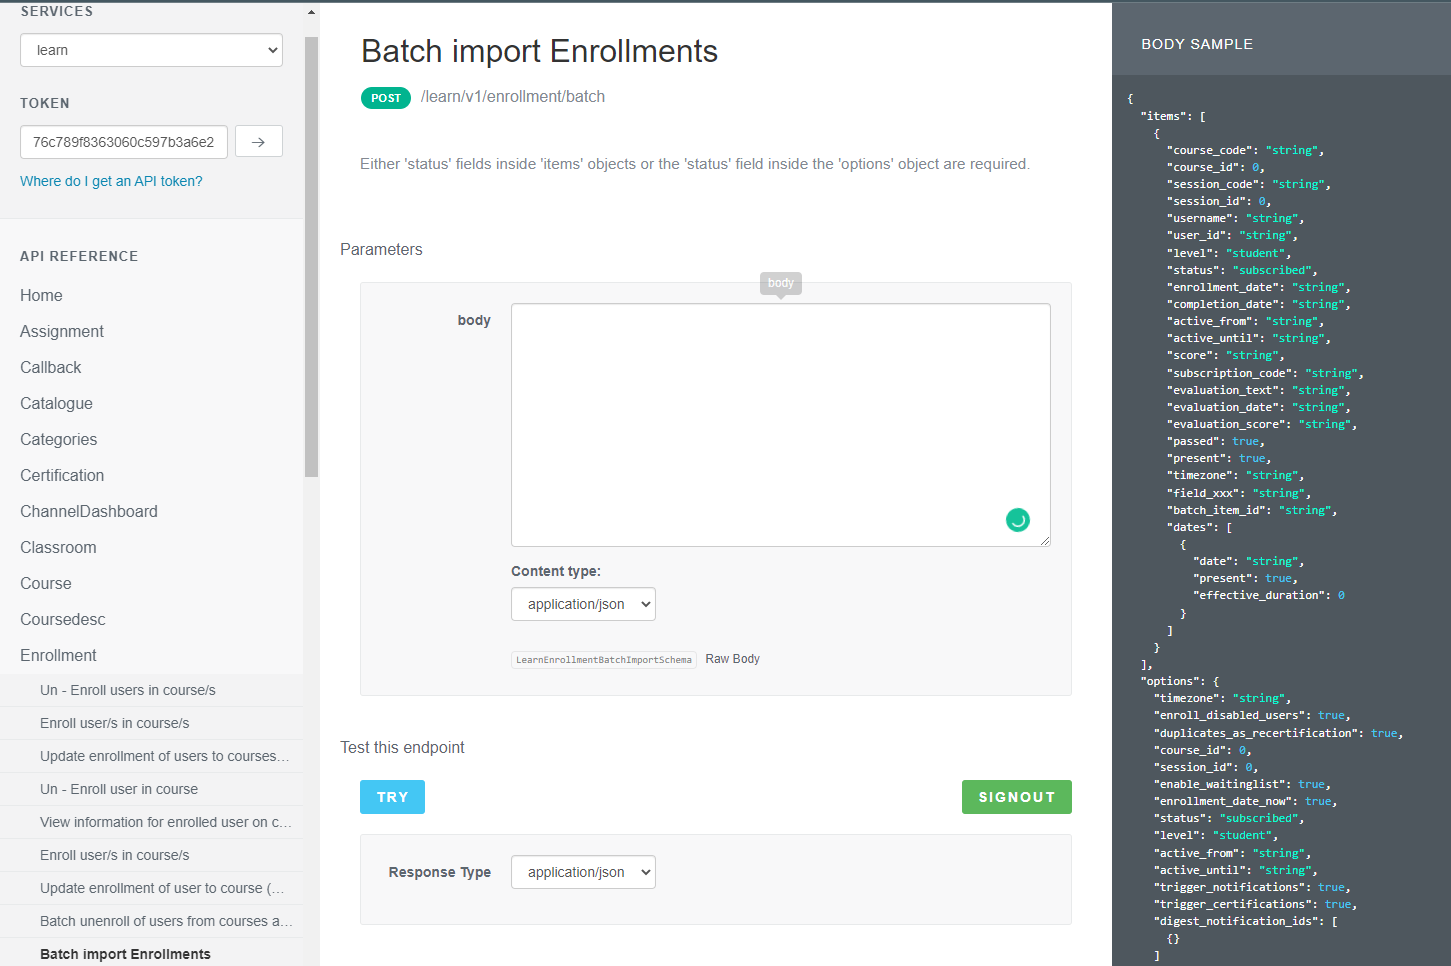
- Paste the information you copied from the ‘Output’ tab of your Excel/Google Sheets file into the ‘body’ area:

- Select the ‘OAUTH’ button underneath the options and sign in if you have not done so already.

- Select the ‘Try’ button.

- The result will show in the middle of the screen in the ‘Response Body’ box. Make sure to review it for potential errors. Each successful update should be noted:

- If there is an error, it will be noted in the response. Look at the ‘success’ line items for a true/false status. In the below example, one of the users was already enrolled in the course and could not be enrolled again or updated. (This user would need to use the update method from a prior article or remove the enrollment prior to running this call):

That’s it! The users should now be enrolled and marked complete according to the information you entered. If you need to do more, simply update the information and repeat the process in batches.
I also want to point out that although in my example I used the same courses and completion date, each line item is unique and can have unique information. You do not need to use the same completion date, and you can enter the same user multiple times with different courses and it will enroll them in each course and mark them complete. Between this and the previous guide, we have now covered the two big use cases for bulk enrolling and marking users complete.
More API Browser Quick Grabs:
Bulk Update Course information
Bulk Unenroll Users from Courses or Learning Plans


