This guide is the second in a new series of new guides brought to you by
I frequently hear that admins need to update their naming conventions, add information to courses, and more—and that they end up doing this manually. While there are unsupported ways to use the automation app, many hope for a simple way to upload a CSV file. I cannot offer that, but there is a single endpoint in the API Browser that allows you to update the Course Code, Title, Description, Language, Status, and Thumbnail for a group of courses. If you can format the information, you can easily update courses without needing to know much about actual APIs.
Important Note: The API endpoint we will be using is a PUT, meaning it will update and change information on your system. It is highly recommended to test on a sandbox environment to make sure you are ok with the changes you are making first.
Filling in Course Information
-
Open the Excel or Google Sheets file below. (They work the same but are available in different formats for preference or compatible programs on work computers)
-
Access ‘API-BulkUpdateCourseInfo_CreateJSON’ on Google Sheets and make your own copy.
-
Download ‘API-BulkUpdateCourseInfo_CreateJSON’ for Excel by downloading the file attached at the end of this guide.
-
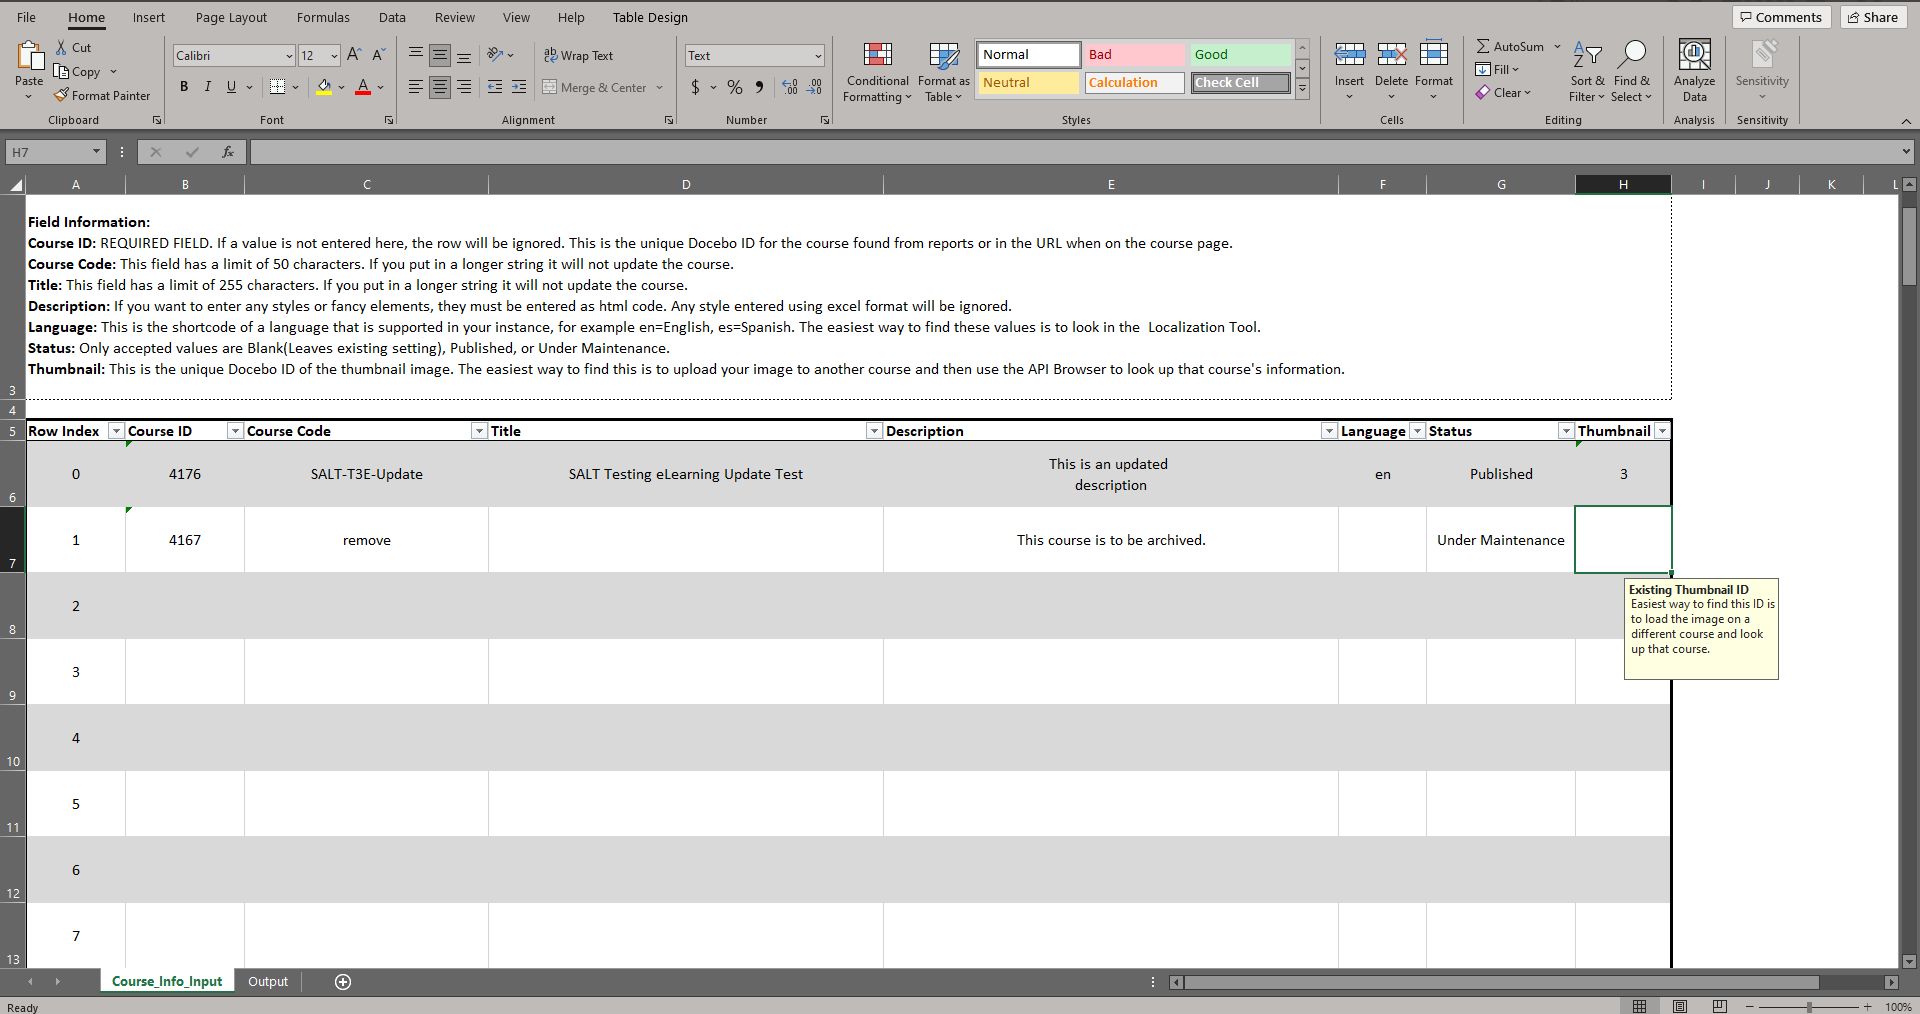
- On the first tab (Course_Info_Input) of the spreadsheet, there is a table of 100 rows. This is the table you will use to fill in the information on the courses you wish to update:
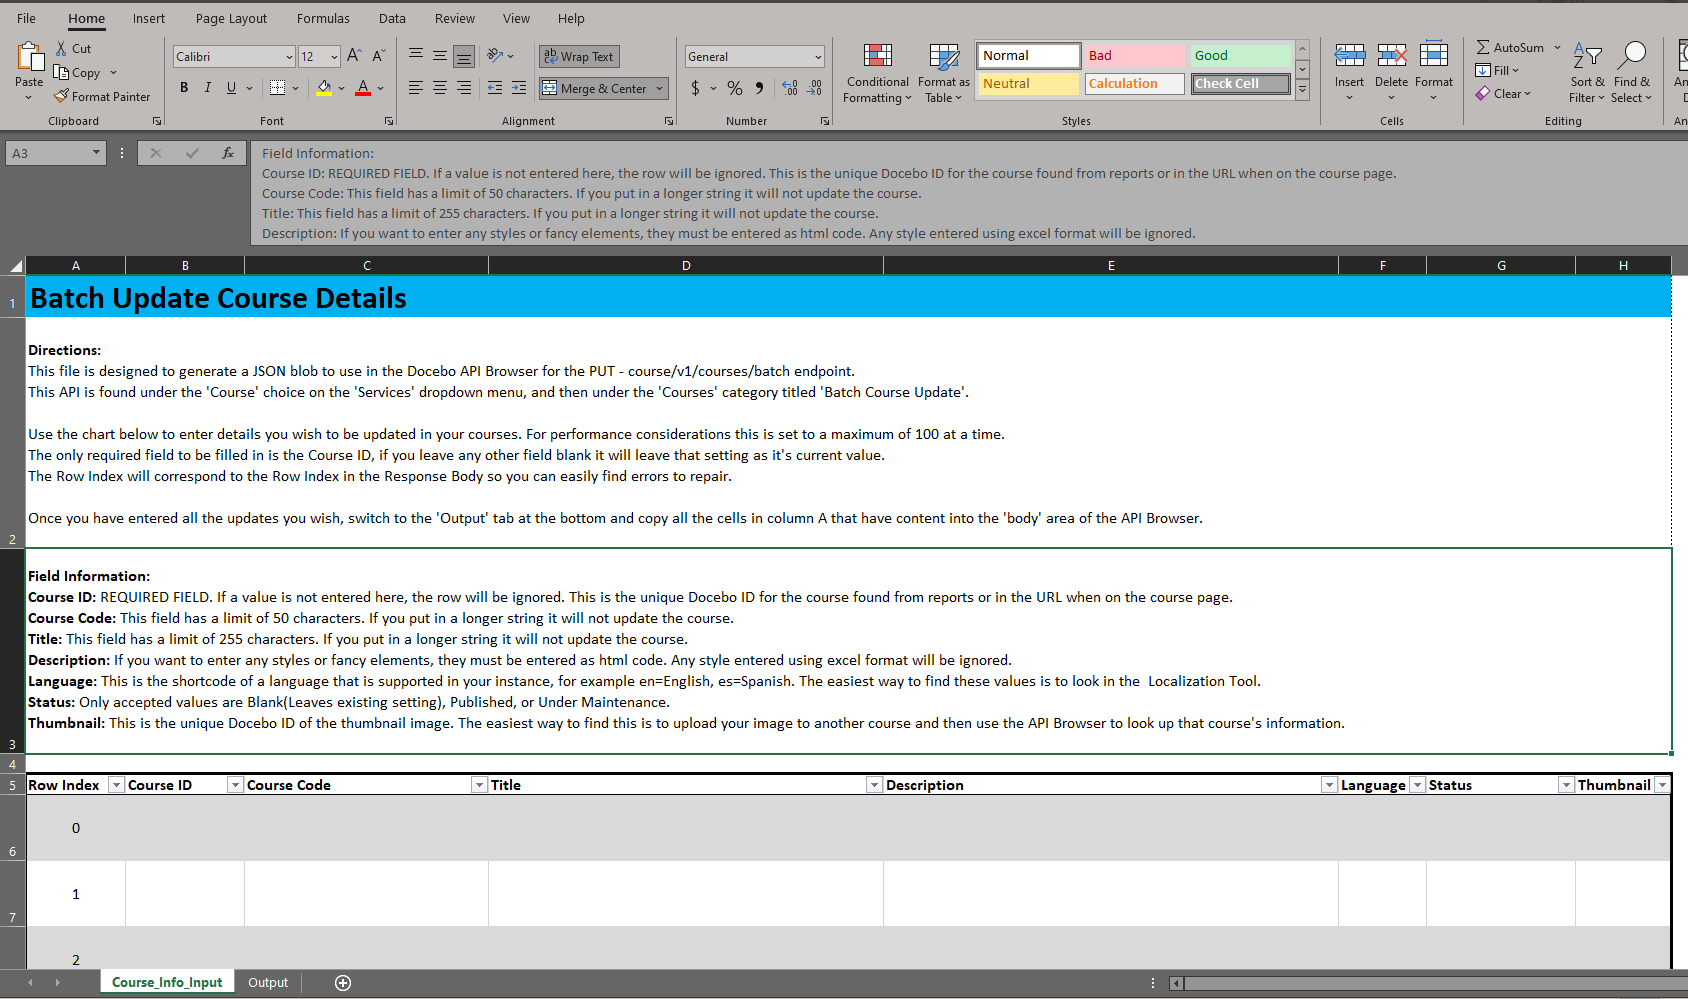
- For each course you wish to update, fill the following information into a row:
- Row Index: Ignore this field and leave the value that is pre-populated. If you have an error during the update, this will come in handy when identifying which course is having the issue.
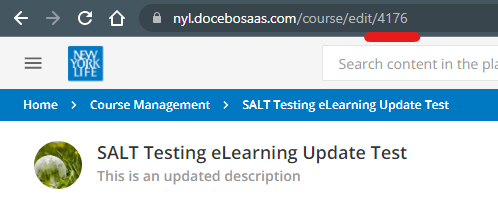
- Course ID: (REQUIRED FIELD) This is the only required field that MUST be populated. If a value is not entered here, the row will be ignored completely. This is the unique Docebo ID for the course found from running reports or in the URL when on the course page:
- Course Code: This field has a limit of 50 characters. If you put in a longer string, it will not update the course and you will receive an error.
- Title: This field has a limit of 255 characters. If you put in a longer string, it will not update the course and you will receive an error.
- Description: If you want to enter any styles or “fancy” elements, they must be entered as HTML code. Any style entered using excel format will be ignored.
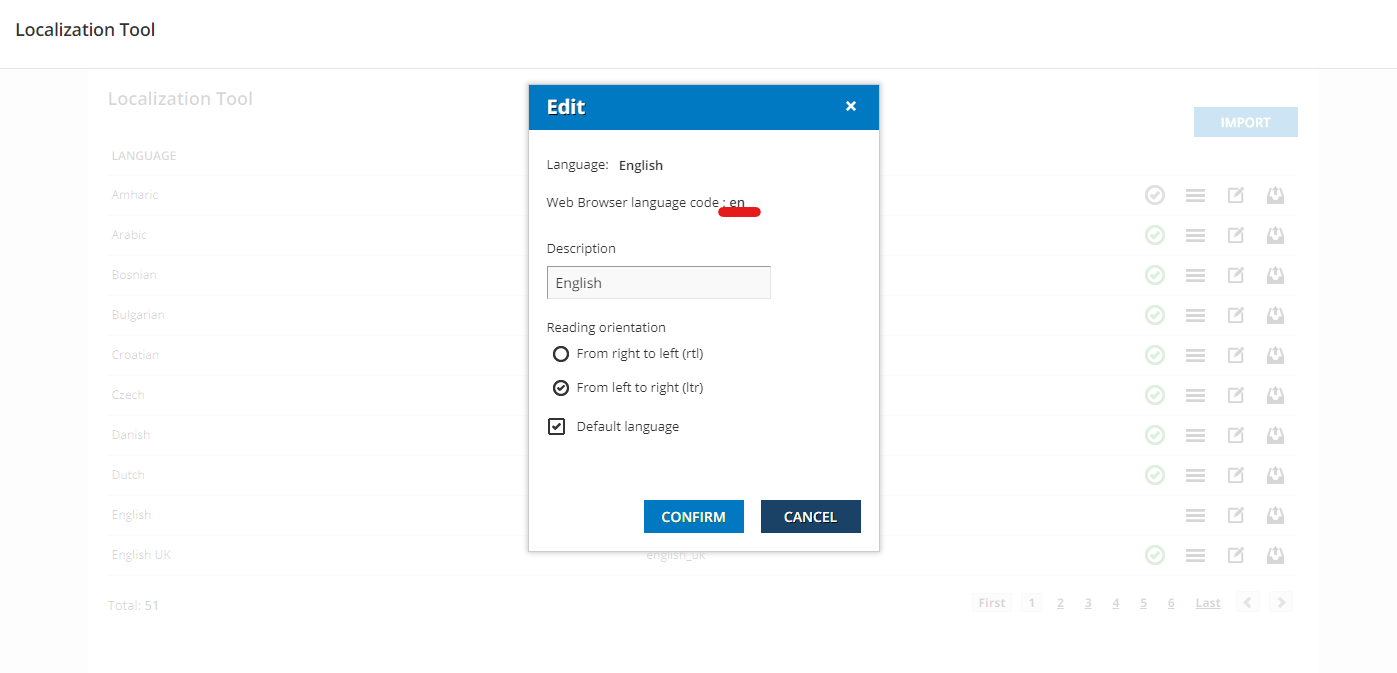
- Language: This is the shortcode of a language that is supported in your instance, for example en=English, es=Spanish. The easiest way to find these values is to look in the Localization Tool:
- Status: Only accepted values are Blank (which leaves the existing status as is), Published, or Under Maintenance.
- Thumbnail: This is the unique Docebo ID of the thumbnail image. The easiest way to find this is to upload your image to another course and then use the API Browser to look up that course's information. (You can use the ‘View a Course info’ Under Course > Courses in the API Browser) It can be useful to keep a chart of your common images so you can put them in easily. Scroll down the ‘Response Body’ to find the thumbnail ID:
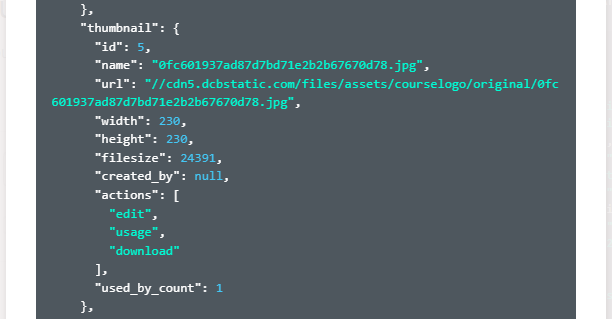
Note: You only need to fill in cells you wish to update the data on. If the current value should stay the same you can either fill it in or leave the cell blank.
- Repeat the process filling in a row for each course you wish to update:
- Once you have entered all your changes, or filled the full 100 rows, switch to the ‘Output’ tab on the bottom of the sheet. You should see rows of the information you have put in formatted properly into the JSON format the API endpoint is looking for:
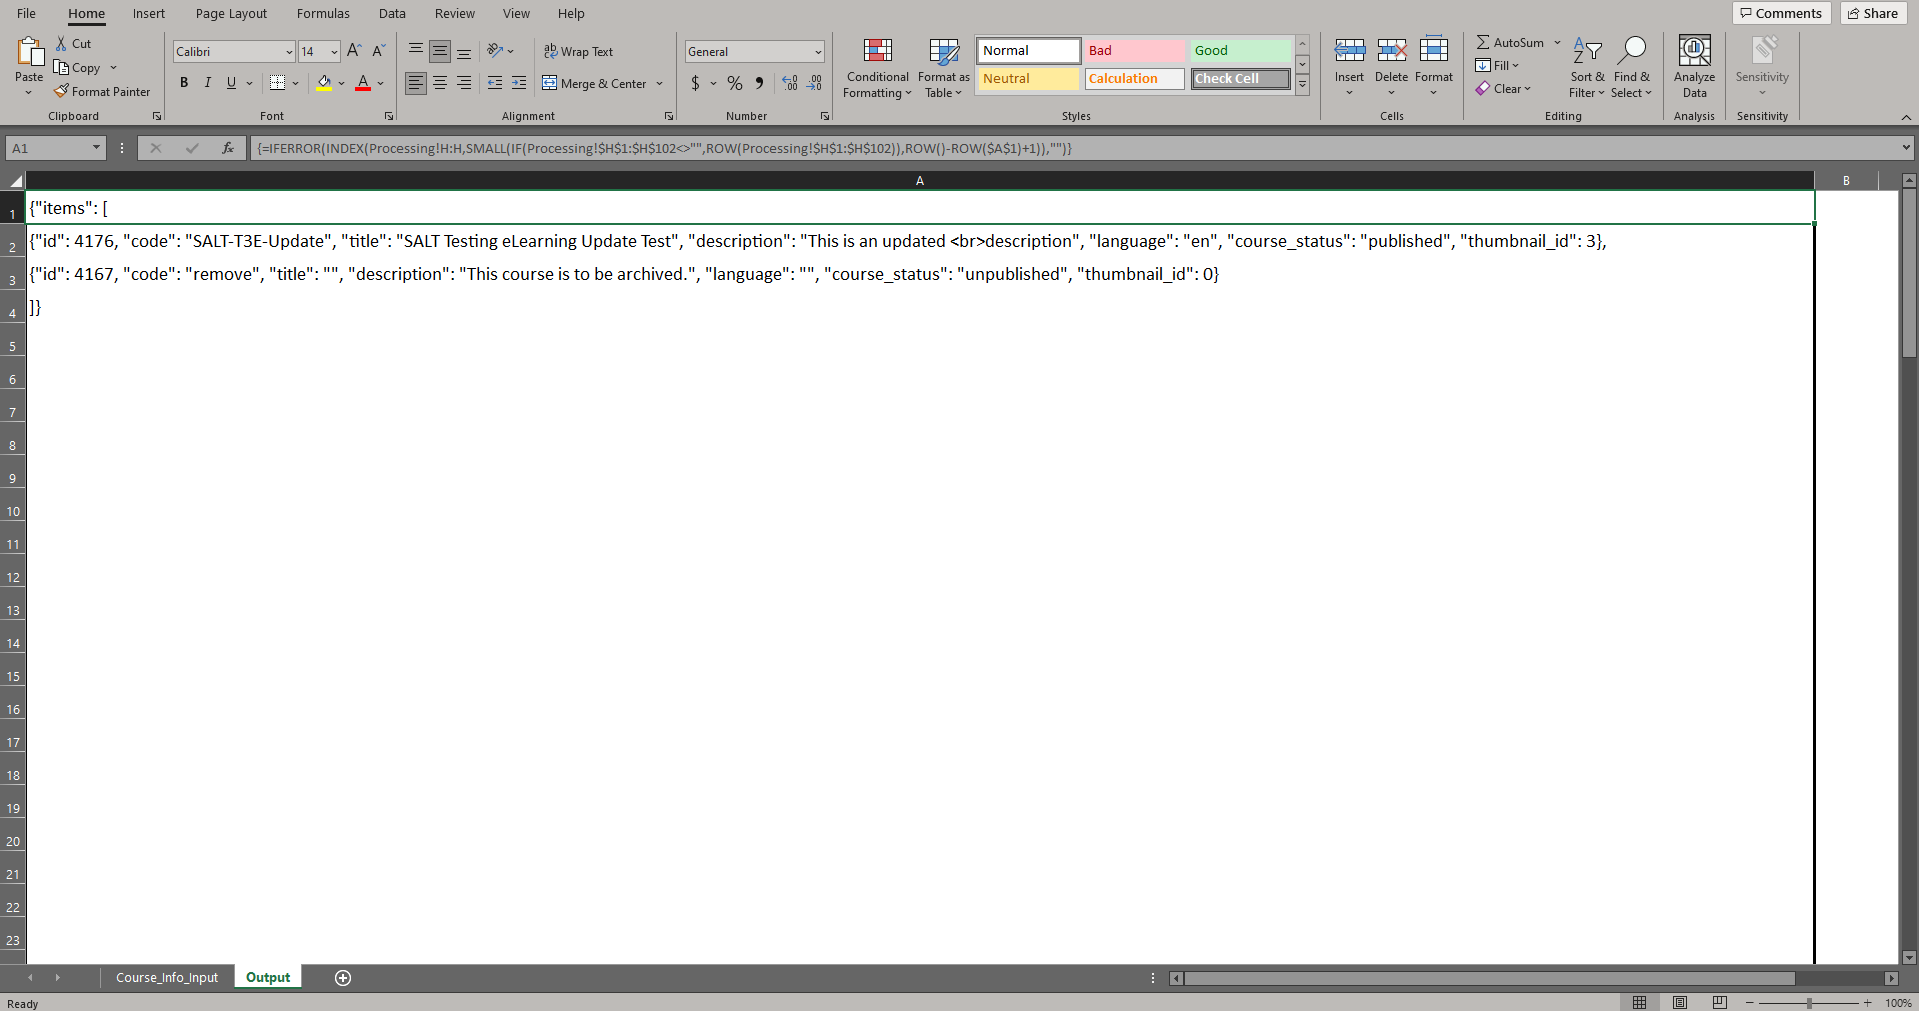
- Select all the cells in column A that have visible content in them and copy them to your clipboard:

Making the Batch Course Update
If you are not familiar with the API Browser, I encourage you to check out the overview provided in this article.
-
Log into your Docebo instances API Browser by going to: https://<yoursubdomain.docebosaas.com>/api-browser/
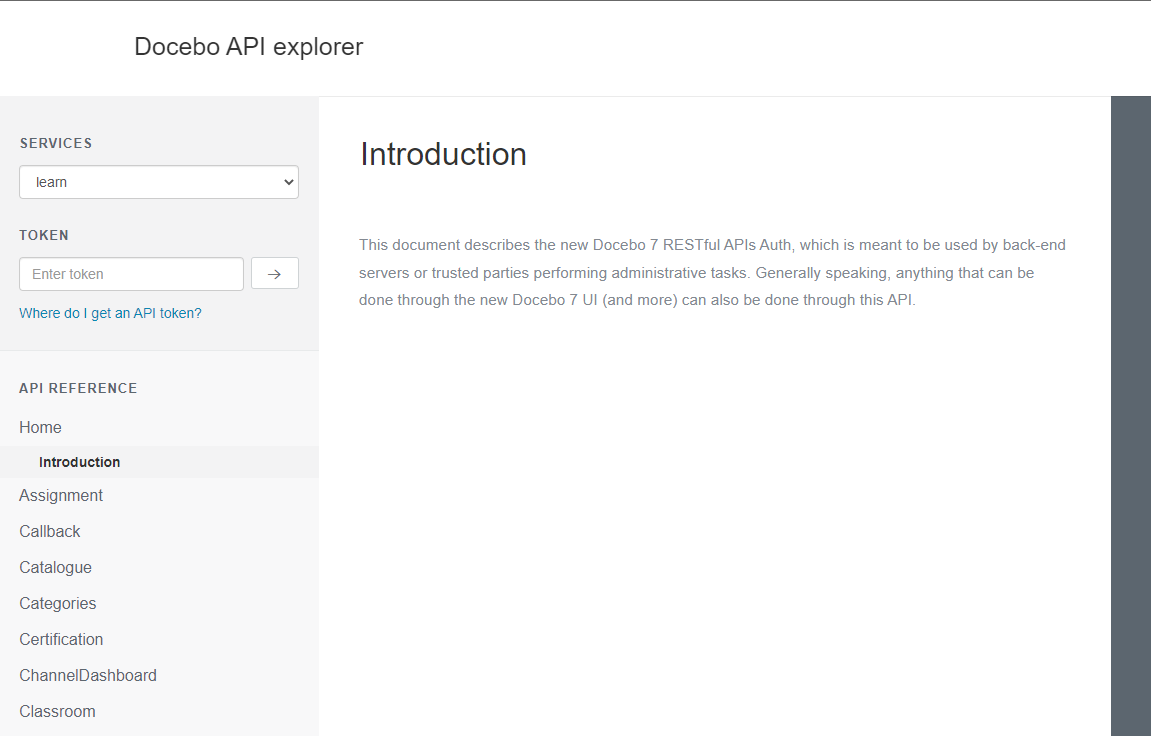
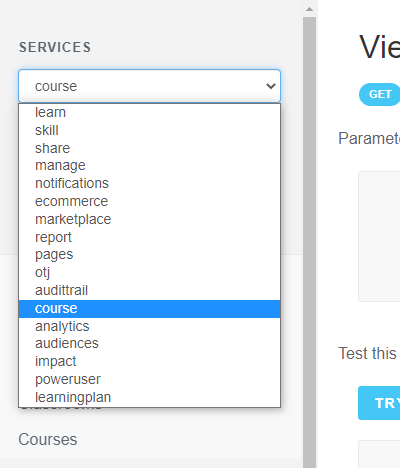
- On the ‘Services’ menu select ‘Course’.
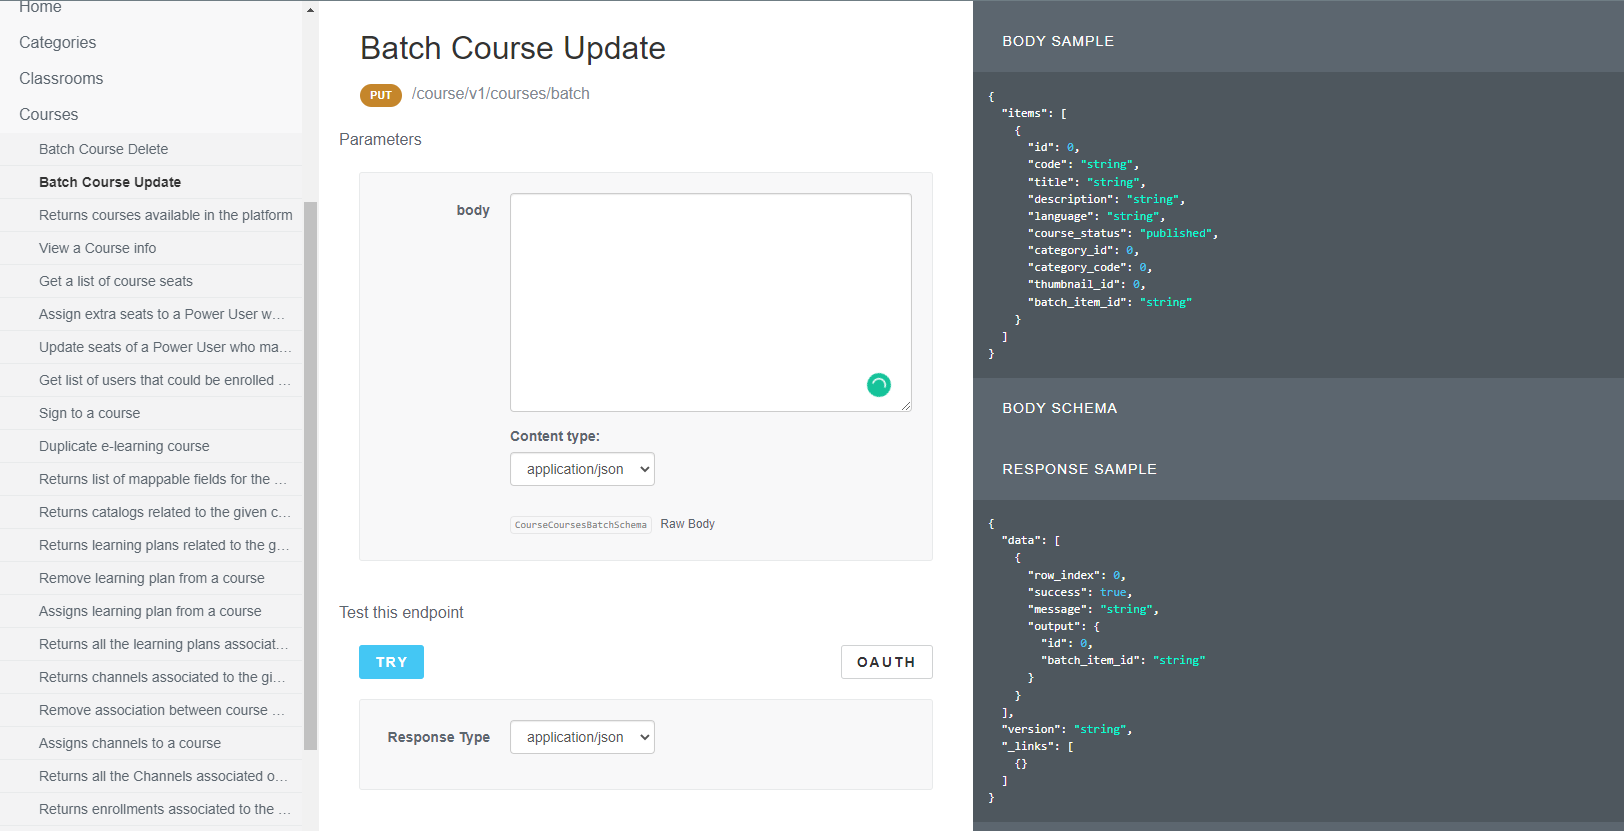
- Scroll down the left side to find and select the ‘Courses’ category.
- Select the ‘Batch Course Update’ option.
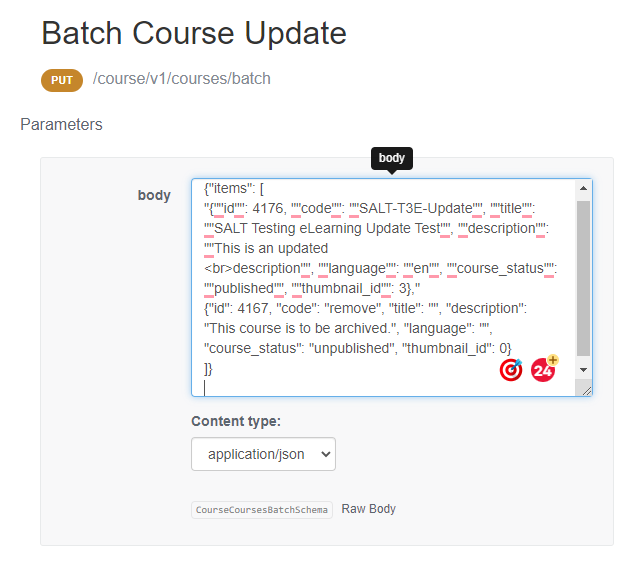
- Paste the content from the ‘Output’ tab in Excel/Google Sheets into the ‘Body’ box:
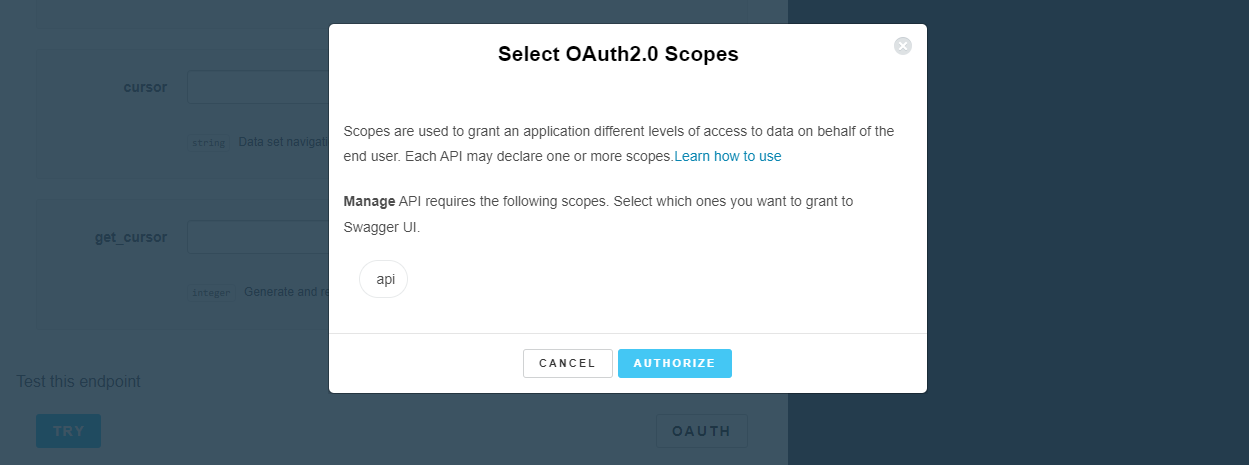
- Select the ‘OAUTH’ button underneath the options and sign in if you have not done so already.
- Select the ‘Try’ button.
- The request and response should open in the middle of your screen:
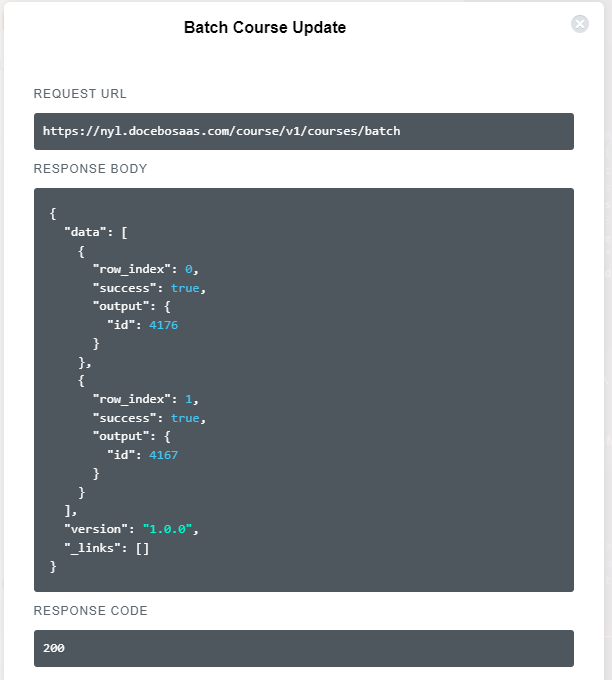
Note: Depending upon how many courses you are updating at one time, it may take a minute or two to process, be patient and watch the ‘Try’ button as it will show ’Loading…’.
- Review the responses to make sure all rows were processed successfully. The above image has two being processed, indicated by both having a ‘success: true’ state.
If a row has an error, this will show as ‘false’ and provide a message to explain what is wrong. If this happens, use the Row Index to find the line item in the Excel/Google Sheet to fix the error. In the below example the second row has an error due to an incorrect language value as I put ‘English’ instead of ‘en’. In this example, the first course was updated but the second was not: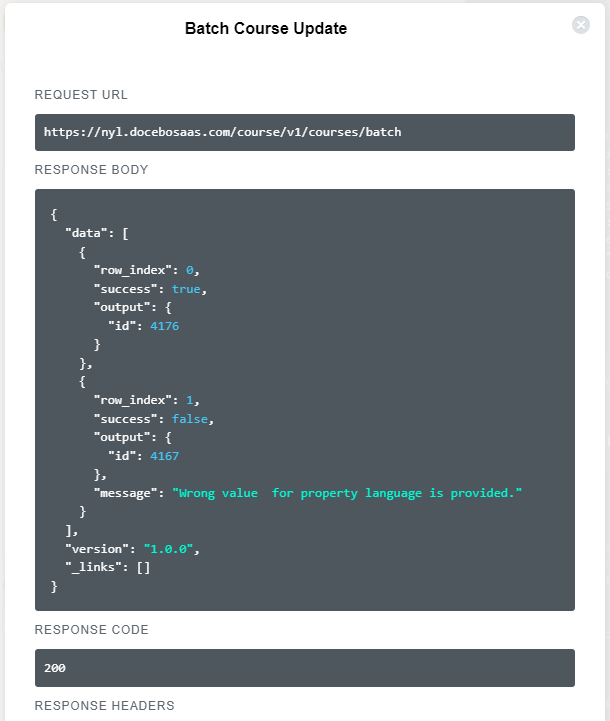
- Repeat the process if you have more than 100 courses to manage/update
Tip: If you are going to use regularly and have more than 100 courses, just save the current information into versions of the file so you can just make tweaks and then run the update call.
That’s it, you just updated 100 courses details with one API call! Go get a job well done snack with your free time.
More API Browser Quick Grabs:
Bulk Unenroll Users from Courses or Learning Plans
Bulk Update User’s Enrollment to a Completion
Bulk Enroll and Mark User Complete in a Course
Bulk Remove Power User Level from Users
How do you use the API Browser? Are there any endpoints you don’t understand or use cases you’re looking for input on? Comment below!


