

This guide is the eighth in a series of new guides brought to you by
It’s Baaaaaaack…
...Scheduling returns!

Let me start by saying that I think there are two types of people in this world—those who live blissful lives never having to handle scheduling learning sessions inside a learning management system, and those of us who are not so lucky. Your reaction to the above will tell me which you are. 😊
This week, we are going to combine a few skills I have gone over so far. Specifically, we will take the work of using an embedded form inside a Docebo page to act as a simple front end to a scheduling wizard. If you have not read that article yet, please first do so here. The backend will use what we learned back when we first took a look at scheduling. Make sure to check that article out as well if you have not. Using a CSV file to bulk schedule is useful for some users, but others among us may have simpler needs or want to hold the users’ hand while they schedule. That is where this method comes in.
Guide Table of Contents
Approach Overview
This one gets a little complex, so before diving in I thought it would be good to explain the concept and how you might want to approach it if you decide to build your own scheduling wizard. I like to describe this method like carrying out a mail merge process in Word:

The features and abilities of the ‘Mailings’ area in Microsoft Word are powerful and flexible. That is a positive, but it also means that unless you live inside the function daily, you probably will make mistakes, get confused, and get frustrated trying to make it work. Fortunately, Microsoft has given us a nice compromise. There is a ‘Step by Step Mail Merge Wizard’ which can be triggered:
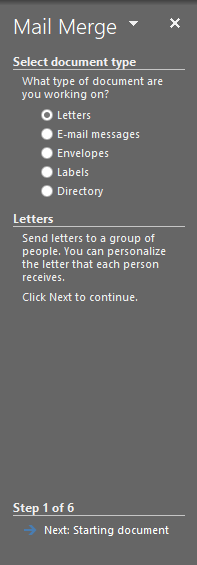
This walks the user through the most common scenarios and gives extra instructions to help you along the way to make sure you make the right choices. Can you use all of the features this way? No. Can you do the most common and probably what you need to do? Yes.
I have come to feel the same way about scheduling VILT sessions and events in Docebo. The current setup has so many abilities and options. This is great, giving administrators maximum flexibility to meet the needs of their programs. However, if you delegate out scheduling to users who are not Docebo Masters, it is almost unrealistic to expect them to remember how to do it all right, even with training and documents, they simply don’t do it often enough. With this in mind, I adopted the same approach Microsoft did. What we needed was a simple wizard that walked the user through the most common scenarios for us, only requesting the information we absolutely need, and providing information along the way to help them make correct choices with minimal training required. This was built using a Qualtrics form, and then connected to a Power Automate Flow that uses the Docebo API to schedule the session. For an example, I have made a clone of one of the forms I use for a wizard so that you can click through the front end to see it in action:
https://research.newyorklife.com/jfe/form/SV_0fvIhimcdSFmnHg
Using the power of a Docebo custom page with an iframe widget with the OAuth turned on, lets this wizard exist inline in the system too (like we learned how to do in the last article in this series), so that the end users do not even realize it is not a Docebo feature, pretty nice right?
Designing Your Wizard
Remember as we go through this process that the goal of the exercise is to make the process simple but useful to the user. As you can see in the example above, I heavily tailored the experience to our precise needs, and I encourage you to do the same. This is one of the advantages to this technique.
Our guiding principle when designing the form was “Is it actually needed?”. The goal was to remove as many steps as possible, while still maximizing the usefulness. This only works by truly customizing to your specific needs. There will always be some information we will need to schedule a session and an event:
- Course (specifically Docebo course ID, but we will use a trick to let users see the Name to select)
- Start date and time
- Finish date and time (we choose to calculate this using how long the session is)
That’s really it. The rest you can technically form or ignore. Now you might be saying, there are seven sections and a couple dozen questions on your wizard. Why did you need those?
First, we do a lot more with this wizard than just schedule sessions and events. You’ll see that later in this guide series.
Second, all those sections and questions were solutions for what we were trying to do. Here are a few questions you might want to use to evaluate what goes on your form:
- Do you want them to be able to schedule multiple events per session?
- Do you want sessions to be centralized to a common time zone, or localized to the person scheduling?
- Do you want to enroll Instructors?
- Will the form be open only to Instructors, or can other users submit the form as well?
- Do you want to handle any type of automatic learner enrollment?
- Do you want to handle calendar invitations yourself, or use native Docebo notices?
- Do you want to offer any attendance options?
- Do you want to control any other options? i.e. join times for instructor/learner, enrollment deadlines, etc.
Sit down and write out all the information you want to collect, or settings you wish to impact when scheduling using your wizard. Then look at each one and ask “Can I get this information without asking the user?” If the answer is yes, move it into a backend bucket. If the answer is no, leave it in your wizard list.
Now that you have a list of the items you need to collect, start to group them into like categories. Organizing the categories is a balance of looking for fields that impact others, i.e. in my form example the instructors impact the GO’s selected, so Instructors come first, but also what feels like a logical order for someone scheduling a session.
Now it is time to simply build the form. Since this can vary so much I am not going into the step by step specifics, but do keep in mind we will be embedding the form into a Docebo custom page, so you might want to keep that in mind when making design and style choices. There are a couple of tricks that might come in handy related to the form that I will outline in the next few sections.
Setup Recode Values

There are several types of questions that you will probably be offering via a multiple choice field, i.e. courses or instructors. What we will eventually need is the Docebo ID of the item, but these are not user friendly to show, nor should just anyone be able to identify them. Fortunately, Qualtrics gives us a workaround here called recode values. Let’s look at how I did this with the course field.
- You can setup the multiple choice field and list all the courses by name like you normally would.
- On the lefthand side, under ‘Question Behavior’ select ‘Recode Values’. A modal should open up:
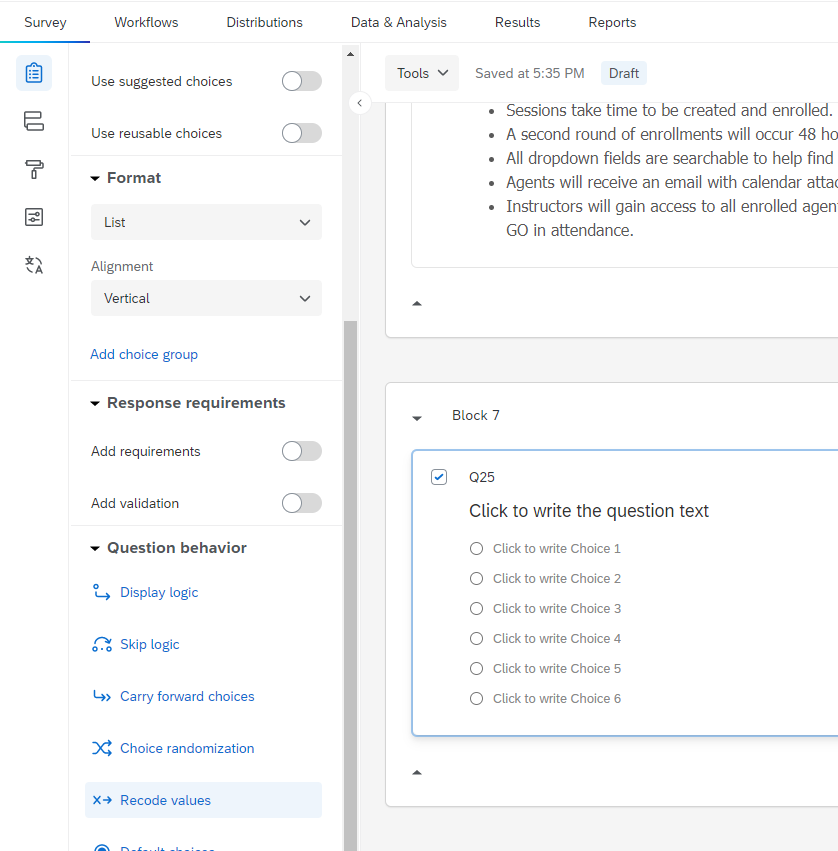
- Recode values are assigned by default to each choice. Check the box for ‘Recode Values’ to make them editable.
- Update each to be the Docebo ID of the course. This recode value will be able to be used when the form is submitted now.
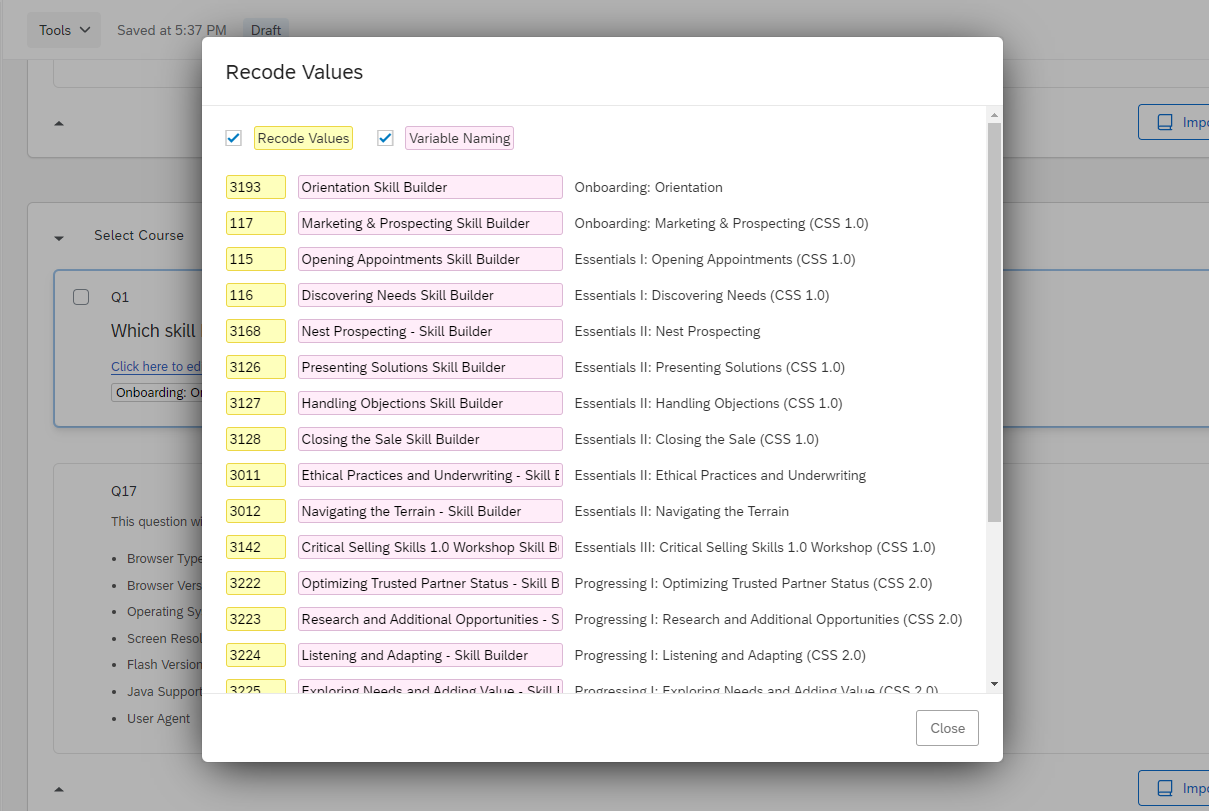
- Select ‘Close’ when done to save the changes.
Tip: In the case of Docebo ID’s, they are all numerical so the recode value works fine. If there is a case you need to send a different set of characters than you want to show to the user, you can use the same setup but edit the ‘Variable Naming’ instead. This gives you three potential values to use for one choice on the list.
Add Embedded Data

I wanted to be able to record the information of who was submitting the form, and I also wanted the form to appear to be “smart” and auto-select them as the instructor and their GO for enrollment. To do this, I used a trick of turning on the OAuth advanced option on an iframe widget. By just doing that, I am passed the Docebo ID of the current logged in user. We did not need to do any API calls to get what was needed here. I detailed how to go about the OAuth method in the last article here so make sure to check it out for more details, but in this case we will add the following:
- Build your basic form in Qualtrics.
- On the ‘Survey Flow’ tab, add a ‘Set Embedded Data’ block and move it to the top.
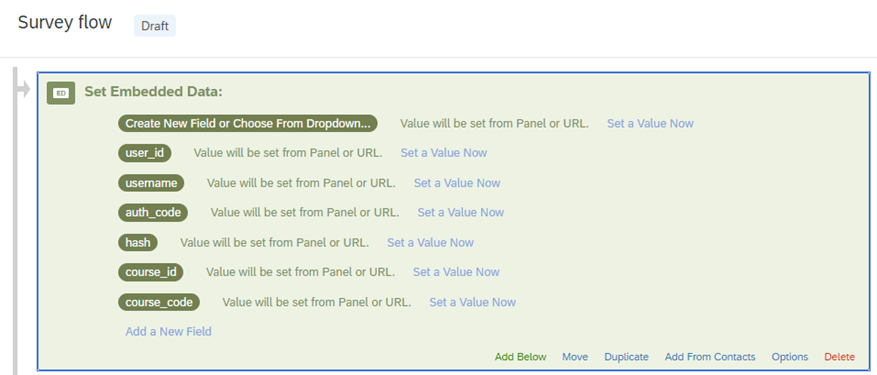
- Add the following fields to be pulled in for use later:
- user_id
- username
- auth_code
- hash
That’s it! Now the user_id embedded data element will have the Docebo ID of the current logged in user when you view the form embedded in Docebo.
Triggering Automation on Form Submission

You’ve built the form, had people try it out to see if it all makes sense, then tweaked and perfected it. The front end for your system is done. In order to start using it, we need the form to trigger a Power Automate flow when the form is submitted. Fortunately, Qualtrics makes this easy and secure to do:
- Go to the ‘Workflows’ tab of your form.
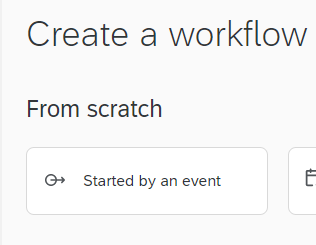
- Select ‘Create a workflow’.
- Under the ‘From Scratch’ section, select ‘Started by an event’.
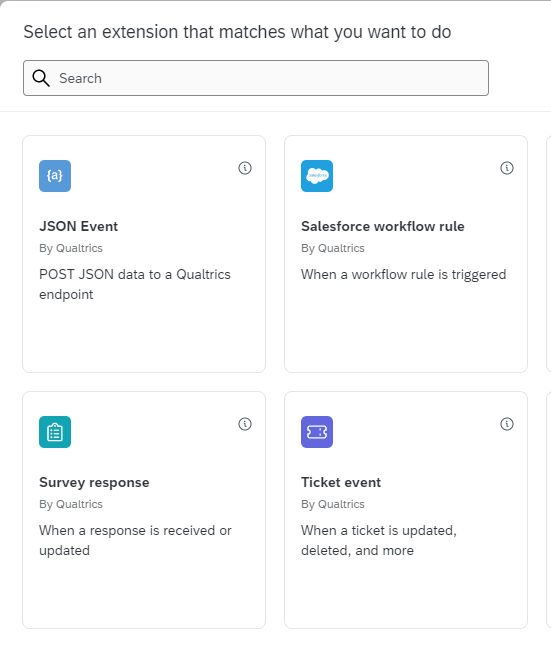
- Select ‘Survey Response’.
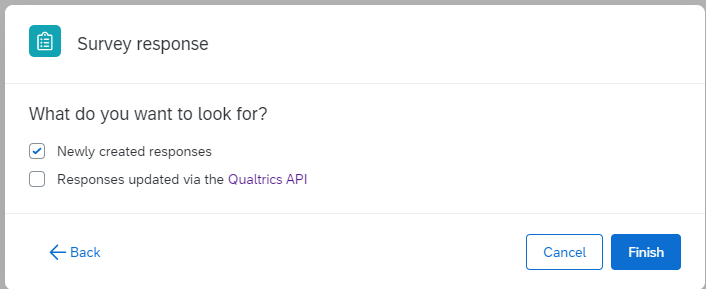
- Leave only ‘Newly created responses’ selected and select ‘Finish’.
- Select the ‘+’ and select ‘Add a task’.
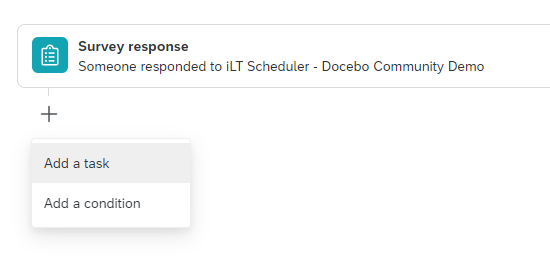
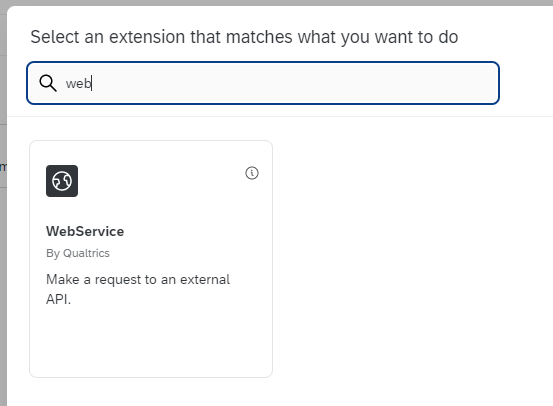
- Select ‘WebService’.
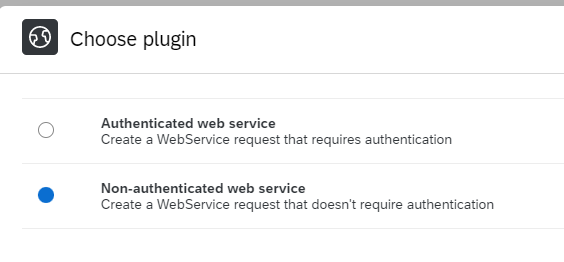
- Select ‘Non-authenticated web service’.
- Fill in the following fields:
- Task Summary: Give a unique and descriptive name.
- Request: Set to ‘POST’
- URL: Place the trigger URL from the Power Automate Flow (if you are unsure about how to get this, it will be covered in a later section).
- Headers: Add a Header and set the following values:
- Key: Content-Type
- Value: application/json
- Body: Set it to ‘JSON’ and ‘Key-value pairs’. Add two sets of key-value pairs:
- Key1: response-id
- Value1: ${rm://Field/ResponseID}
- Key2: survey-id
- Value2: The ID of the survey which can be found in the survey URL, it should look something like this: SV_0fvIhimcdSFmnHg
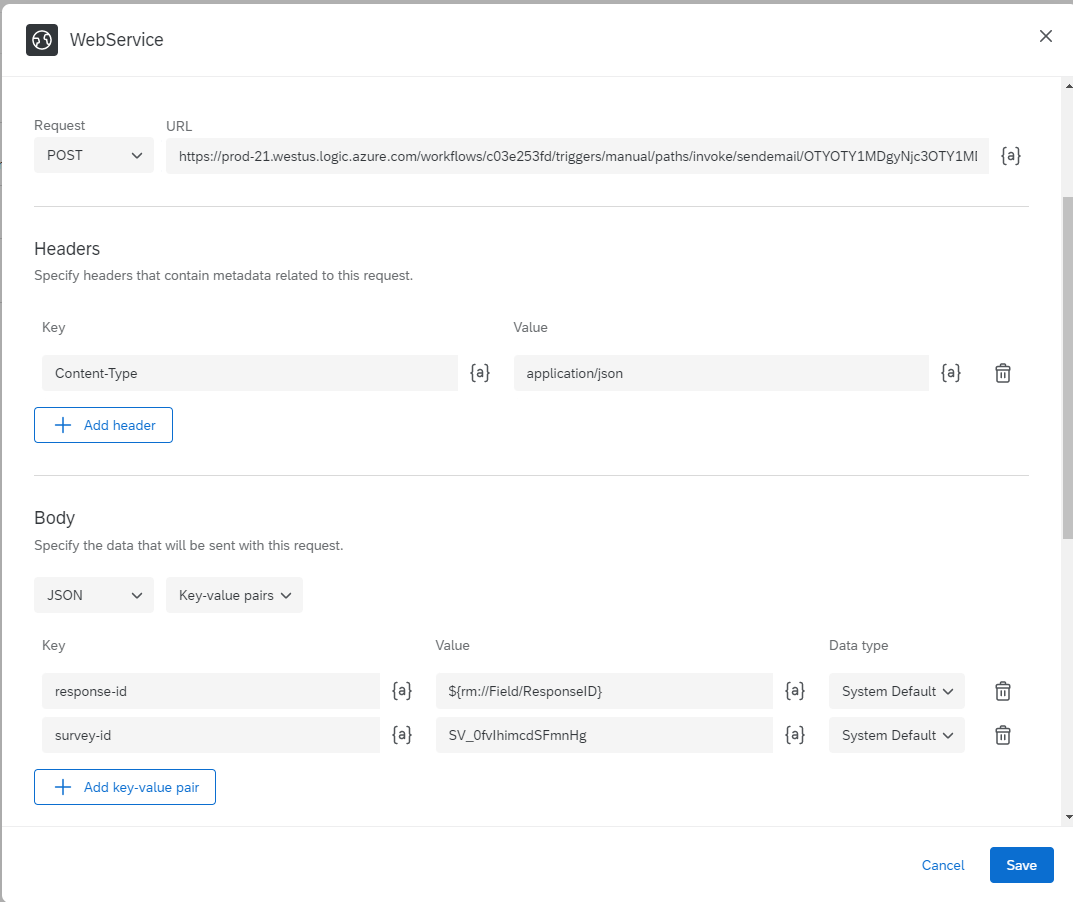
- Select ‘Save’.
Now whenever the survey is submitted, it will perform a web service call to the Power Automate trigger and supply the Survey and Response ID to the flow. This will allow us to establish a secure OAuth connection with Qualtrics and retrieve the full response details securely. We will go over how to do this later.
Setting Up the Backend
You’ve identified what you want your wizard to collect and do, built the front end to match this, and set up Qualtrics to send a web service call on submission. It is time to build the part to receive that service call, process it, and then actually build the session and event in Docebo.
Optional: SharePoint List to Track Created Sessions/Events
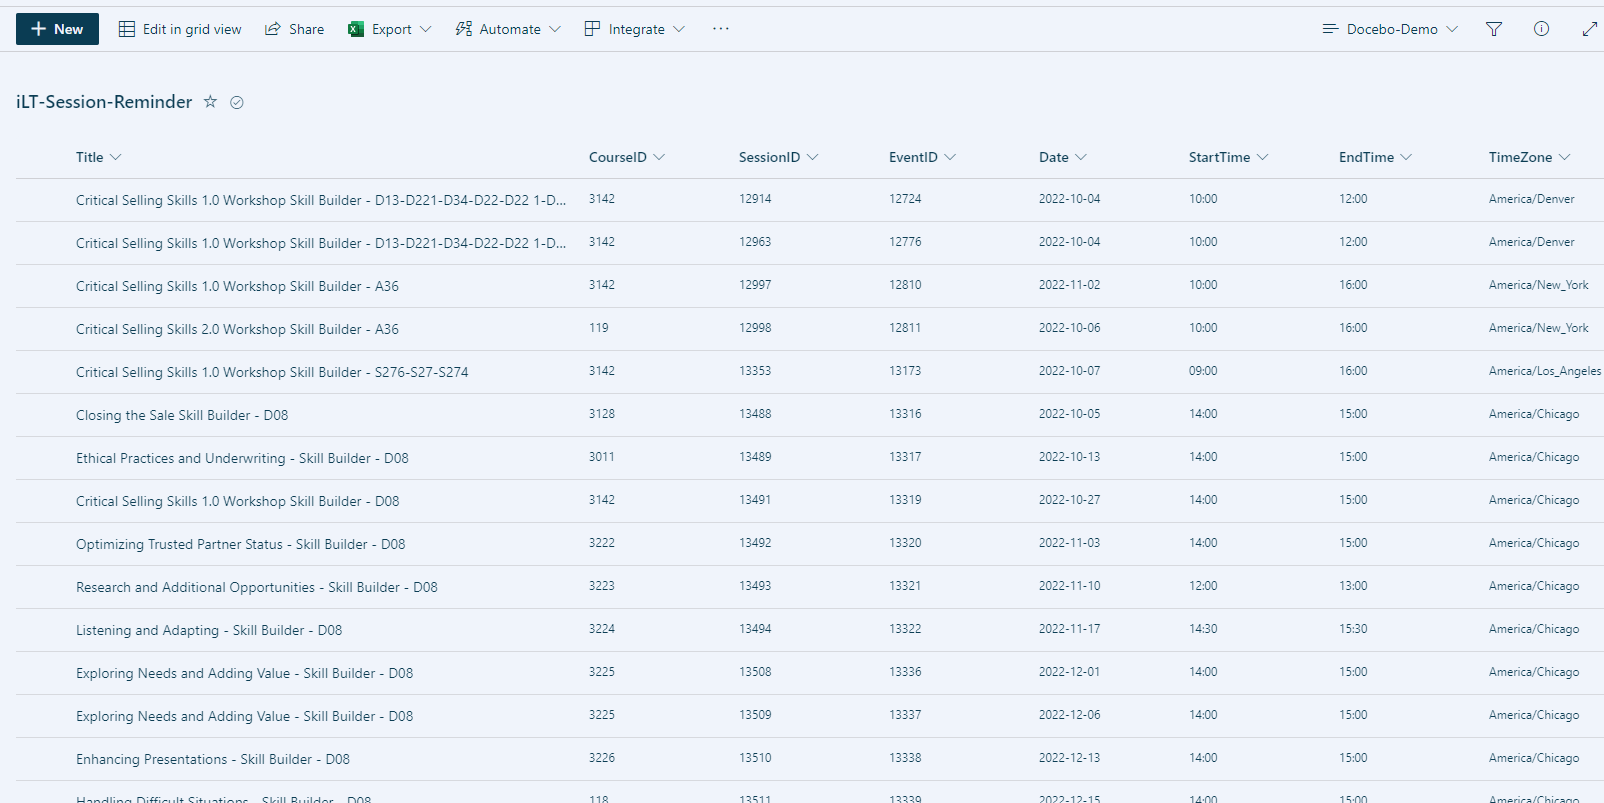
You may not require this section, but it is needed for some of the optional abilities I’ll go over later. I also find it comes in handy for troubleshooting, tracking, reporting, etc. The goal here is to basically make a mini database that holds all the information about each event that gets created. It is just a simple SharePoint list with a column for each piece of information you want to collect, where each row item will equal an event.
Note: The reason I say event here is because, if there are multiple events per session, there will be multiple line items.
If you want to build this, here are some recommended things you might want to include (your precise ones will vary depending upon your setup):
- Title: The default column in a SharePoint list which I use to be the title of the session/event
- Date: The date of the event. I like to keep these in the format of yyyy-MM-dd as it is easier to sort and calculate.
Tip: I use generic text entry fields instead of proper date/time columns. Since we will be writing to and from these columns programmatically, it is just easier than needing to constantly convert formats.
- Start Time: The start time of the event in 24-hour style, HH:mm
- End Time: The calculated end time of the event in 24-hour style, HH:mm
- Time Zone: The time zone of the event, if you are localizing the events.
- Course ID: The Docebo ID of the course.
- Session ID: The Docebo ID of the session.
- Event ID: The Docebo ID of the event.
- VC Tool Link: If you are using a virtual conference tool, i.e. Zoom, Teams, Webex; you might want to keep track of the URL
Update the Custom Connector for Docebo
Before we can build out the Power Automate Flow, we must make sure that the custom connector is configured with the APIs to create the session and the event within Docebo. These are the same as we used in a previous article to bulk create via CSV, but for reference, I will list them again. Please make sure these are configured:
- POST - /course/v1/courses/{course_id}/sessions – This will be used to create the Session. Only the Course Docebo ID is required to run this, however, I recommend having the following settings available. You may need others depending upon your exact needs:
- Instructors
- Name
- Description
- Min Enroll
- Max Enroll
- Enrollment Deadline
- Custom Deadline Days
- Evaluation Type
- Min Attended Dates for Completion
- POST - /course/v1/sessions/{session-id}/events – This will be used to create the Event within the Session. The only required field here is the Session ID the Event is being created under. This is usually a tricky step where you use the built in CSV upload tool. The value will be returned to us, though, to use when we create the Session. I recommend having the following settings available. You may need others depending on your exact needs:
- Name
- Day
- Description
- Time Begin
- Time End
- Allow Join Completion
- Join In Advance Time User/Teacher
- Allow Completion Percentage
- Required Completion Percentage
- Timezone
- Custom URL
- Any fields related to any collaboration or webinar tools (they are all available).
Power Automate to Create the Docebo Session and Event
As a reminder, this entire setup will be and should be very personalized. I am going to demonstrate the basis of what I do, leaving out as many as the extras as possible so that you can see the core. Next time we will look at how you can build on top of this core to perform many more functions.
- Create a new ‘Automated Cloud Flow’ in Power Automate.
- Set the trigger as ‘When a HTTP request is received’.
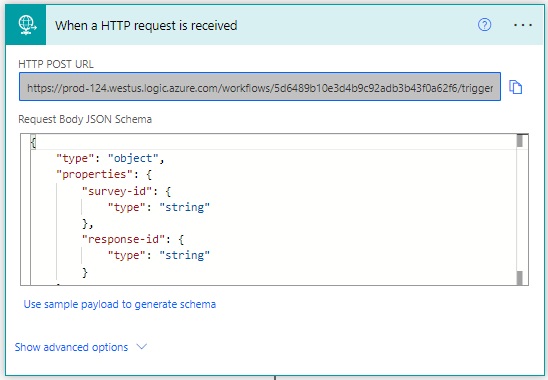
Note: Once you save for the first time, the ‘HTTP Post URL’ will be generated and this is the URL to add to the Qualtrics Workflow we setup earlier.
- In the ‘Request Body JSON Schema’ area, if you built the Qualtrics web service call as described above, it should be the following format:
{
"type": "object",
"properties": {
"survey-id": {
"type": "string"
},
"response-id": {
"type": "string"
}
}
} - We need to establish a connection to Qualtrics to get all the data submitted in the response.

Create an item ‘HTTP’ and configure the following settings:- Method: Post
- URI: https://iad1.qualtrics.com/oauth2/token
Note: The core part of that URL may vary depending upon where your Qualtrics is hosted, see this support article to find yours: https://api.qualtrics.com/ZG9jOjg3NjYzMw-base-url-and-datacenter-i-ds
- Headers:
- Content-Type: application/x-www-form-urlencoded
- Body: grant_type=client_credentials&scope=read:survey_responses&client_id=<YOUR CLIENT ID HERE>&client_secret=<YOUR SECRET HERE>
Note: You need to configure a Qualtrics API OAuth and replace the client_id and client_secret above. For instructions on how to generate these see this support article: https://www.qualtrics.com/support/integrations/api-integration/overview/#APIOAuth
- Authentication: None
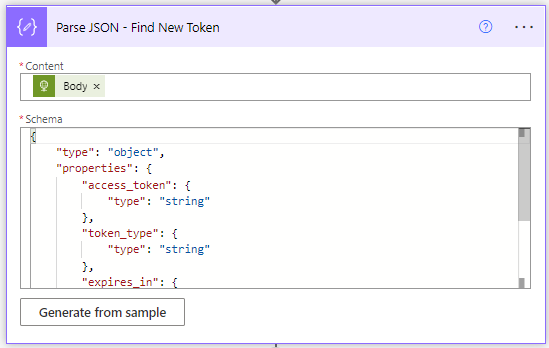
- Create an item ‘Parse JSON’. In the ‘Content’ field put the ‘Body’ from the Output of the previous HTTP step. In the Schema, put the following:
{
"type": "object",
"properties": {
"access_token": {
"type": "string"
},
"token_type": {
"type": "string"
},
"expires_in": {
"type": "integer"
},
"scope": {
"type": "string
}
}
}
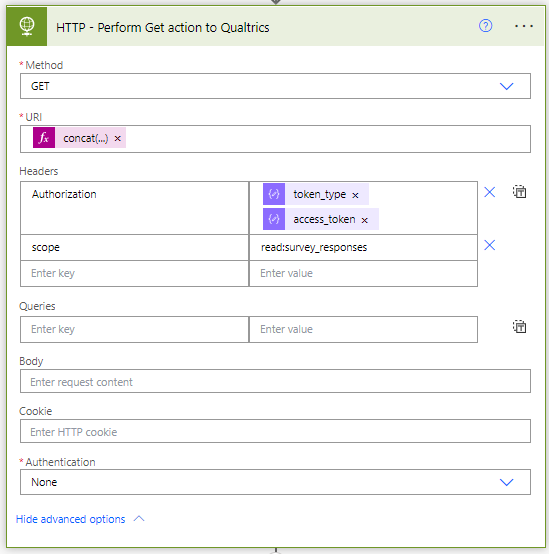
- Create a new item ‘HTTP’. Fill in the following details:
- Method: Get
- URI: concat('https://iad1.qualtrics.com/API/v3/surveys/',triggerBody()?['survey-id'],'/responses/',triggerBody()?['response-id'])
Note: The core part of that URL may vary depending upon where your Qualtrics is hosted, see this support article to find yours: https://api.qualtrics.com/ZG9jOjg3NjYzMw-base-url-and-datacenter-i-ds
- Headers:
- Authorization: ‘token_type’ from previous step, hit enter, then ‘access_token’ from previous step.
- Scope: read:survey_responses
- Authentication: None
- Create an item ‘Parse JSON’. In the ‘Content’ field, put the ‘Body’ from the Output of the previous HTTP step. In the Schema, you want to use a sample payload from Qualtrics to generate the proper one.
My trick to this is to save the flow at this point and go submit the form. If you open the flow run, you can grab a sample of the body from the HTTP to Qualtrics. Paste this into the ‘Generate from sample’ option and it will automatically configure the Schema for you.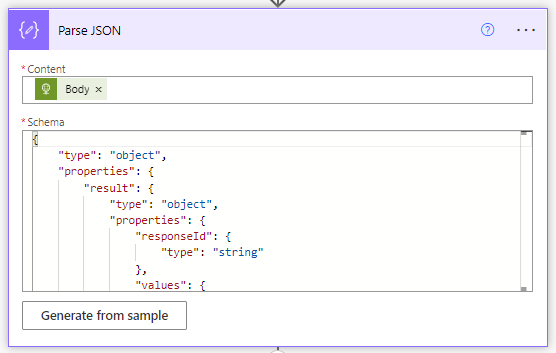
- Now I typically create a bunch of variables to do some calculations with. Technically you do not need most of these as you could just use the items directly from the parse json step above. Then, however, you’d need to keep track of things like how ‘QID1’ is equivalent to the Course ID. Personally, I find it easier to track these things by loading them into variables named appropriately. Then I can easily refer to them later, and I can calculate or edit them along the way. Here are the variables I have setup here:
| Name | Type | Value |
| Course-ID | String | The question value that has the course ID from the form. |
| SubmittedStartTime | String | The question that has the start time from the form. |
| SessionDate | String | formatDateTime(variables('SubmittedStartTime'),'yyyy-MM-dd') |
| DEventStartTime | String | formatDateTime(variables('SubmittedStartTime'),'HH:mm:ss') |
| SessionLength | String | The question value that has the length of the session from the form. |
| SessionLengthArray | Array | split(variables('SessionLength'),'.') |
| SessionLengthHour | String | int(variables('SessionLengthArray')?[0]) |
| SessionLengthMinute | Integer | We only offer the ability to do on the hour or half hour using this scheduler, |
| SessionEndTime | String | addMinutes(addHours(variables('DEventStartTime'),variables('SessionLengthHour'), |
| SetTimeZone | String | The question value of the timezone asked on the form. |
| SelectedInstructors | Array | The question value of the Docebo ID of instructors from the form, for me this is: body('Parse_JSON')?['result']?['values']?['QID4'] |
| ZoomURL | String | The question value of the Zoom URL that was submitted on the form. |
| ClickToJoin | String | Using the question if they wanted to record attendance on click to join, |
| SessionTitle | String | Blank |
- For the session title, I use a separate SharePoint list that the LMS Admin keeps which has course details and has a column for the name convention we use for the sessions. You may form it other ways depending on your needs. The Sharepoint look up matches the Course-ID variable from above and then sets the SessionTitle to the Title value of the course returned. (We also add the group values for who the session is created for after this, but we are not covering that here.)
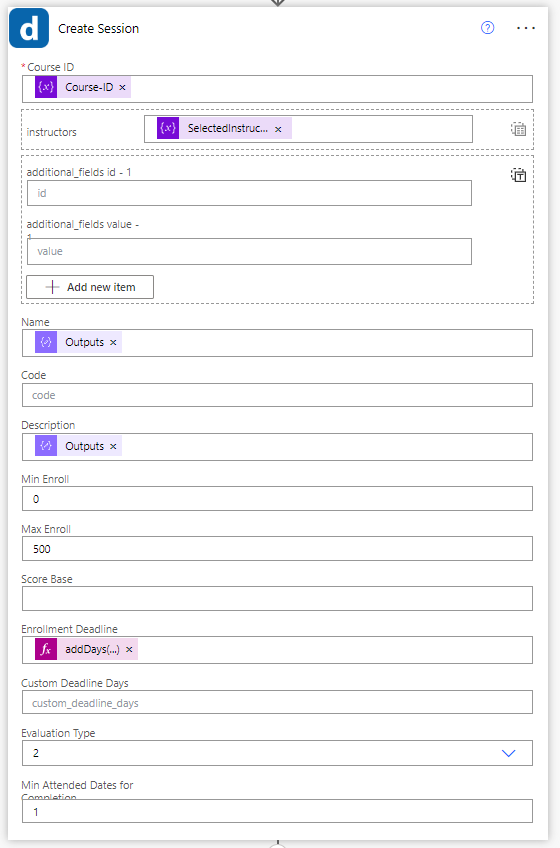
- Create a new item ‘Create Session’ from your custom connector and set the following values:
- Course ID: Course-ID variable
- Instructors: SelectedInstructors variable
- Name: SessionTitle variable
- Min Enroll: 0 (or whatever value you wish)
- Max Enroll: 500 (or whatever value you wish)
- Enrollment Deadline: I like to set this the day before the session doing a simple formula:
addDays(variables('SessionDate'),-2,'yyyy-MM-dd') - Evaluation Type: we do attendance, so a value of 2
- Min Attended Dates for Completion: 1 (or however many you want)
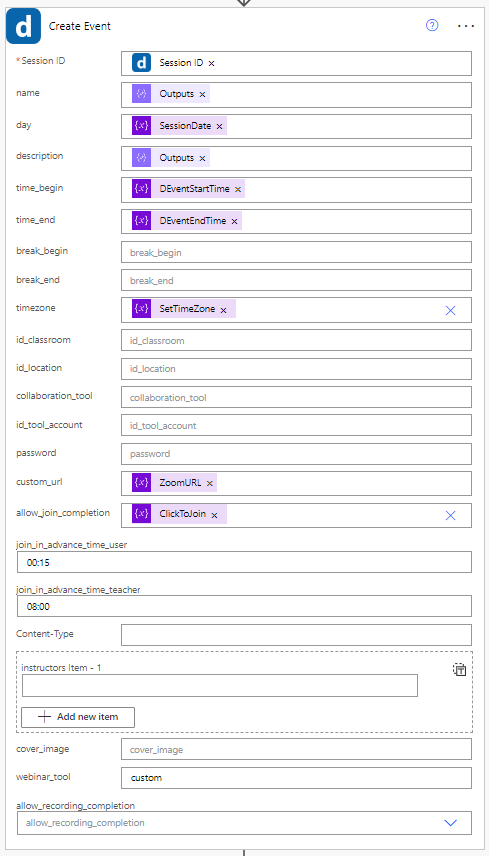
- Create a new item ‘Create Event’ from your custom connector and set the following values:
- Session ID: Session ID from the previous step
- Name: SessionTitle variable
- Day: SessionDate variable
- Time_begin: DEventStartTime variable
- Time_end: DEventEndTime variable
- Timezone: SetTimeZone variable
- CustomURL: ZoomURL variable
- Allow_Join_Completion: ClickToJoin variable
- Join_in_advance_time_user: We like to set this to 00:15 so the join button shows to learners 15 minutes prior
- Join_in_advance_time_teacher: We like to set this to 08:00 so the join button shows to Instructors 8 hours prior
- Webinar_tool: custom (you can also select others you have configured instead)
- Create a new item ‘Create SharePoint Item’ and fill in all the appropriate information you wish to keep:

(This is optional, but if you made the SharePoint list, this is where to record everything.)
And you’re done. Make sure to save your work!
Now when you submit the Qualtrics form, it will trigger this flow to run, and the flow will create a new session and event within Docebo on its own. Best of all, we have pulled some of the harder steps to remember and taken care of them in the background.
Once you’ve embedded the form onto a custom page, anyone given access to that page will be able to quickly and easily submit to create a session and event.
What’s Next?

Now that the basic scheduling wizard is in place, we can look at ways to enhance and improve it—we just need more power!
Want to pre-enroll eligible users? No problem.
Want to use your own custom calendar invites? Lets do it!
Want to send reminders? Absolutely.
Want to let power users temporary access to users to mark attendance? Consider it done.
It is really up to you how to customize and add value to the process, but in future guides, we will cover a couple options that I have found useful. Hopefully, you can use these as inspiration to build your own!
Guide Series:
The Art of Being Lazy: Leveraging the API to Take Care of Repetitive Tasks & Fill Feature Gaps
Getting Started: Building Out Your Toolbox [Part 1] and [Part 2]
Reports: Sending, modifying, and more!
In the Room When it Happens: Act On Events with Webhooks
Bulk Scheduling ILT Sessions with a CSV File
Tag, You’re It!: Tracking and Managing Content Tags
Let Others Do It: The Power of Forms in a Workflow
You Built It, They Came, Now What?: Scheduling ILT Wizard Bonus Activities