Does your platform need something new? Is your current font just not catching your eye anymore? Docebo’s own Nick Tosto (Technical Services Team Lead) has got you covered!
It is important to note, however, that this requires the application of CSS. Docebo does not support the ability to add custom fonts to platforms. The methods shown below were tested prior to publication, but may not work for your platform or may break in the future.
It should also be noted that CSS, including any font change, does not apply in the mobile app. These changes only affect the web browser experience.
Guide Table of Contents
While Docebo does not support the use of custom fonts via the UI, CSS opens the door to a world of platform customization. This guide will explain how to make custom fonts available to your platform. Applying these fonts to text in your platform will require authoring custom code, but you can use ours as a starting off point.
When adding a new font to your platform, you’re likely in one of two scenarios: Either you’re using an externally hosted font, or you’re using a font file.
Scenario 1: Using a Google Font or Other Externally Hosted Font
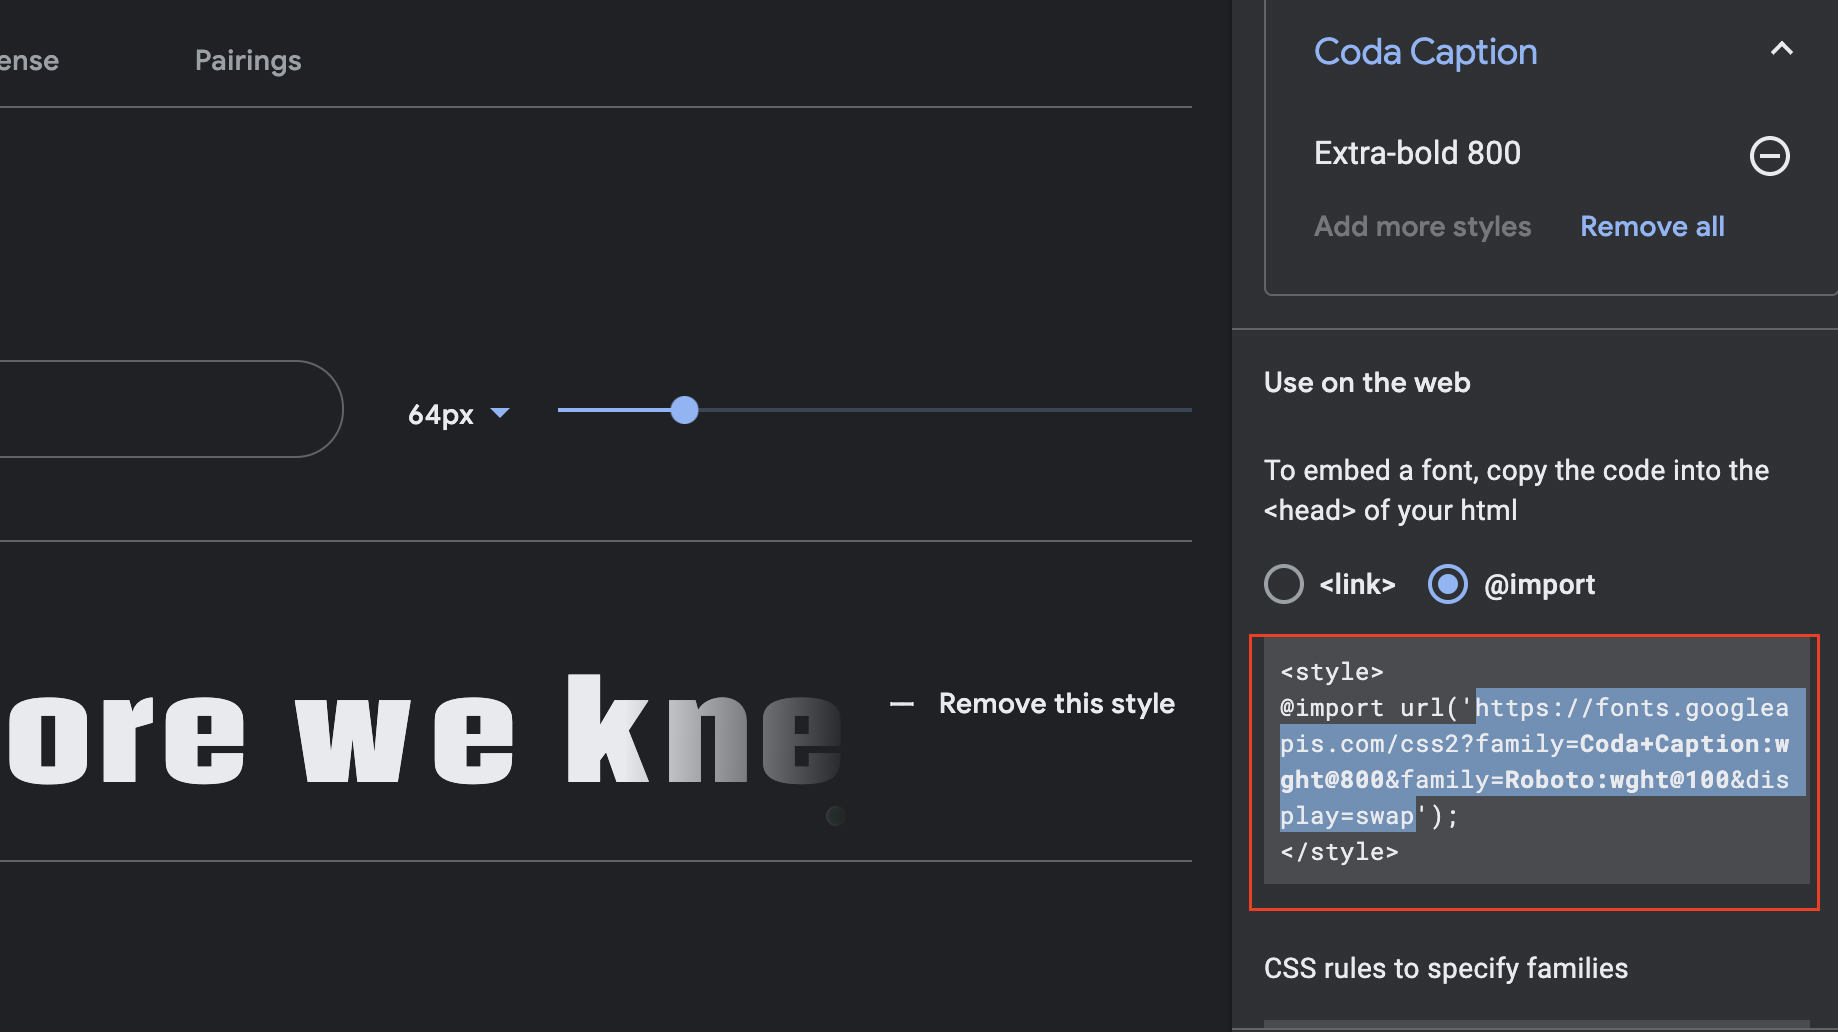
For security reasons, Docebo does not allow customers to use the @Import rule in the Configure Branding & Look area of the LMS. Because of this, it isn’t possible to use one of the more common ways to import fonts for use on a website. Instead, you need to visit the URL that is provided in the @import CSS for that font:

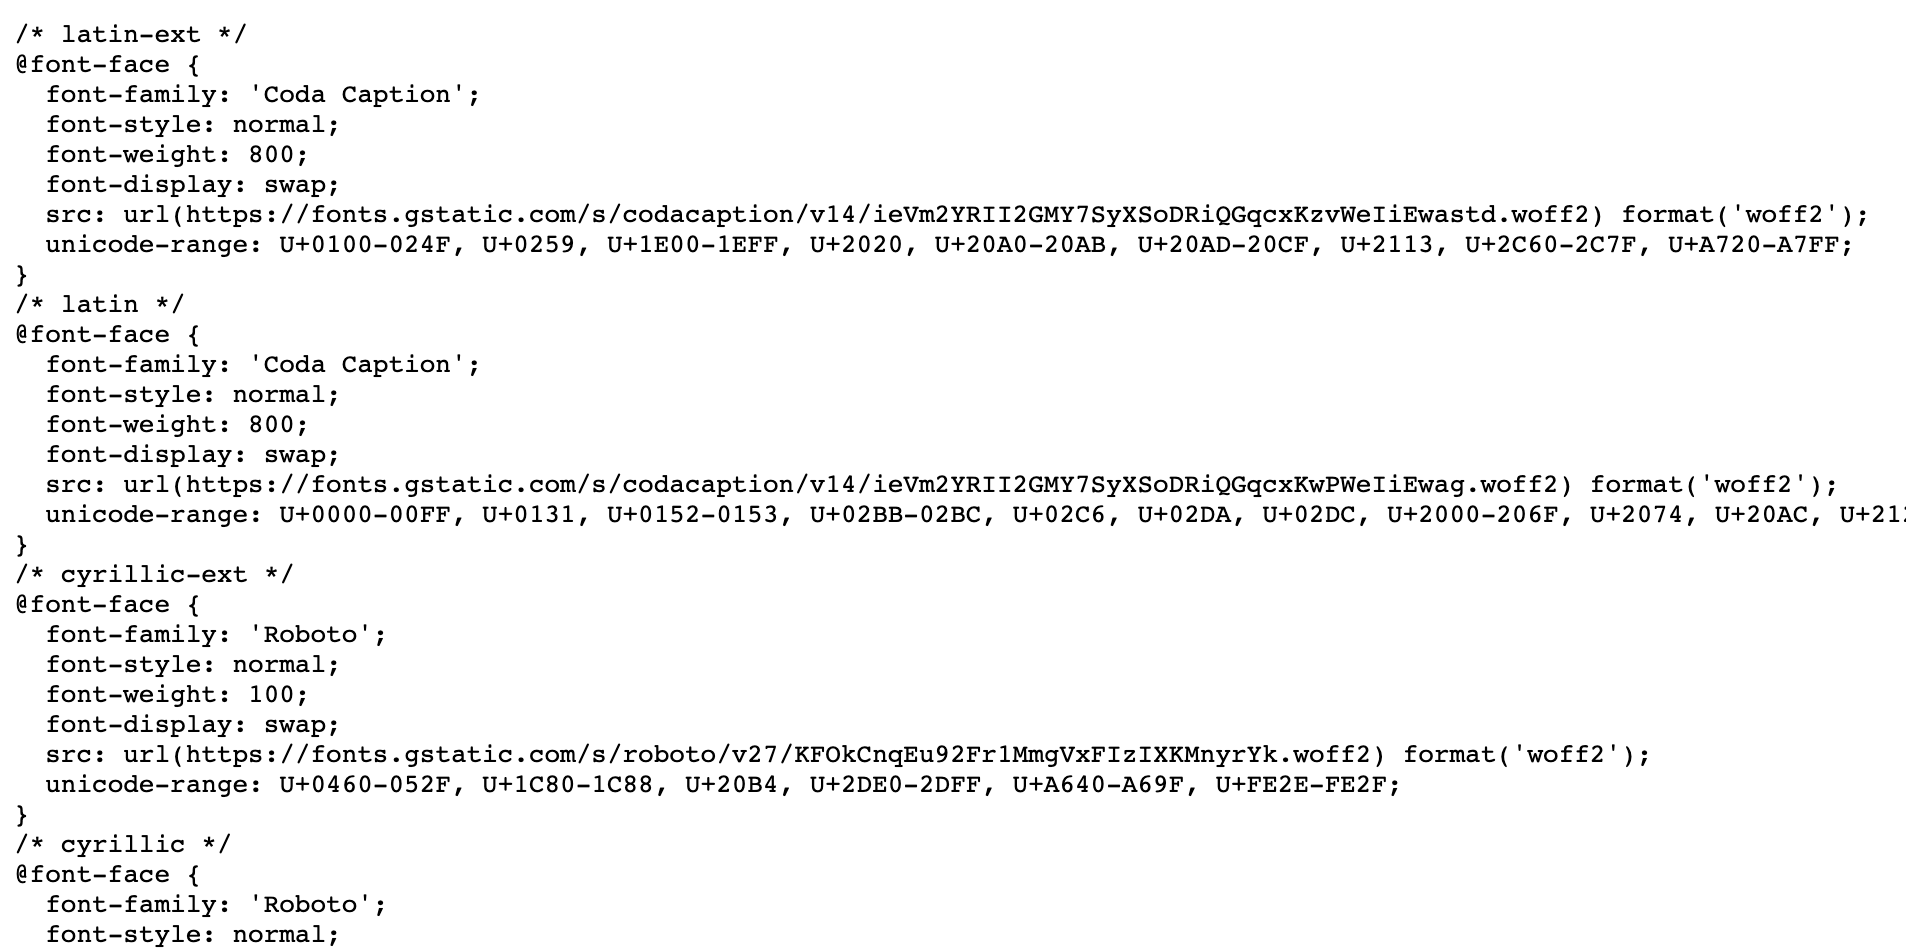
If you visit this URL, you should be taken to a page of CSS code:

Copy and paste the contents of this page into the top of the Configure Branding & Look area of your LMS (under Admin Menu > Settings). This code declares and defines the font you would like to use on your platform.
Now this font may be referenced by name in your CSS and you can apply it throughout the platform.
Scenario 2: Using a Font File
Docebo does not offer a way for customers to upload font files to be used in the platform. Font files either need to be hosted externally (as shown in Scenario 1) or fully defined in the CSS. To fully define the font in the CSS, you can convert a font file to Base64 and paste it into the Custom Styles area.
Example: A company uses a custom font and the designer shared the .woff2 file (or .otf, .ttf etc.) to be used on the LMS. Since the font file cannot be uploaded into Docebo, it needs to be converted to Base64 so that all of the font data is accessible locally in the CSS.
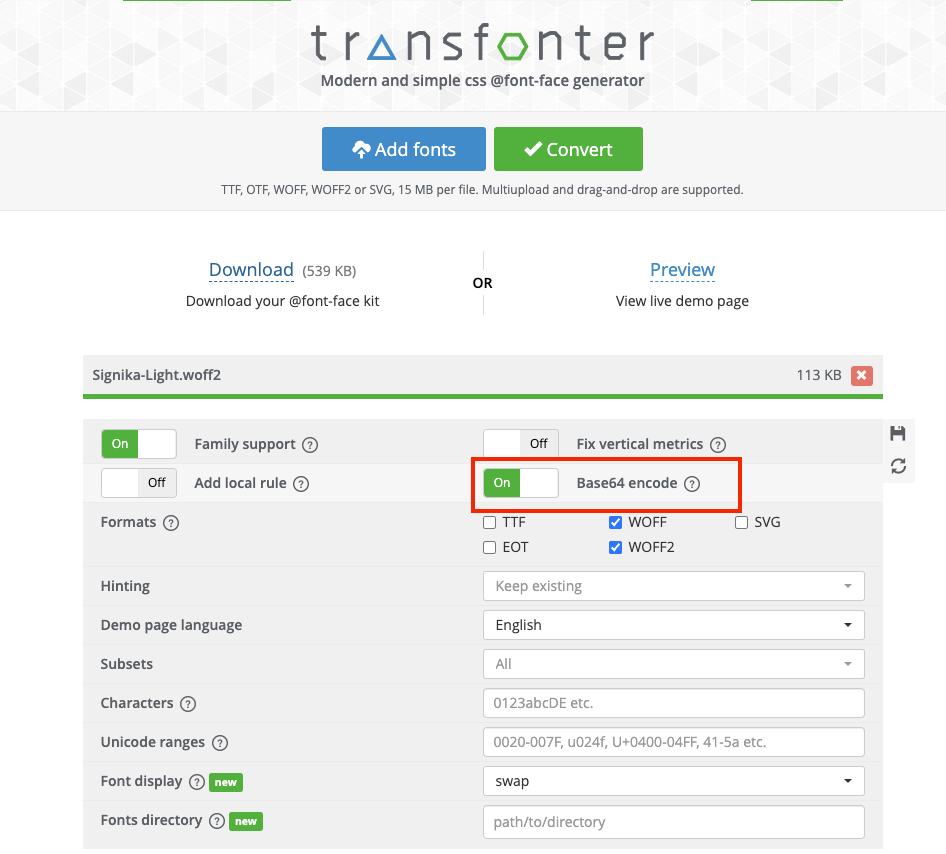
To do this, start by visiting a Webfont generator site such as transfonter and upload your font file. Select the ‘Expert’ button to see all available configuration options. Leave all settings as-is, but make sure to select the option for Base64 encode:

Click ‘Convert’.
Download the kit .zip file and open the stylesheet.css file. You should see CSS code that looks like this:

Note: The Base64 code will be extremely long. Depending on your word wrap settings, the resulting code may look like The Matrix. Still, go ahead and copy the code.
Copy this code into the Custom Styles area of your LMS (Admin Menu > Settings > Configure Branding & Look). Now you can reference the font for use throughout the platform.
Applying Custom Fonts to Text in the Platform
After you’ve imported your custom fonts using one of the methods above, you still need to specify which parts of the platform should use the font. If you’d like to apply the font globally, you could use code like this as a starting point:
/* Change font for entire platform */
a:not(.zmdi), abbr, acronym, address, applet, article, aside, audio, b, big, blockquote, body, button, canvas, caption, center, cite, code, dd, del, details, dfn, div, dl, dt, em:not(.zmdi), embed, fieldset, figcaption, figure, footer, form, h1, h2, h3, h4, h5, h6, header, hgroup, html, iframe, ins, kbd, label, legend, li, mark, menu, nav, object, ol, output, p:not(.zmdi), pre, q, ruby, s, samp, section, small, span:not(.zmdi), strike, strong, sub, summary, sup, table, tbody, td, tfoot, th, thead, time, tr, tt, u, ul, var {
font-family: Roboto !important;
}
Keep in mind that some font sets don’t have glyphs for certain special characters which may result in missing or incorrect characters.
And most importantly, make sure to replace ‘Roboto’ in the code above with the name of the font you’re using. This will be the name listed after ‘font-family’ in the code you retrieve in either scenario above.
Now that you know how to apply custom fonts to your platform, how will you use them? Let us know in the comments below! ⬇️


