


If you’re looking to use Zapier or a similar platform with Docebo, this is guide is for you! Patrick Morales (Docebo University Admin) is back with a new guide so you can authenticate in your chosen webhook platform with ease.
This guide will walk you through the beginning stages of creating a Zapier integration that can authenticate into Docebo via API. We’ll then show you how to reference the authentication token captured in the original step in other calls. In this example we’ll be using a Slack trigger as our initial trigger. This is purely for example and you can replace these steps with whatever trigger you’re trying to use to build your Zap.
Initial steps for creating a Zap
- Create a new Zap by pressing the Create Zap button.

- Choose the app you’ll be using to trigger the Zap.

- Choose whatever trigger event you’d like. (In this instance we’ll be using “Saved Message from Slack”.)
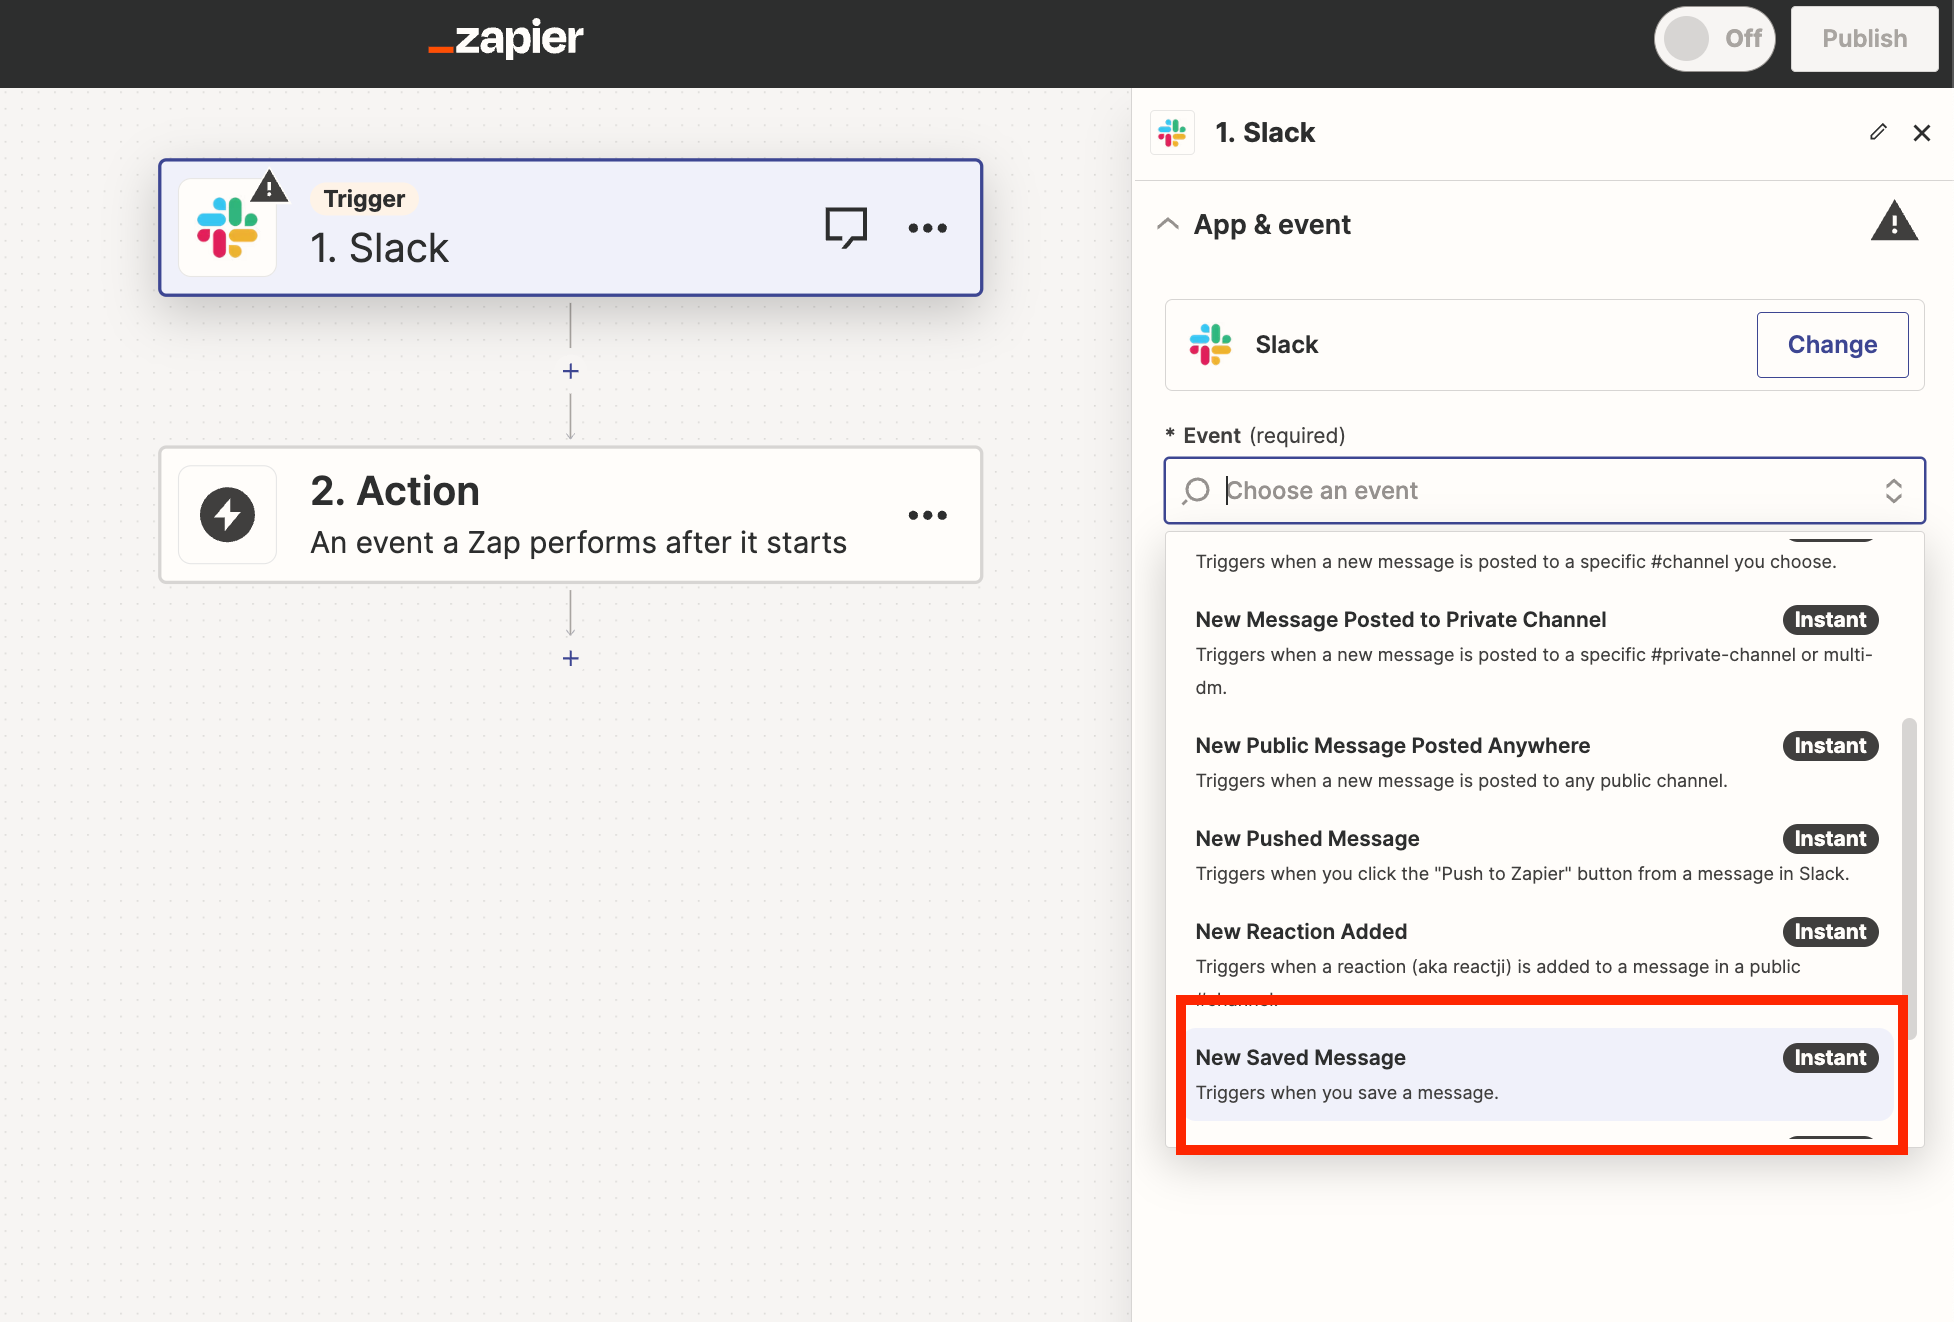
- Click Continue and Test the Webhook.
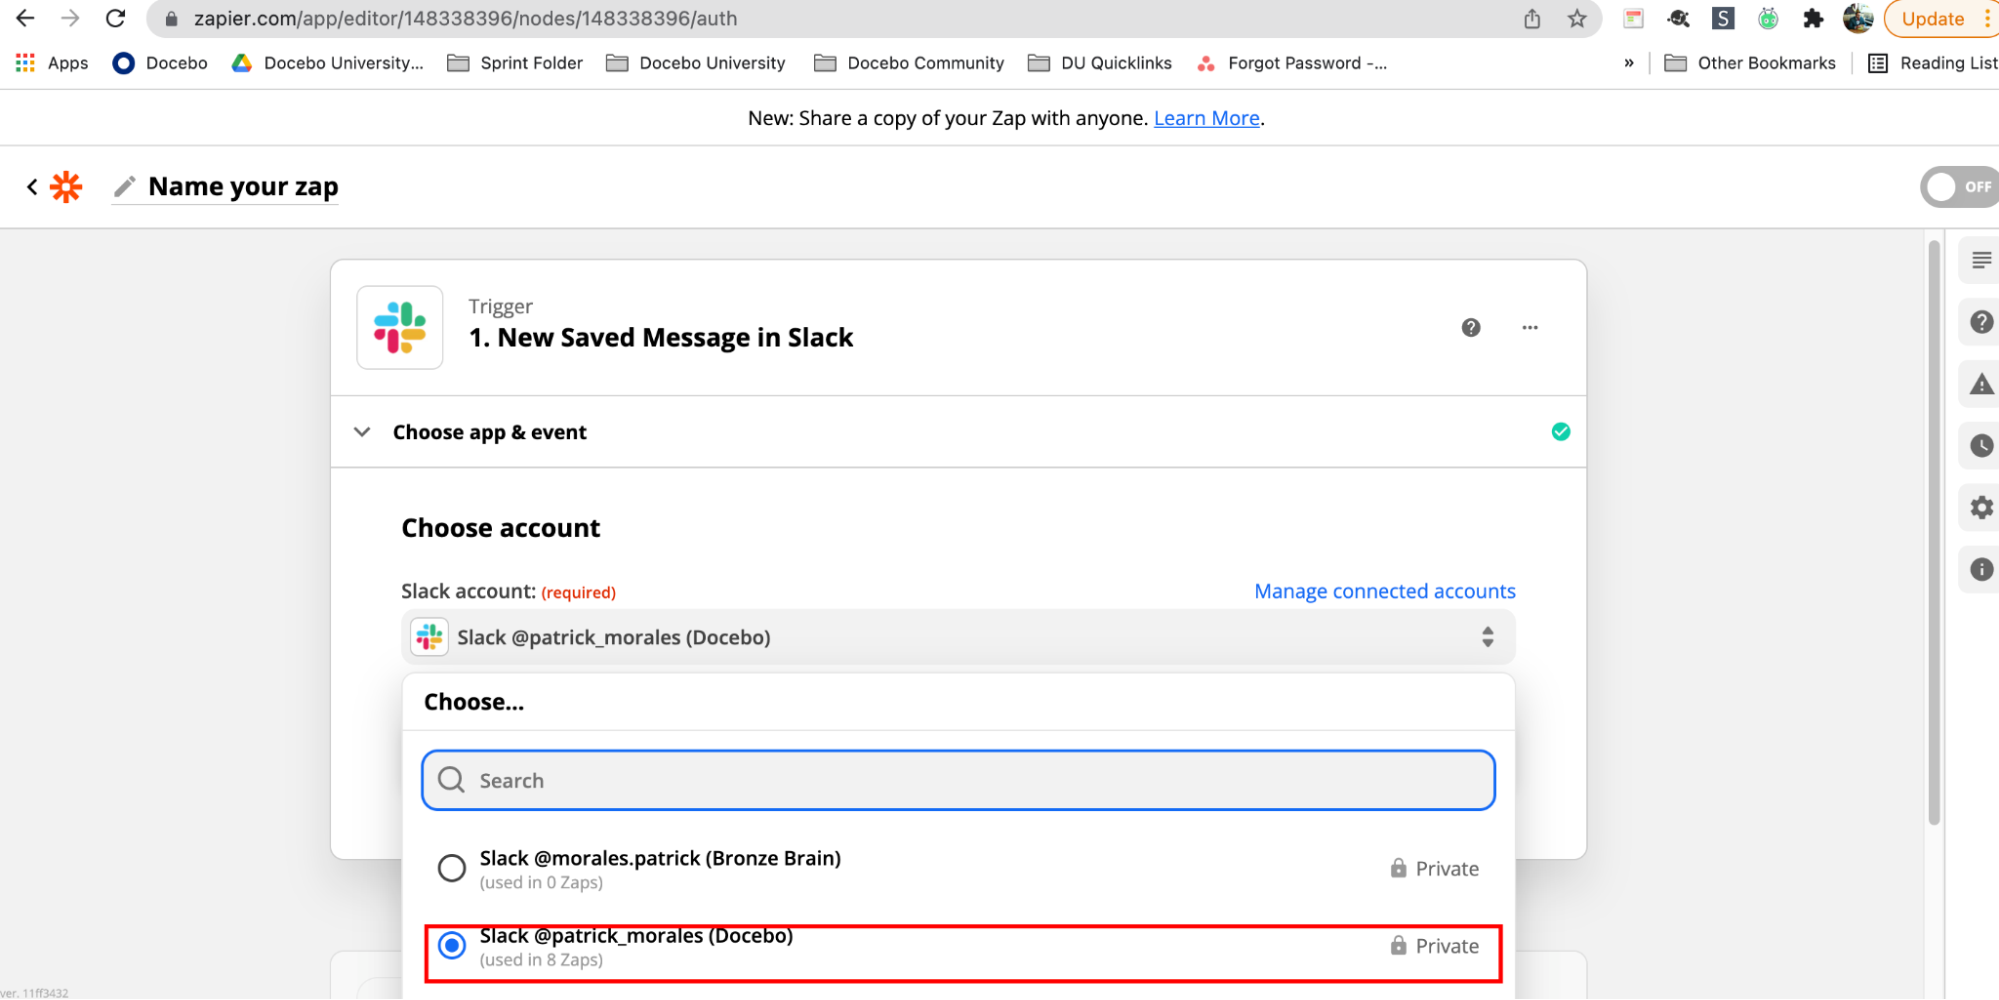
- Next choose the Slack account you’ll be using. If you haven’t connected the account, click connect account to connect your Slack account to your Zapier instance.
Authentication
Now that we’ve created our event trigger and specified the information we’ll be capturing, our next step is to generate a token that will allow the platform to make API calls and manipulate data within the LMS.
These next steps assume that you have already created API credentials within the API and SSO app inside your instance of Docebo Learn. If you’re not familiar with this then my suggestion would be to refer to this Knowledge Base article on how to configure that app.
Assuming you’ve already created API credentials, we can proceed with the following steps:
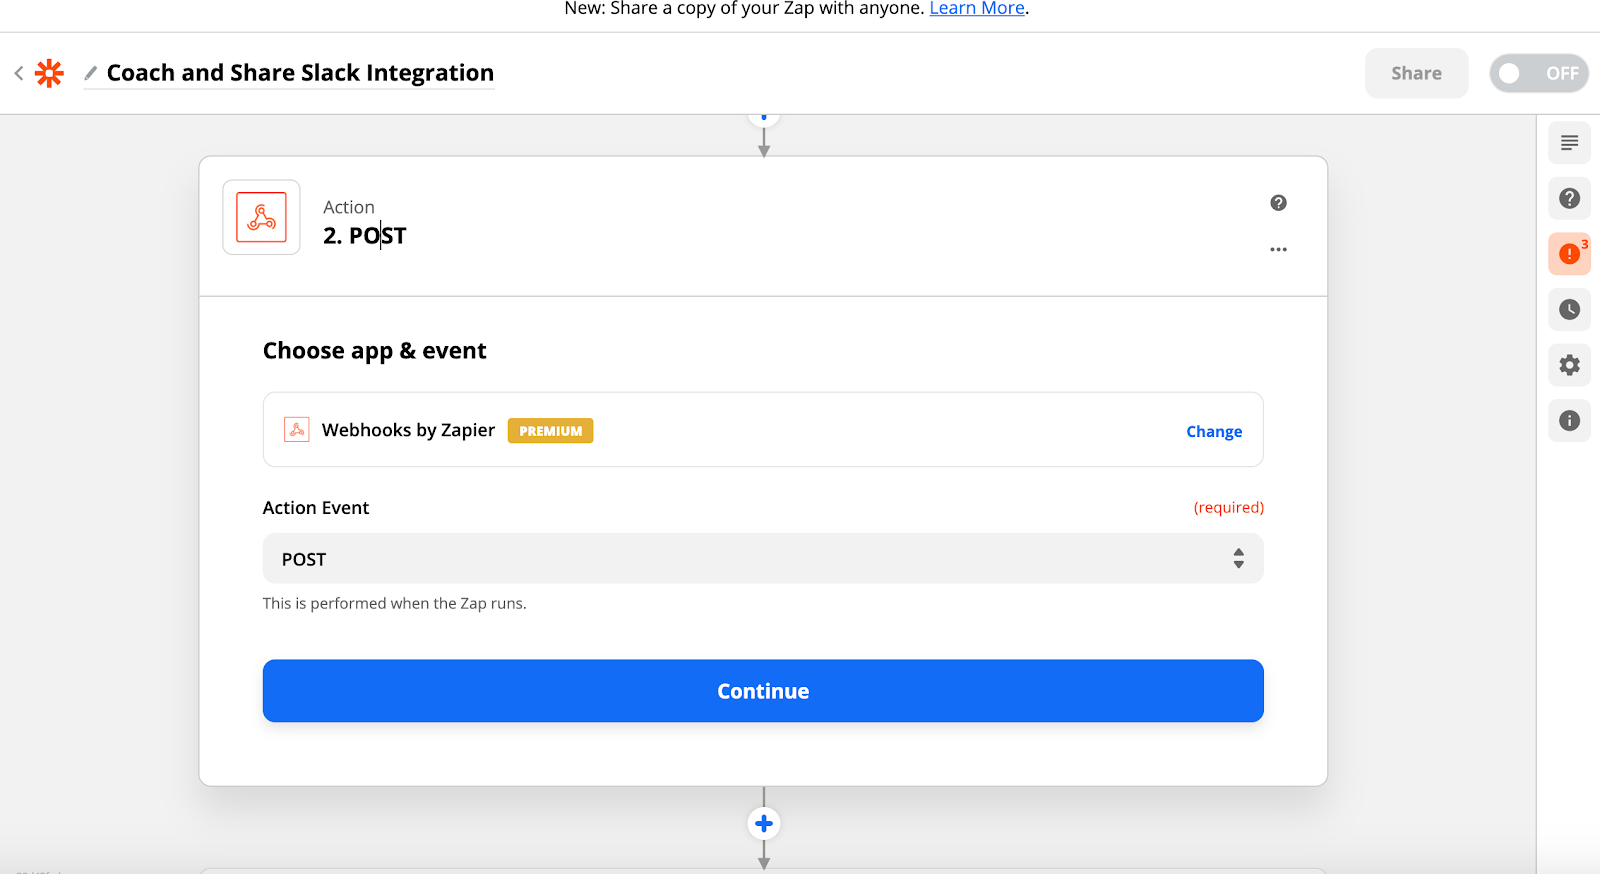
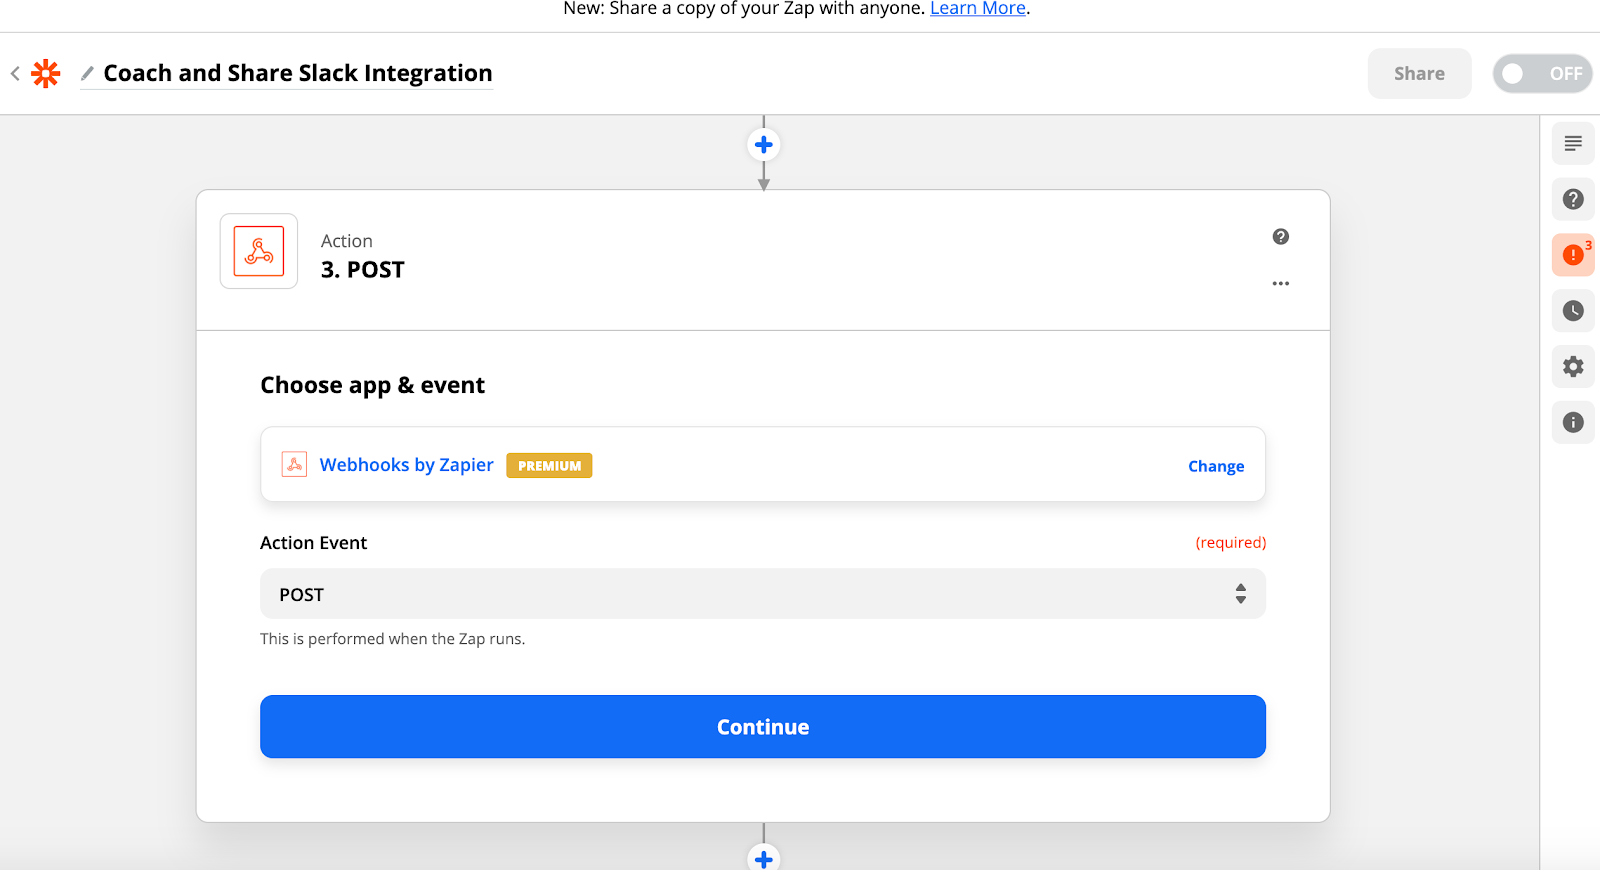
- We’ll click the plus icon to add the new event trigger.

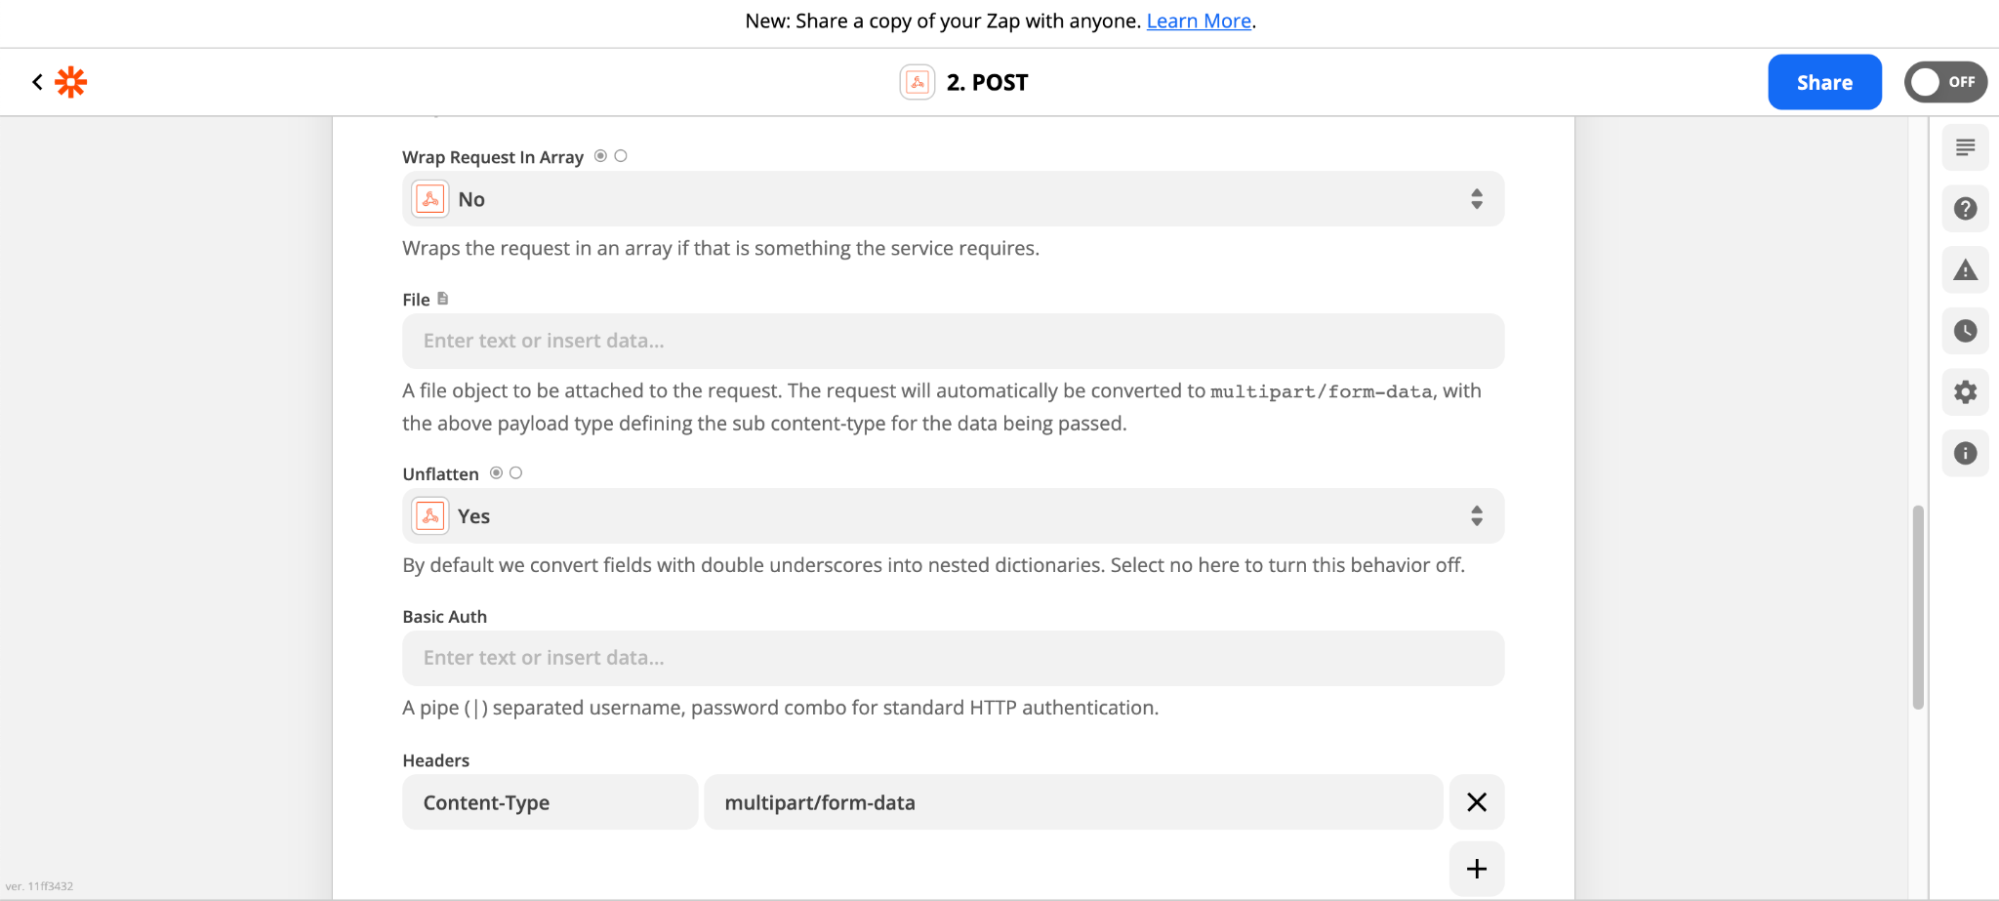
- This time we’re going to search and select Webhook”. For Action Event, we’ll select Post.
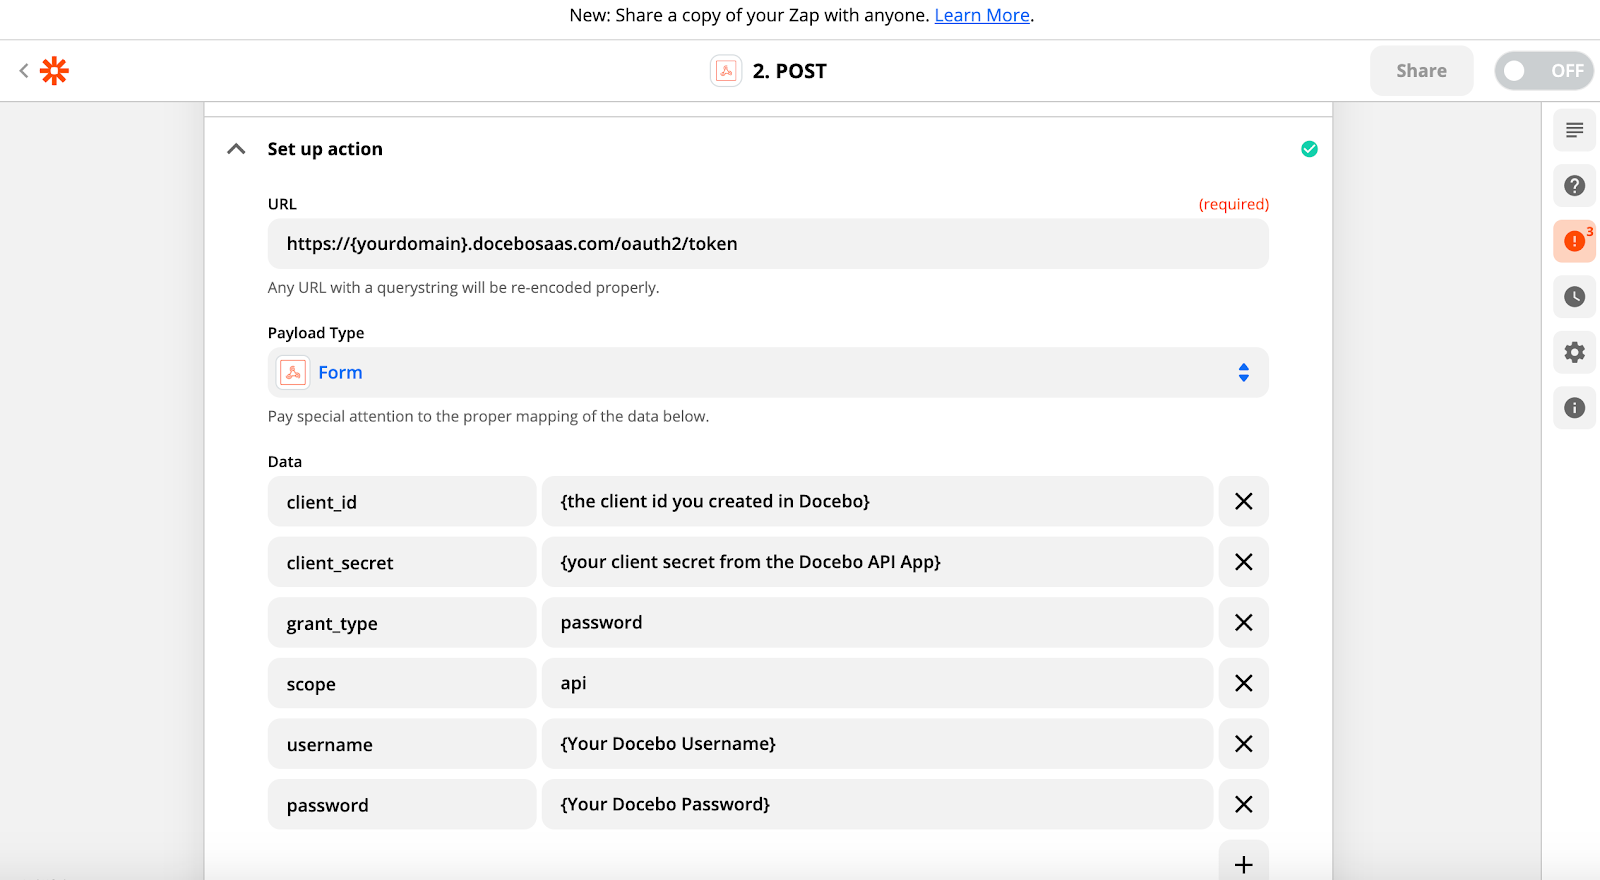
- Next we’ll setup the action with a form payload type using the following attributes:
Anything below with brackets indicates that you’ll be replacing it with values specific to your instance. It’s important to note that grant_type=password correlates to what you’ve chosen in the API app when you created your credentials. Scope=API should be the same in your platform as well.
- Last, you’ll want to test this trigger.
Common issues:
- Your grant type doesn’t match what you’ve configured in the API and SSO app
- The credentials you’ve supplied aren’t accurate
Now that you’ve generated a token you can reference this token in other API calls. For instance, in the example above we’re using a saved Slack post that we can then post as a question in a channel within Coach and Share.
👉 It’s important to point out that we need to add a reference to the token we generated in our first Post event. We’ll add an Authorization header and reference the Token Type and Access Token.
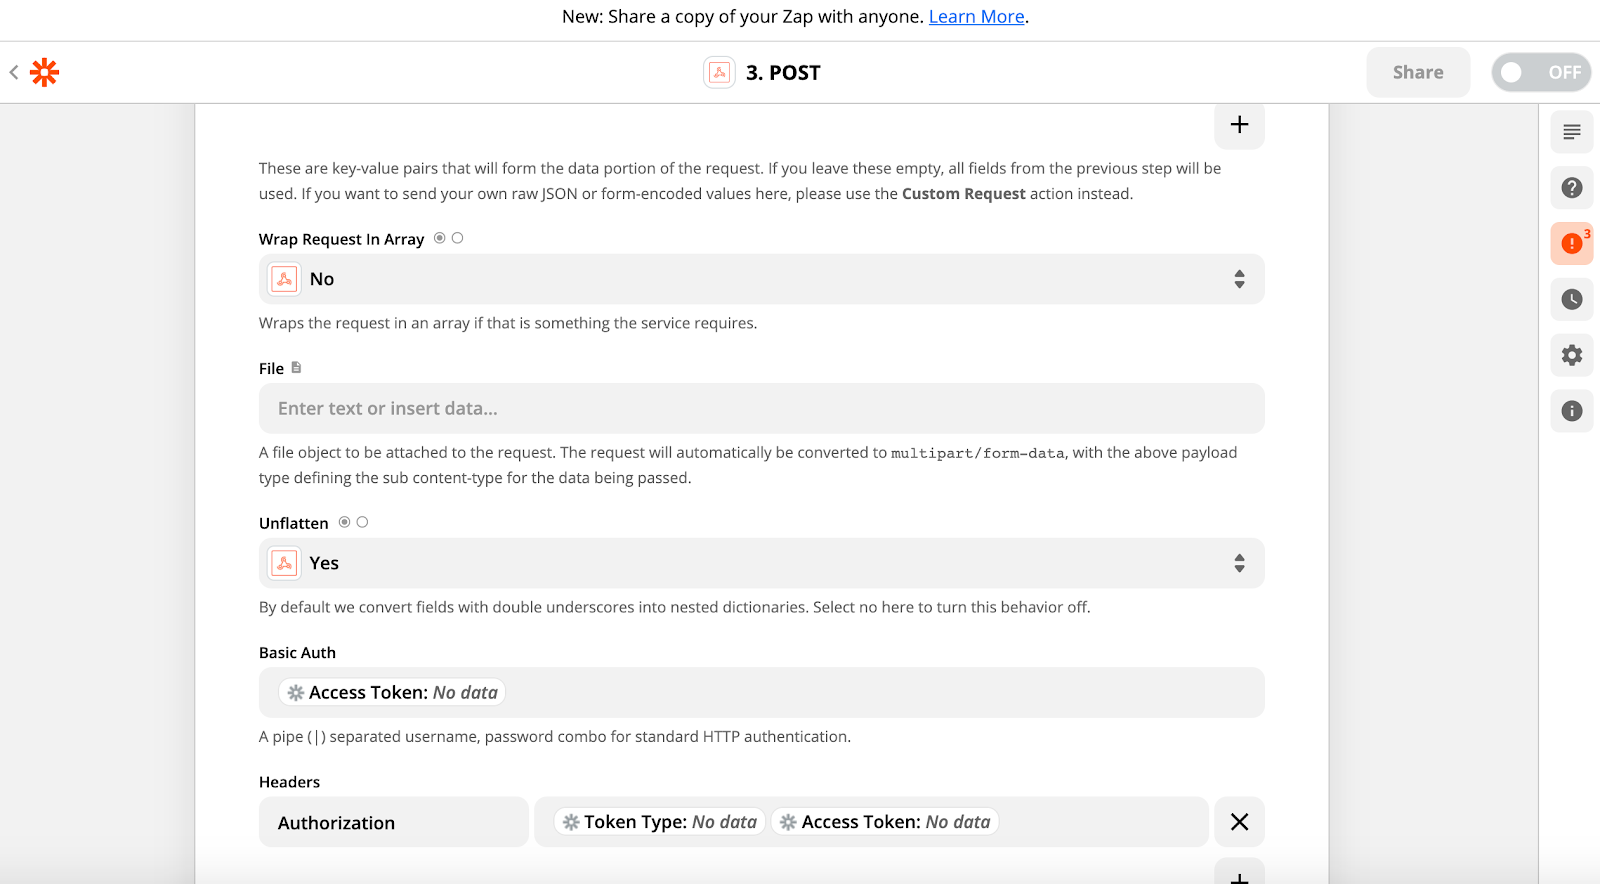
Note: You’ll want to ensure there is a space between the token type variable and the access token variable. This is a common error at this stage in your Zap.
Now you know how the basics of how to set up a Zap that will communicate information to your Docebo Learn instance. Have any further questions? Want to share how you use a webhook platform alongside Docebo? Don’t hesitate to comment below 👇


