

Are you tired of manually assigning resources to each individual Power User? You’re in the right place! This video tutorial and transcript from Docebo’s own Adrian Thomas (Customer Success Associate) walks you through the basics of assigning resources to Power Users using the Automation App.
Transcript
Welcome to my tutorial on Power User Mapping via the Automation tool. The Automation tool is a very powerful feature of Docebo Learn, and if you aren't already using it, you'll definitely want to after today! It's a great asset for creating and managing Users, and best of all, it's super easy to use once you know how it works.
Today, I want to show you how to use the Automation tool's Power User Mapping rule. This feature enables you to assign and remove resources for your Power Users via a CSV file. A popular use case where you'd need this rule is when you want to enable your Managers with Power User permissions and assign their individual direct reports as resources.
Now before we begin, you'll already need to have the Automation App enabled, as well as an FTP or an SFTP server that it can connect to. If you don't, then please refer to the Docebo University course on the Automation App to get started.
Creating a Rule
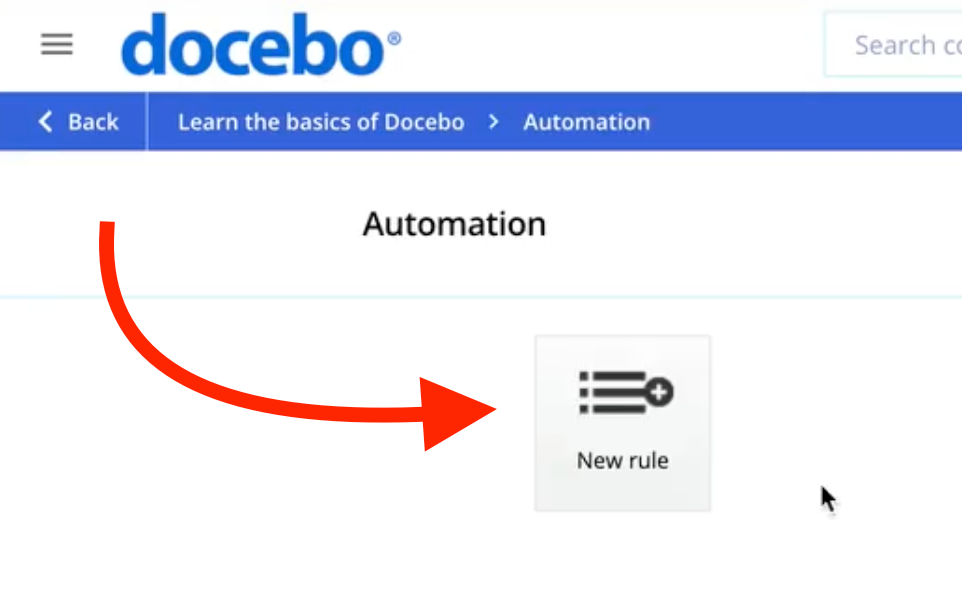
- Once you have your Automation App and SFTP server ready, you'll want to start off by creating a new rule in the Automation App.
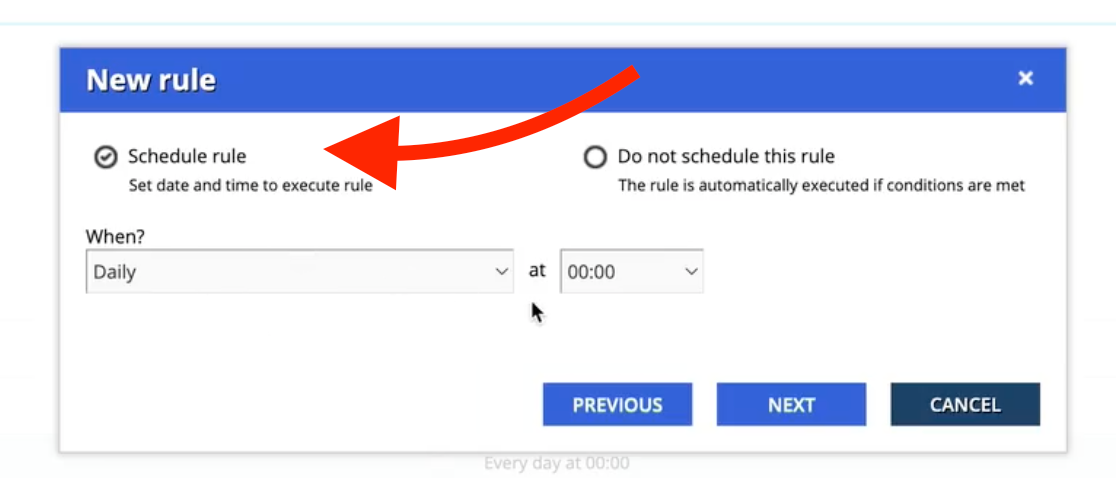
- Set it as a scheduled rule, and choose the frequency you want the system to check for your chosen conditions.
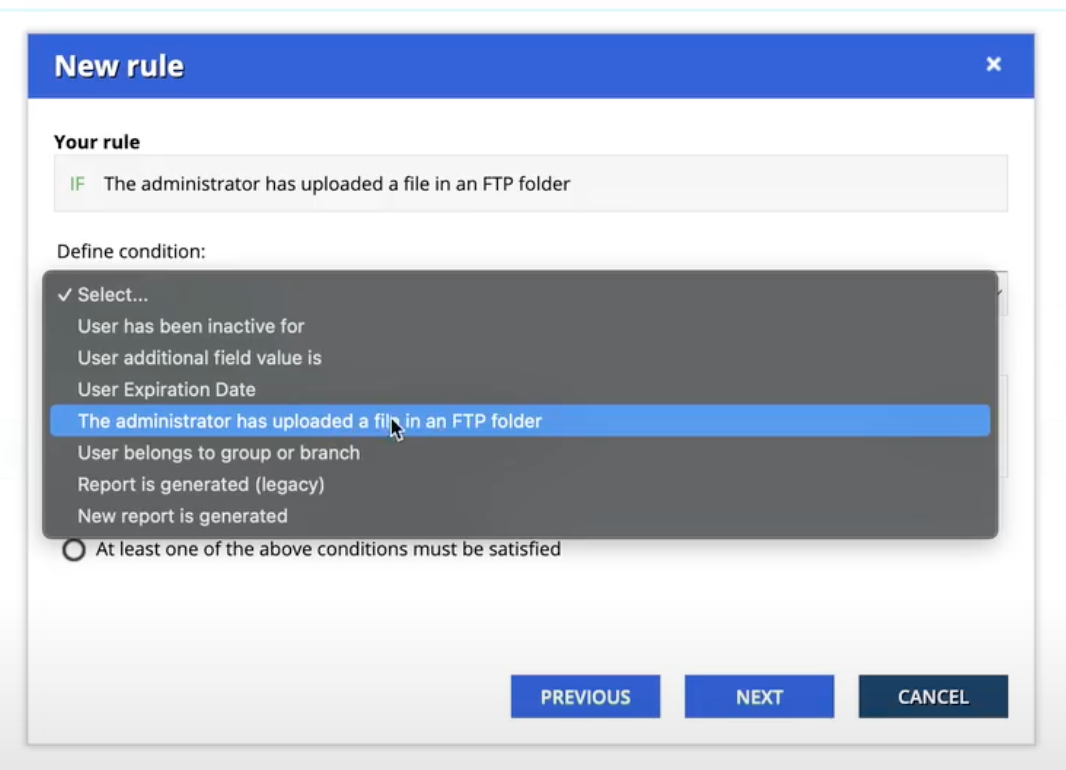
- Next, you'll want to choose the condition "The administrator has uploaded a file in an FTP folder" and configure the rules of the server where the system should look for the CSV you'll use to import your Power User Mapping settings.
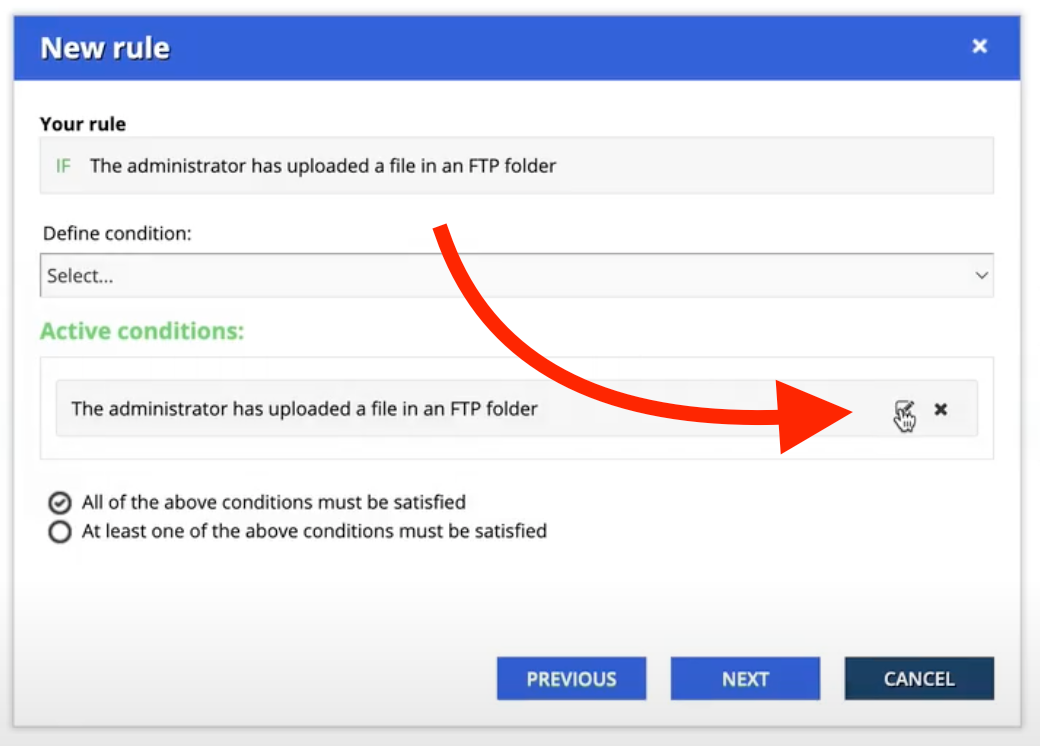
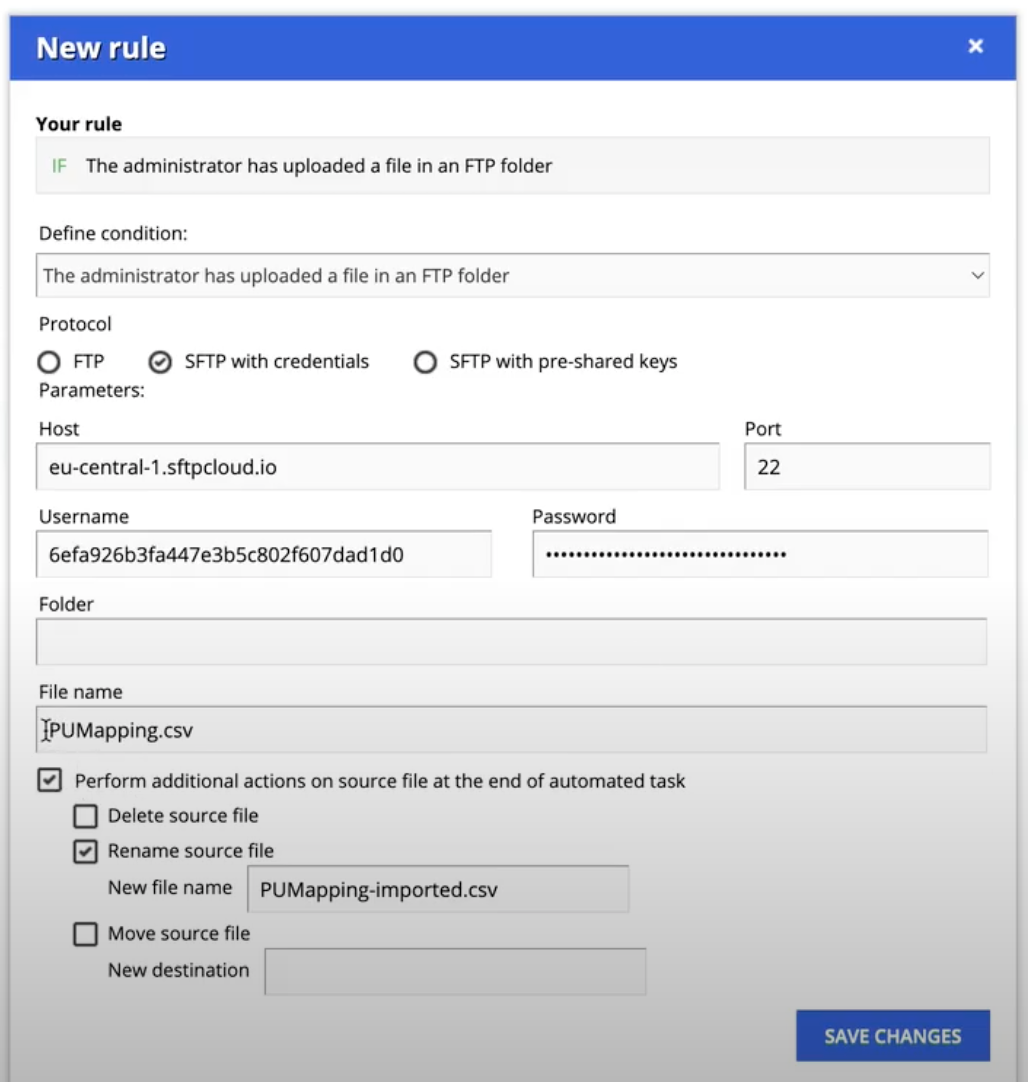
In this tutorial, I have my rule configured to look for a file called PUMapping.csv, and then rename it to PUMapping-imported.csv after the rule has run, so I can refer to it later if needed. You can also add additional conditions to control when this rule should trigger if you'd like. Feel free to share your unique condition combinations in the comments below.
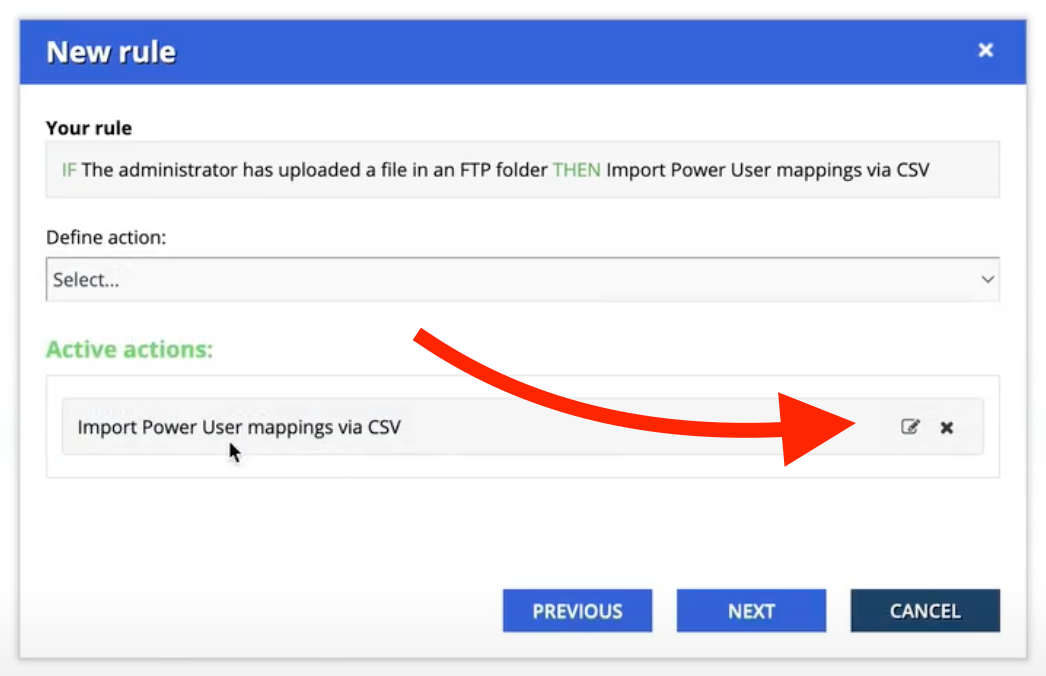
- Next, select the Action: Import Power User Mappings via CSV option and configure the Import Schema to match your Mapping CSV.

Formatting a Power User Mapping CSV
But let's pause here and take a look at the necessary format for a Power User Mapping CSV, and how you can easily generate the basis for one using the platform's reporting features.
Let's refer to the Knowledge Base article, “Creating a Rule for the Automation App”, which will also be linked down below.
As you can see, the Power User Mapping rule is configured through the values found in the following 4 columns:
- The first column is the Username which, of course, holds the Username of the Power User to be modified.
- The next column is for Association Type, which holds The type of resource to be associated with or removed from the current Power User. This value can be one of the following strings:
- User, Branch, Branch_descendants, Group, Course, Course_category, Learning_plan, Catalog, Location
- The following column is for the Item Code which is dependent on the Association Type from the previous column. So if the Association Type is User, we'll insert resource's Username here; If it's Branch or Branch_Descendants, then we insert the respective Branch Code; if Group, then that Group's name and so on as according to the document.
- Finally, the last column is the Action Type, which will hold a value of A if we’re adding the defined association to a Power User, or D if deleting it.
Now that we know how to format a Power User Mapping CSV, let's go back and complete the configuration of the Action Step of our Power User Mapping Automation Rule.
Completing Your Automation Configuration
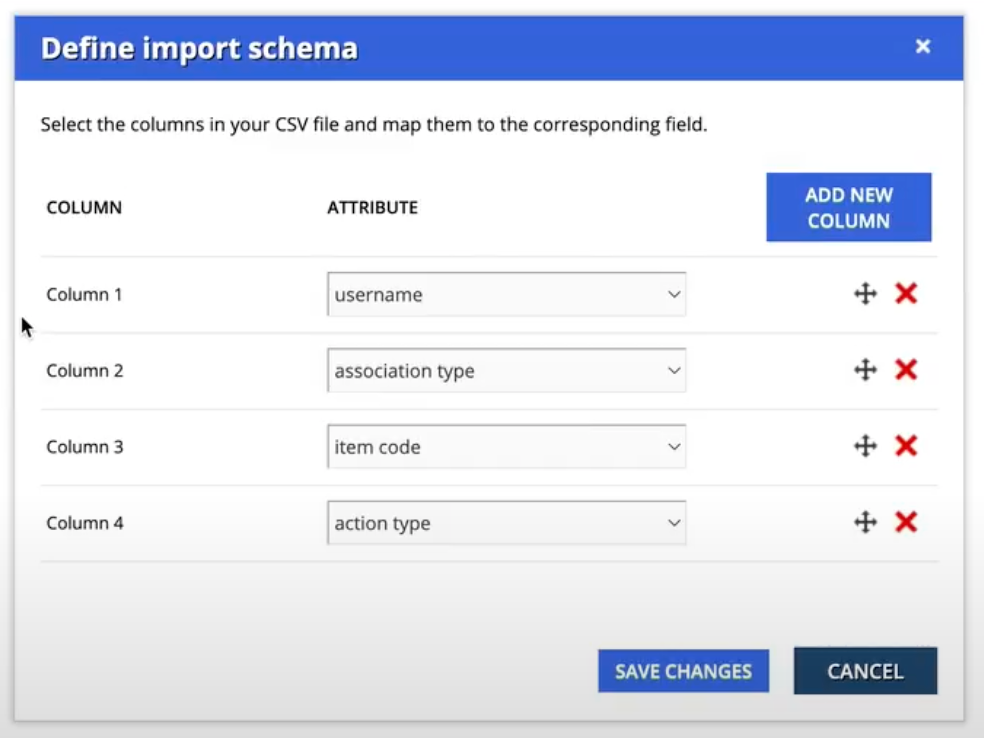
Navigating back to our rule, we'll open the settings of the Import Power User Mapping action, so we can configure the Import Schema.

I'm going to add 4 new columns, and for convenience, I'm going to follow the same order outlined in the Knowledge Base article: Starting with the Username column, then Association Type, then Item Code, and finally the Action Type.
Now I can save these changes and configure any final settings, like if my CSV will contain a header row, or if I want errors to be sent to an email address. After that, I can save my rule and have it trigger whenever I've added my defined CSV to the linked SFTP Folder.
Now that we've completed creating the rule, we just need to create our Mapping CSV so we can see the rule in action! Let's take a look at how we can use the Docebo platform to generate a report with the information needed in relation to the aforementioned use case of mapping your Manager's direct reports as resources to their Power User Profile.
Updating Managers to Power Users
First, I want to confirm that all my Managers are already Power Users and assigned to the Profile with the permissions I've configured. I've created a Power User Profile called Manager with the additional permissions I want my Power User Managers to have over their direct reports outside of the ones included on the My Teams page.
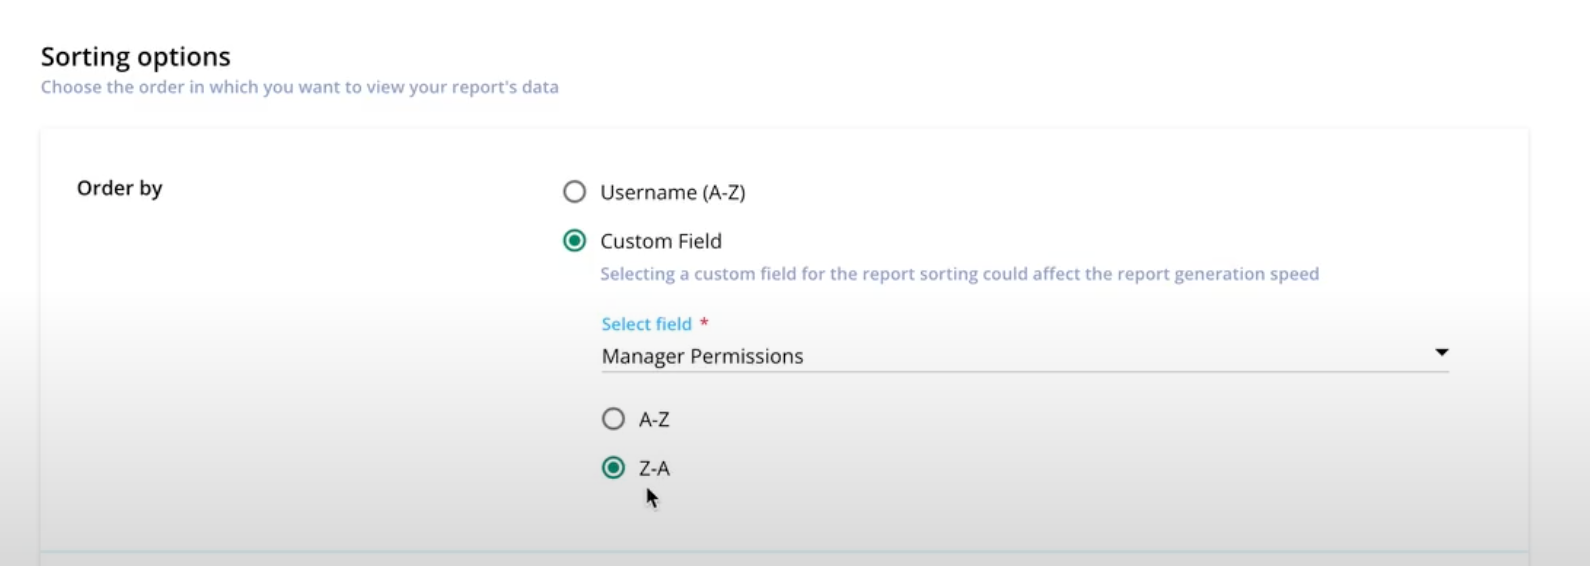
To find this, I've created a “Users - Custom Report”, with the Manager Permissions and User Level columns enabled. I've also set it to Sort by the Manager Permissions column in reverse alphabetical order, so all my Managers with Yes in Permissions will be at the top of my report.
When I pull this report, I can see that most of my Managers are still regular Users, so I'm going to use this report as the base to update these Users into Power Users with my Manager Profile.
After updating all my Managers via CSV into Power Users, I'm ready to generate my Power User Mapping CSV.
Generating a Power User Mapping CSV
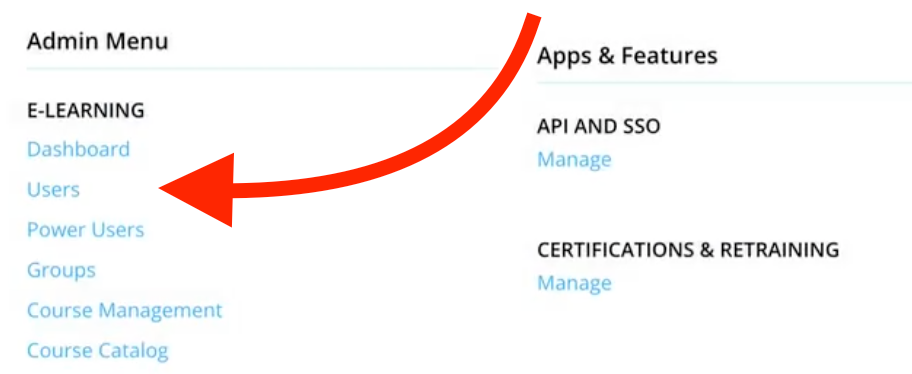
This time, I'm going to navigate to my User Management menu to filter the direct reports that I'll need to assign to my newly created Power Users.
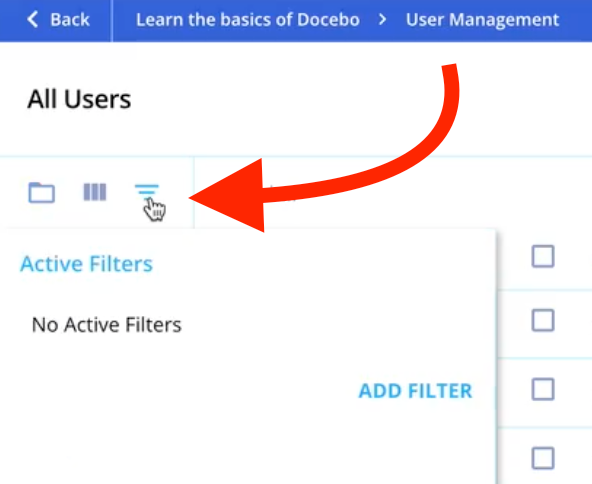
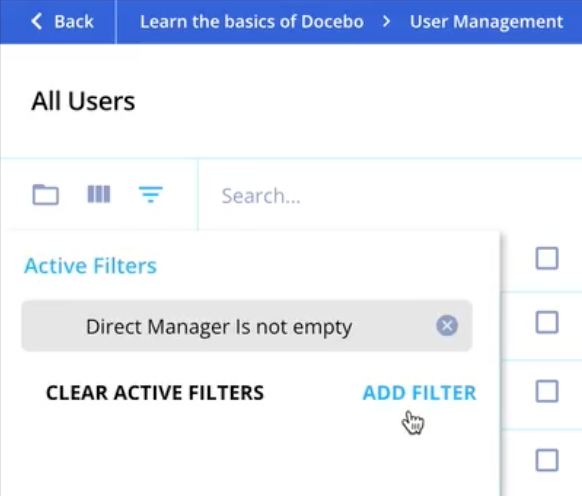
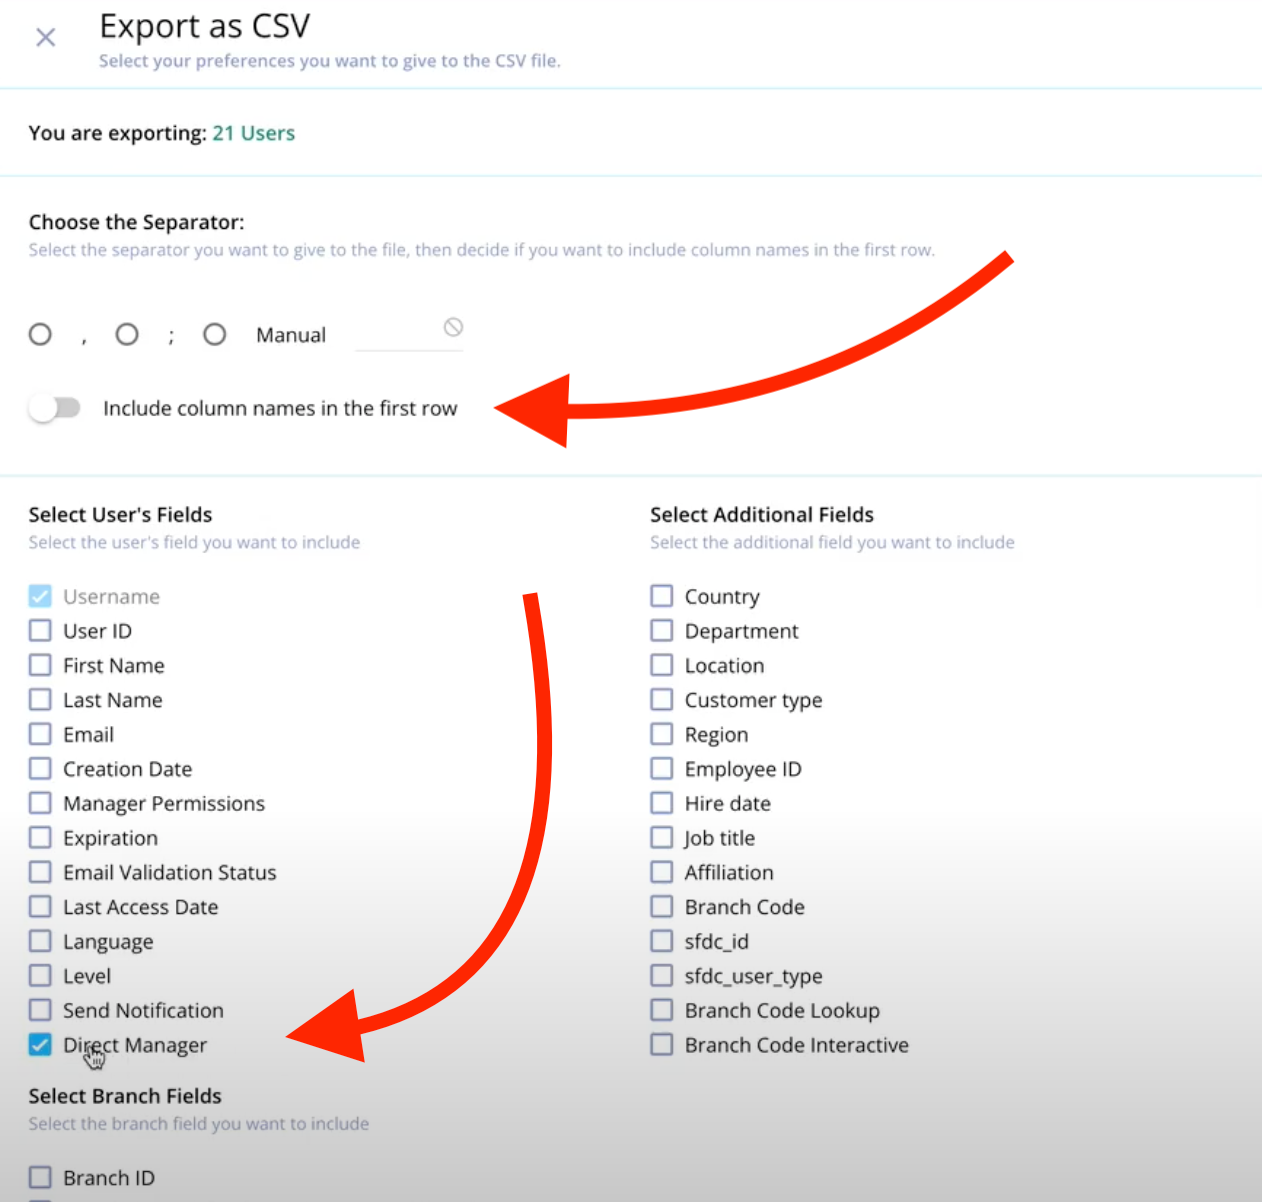
I'm going to filter my Users by choosing the Direct Manager filter and the "Is Not Empty" option. This allows me to filter out Users who do not currently have a Manager assigned on the system.
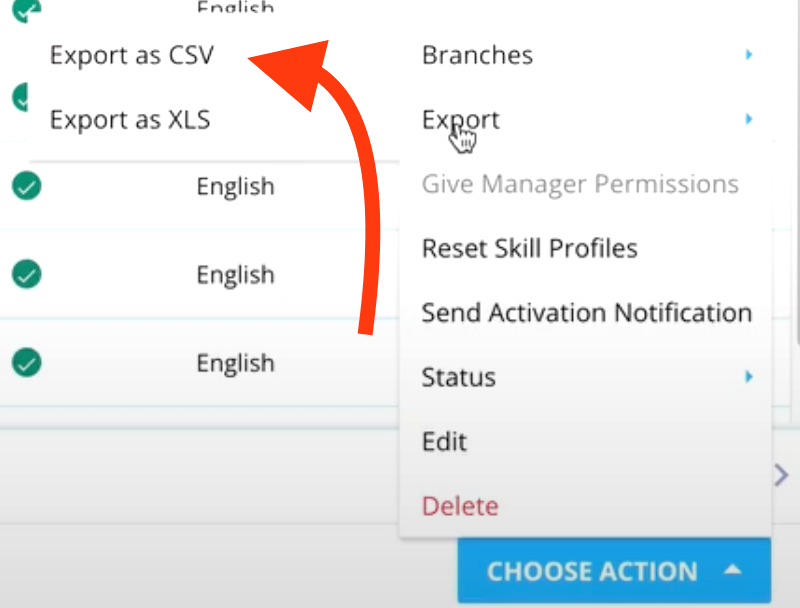
I'll select them all and choose to export these Users via CSV. For this export, I'll also enable the Direct Manager column to show me who their managers are. For convenience, I'll also enable the column name in the first row option.
This step can also be achieved using another “Users - Custom Report” with the same filters as well, which works great for automating the entire process.
With this CSV, I just need to configure the data to suit the Power User Mapping format. I'm going to switch the column order, and make sure I have 2 empty columns added.
- First I'll rename the “Direct Manager” column so it will now be the “Username” column.
- For the next column, I’ll add the header of “Association Type” as well as the value of User for each of my rows.
- Next, I’ll rename the “Username” column to become the “Item Code” column.
- And finally in the last column, I'll add the “Action Type”, which will be A for all the Users, so I can add them as resources.
Then I just need to save this file as the name PUMapping.csv (as defined in my rule), and then add it to my SFTP folder and execute the rule.
And there you have it! All of my Power Managers now have their unique Direct Reports added to their profiles as resources. Pretty neat, huh?
And best of all, if I ever need to reverse this action, I can just take the same PUMapping csv and change the Action Type to D to delete and remove the resources. You can use this method to keep your User Resources updated when changes are made on the Manager side.
Once you get the hang of it, you can even combine this rule with other Automation rules, to further automate the process. But let's save that for another video. Try it out and let us know how you use this rule on your own platform in the comments below. Until next time!
How do you use the Automation App? Share some more inspiration with us below! ⬇️


