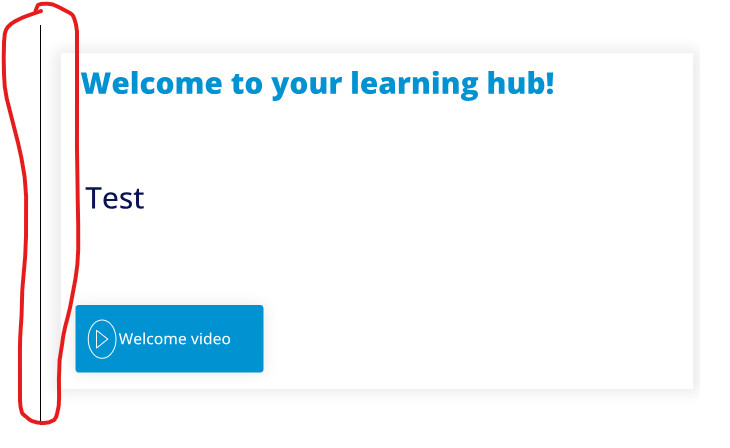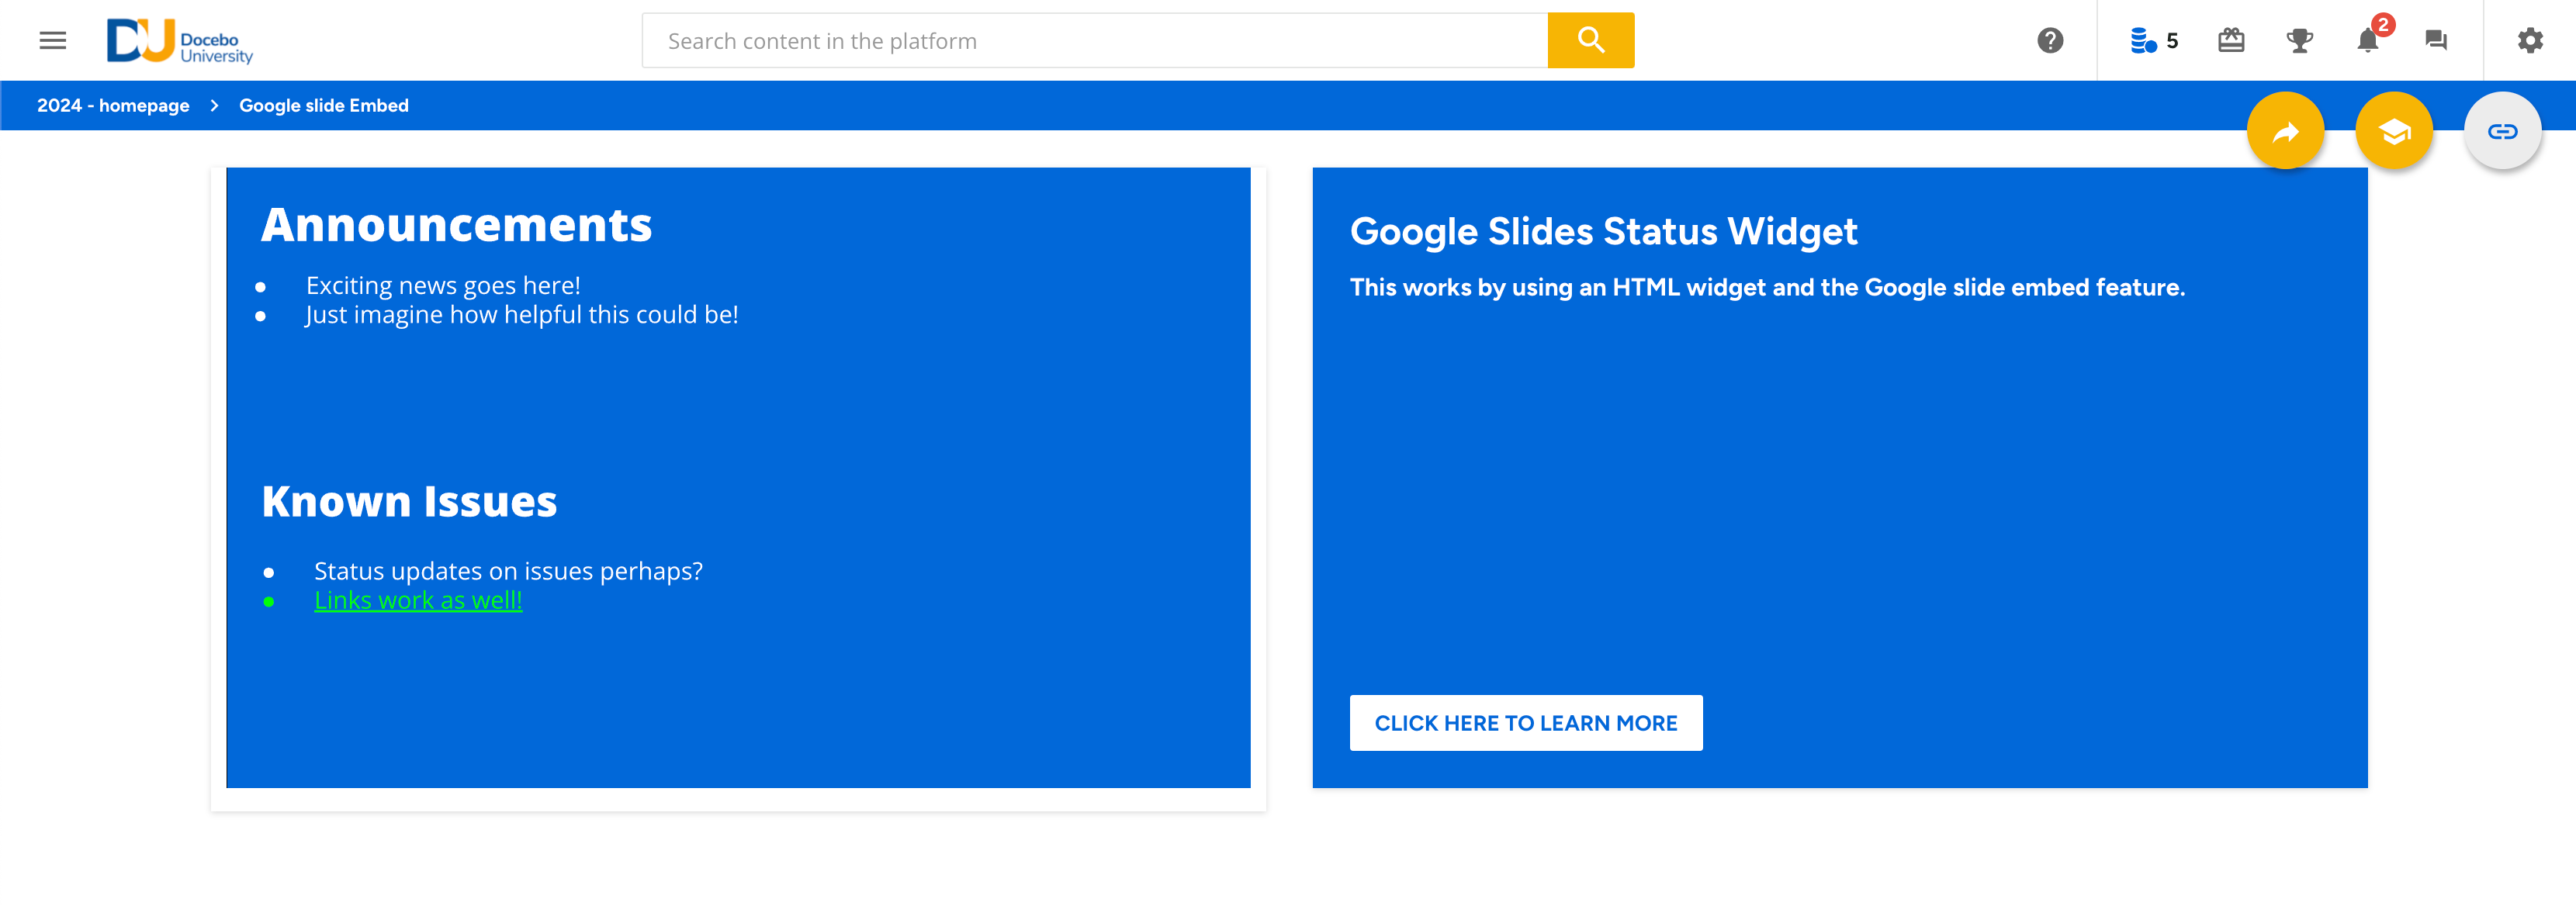
The following is a guide that shows how you can embed a google slide within a custom page that you can use for a variety of uses cases. The advantage of this over custom html and css is that people who don’t have admin access to Docebo can update the slide making it a great solution for teams that need to communicate through the LMS but who don’t require super admin privileges.
💡 Scope Warning!
This guide is created to specifically replicate the widget and positioning within the screenshot at the top. Future versions of this guide will provide guidance on customizations and different dimensions but for the time being it will be limited to the above layout and format.
The good news is that i’ve provided two versions of instructions:
- A fixed size version
- A mobile responsive version that adjusts with the browser size.
📋 Step-by-Step Guide
Pre-requisites
- A Google Slide link you intend to embed.
- Admin access to your Docebo Learn LMS account.
- Previous experience building a custom page in Docebo
🎯 Fixed Dimensions Google Slide
The steps below will create a fixed slide with fixed dimensions. For a mobile responsive version scroll to the end.
Step 1: Adjusting the Slide Size in Google Slides
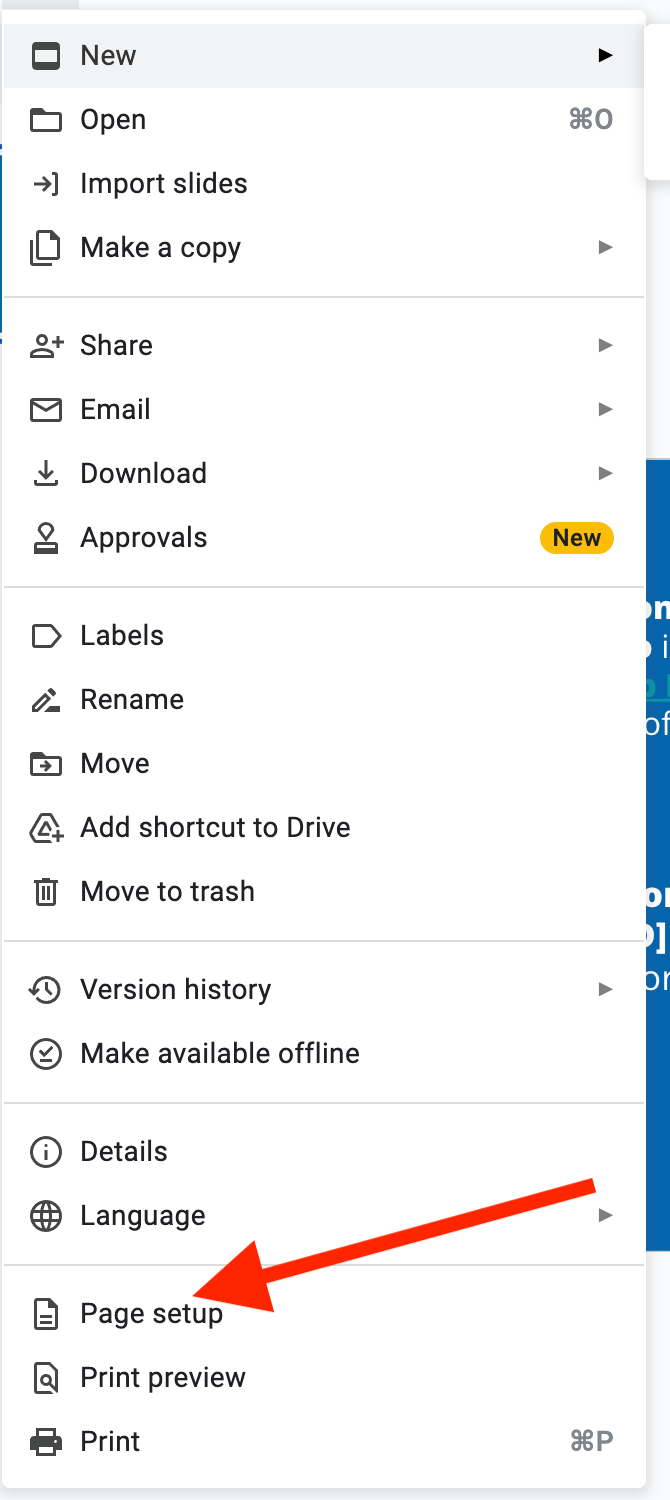
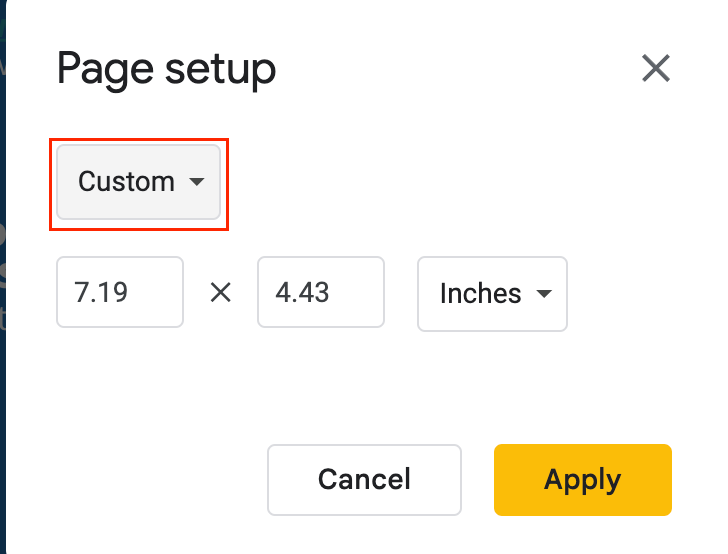
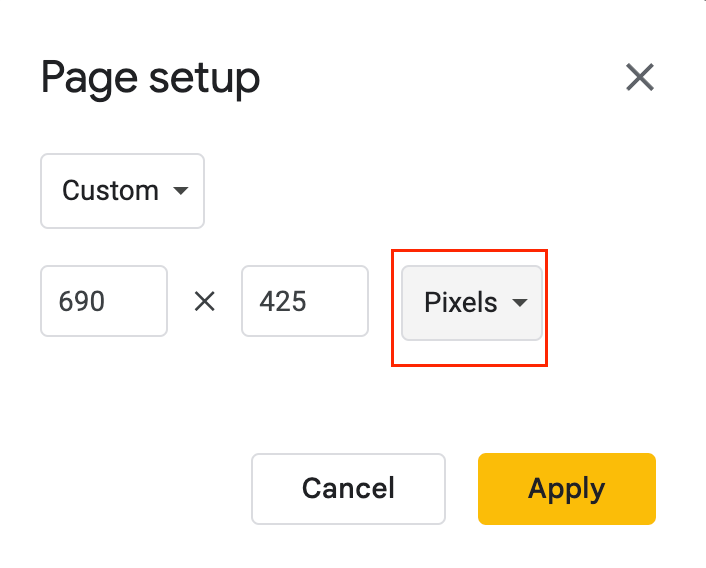
In order for the slide to fit within the two column row layout you’ll need to change the dimensions of the slide page layout.
Step 2: Obtain Google Slides Embed Code
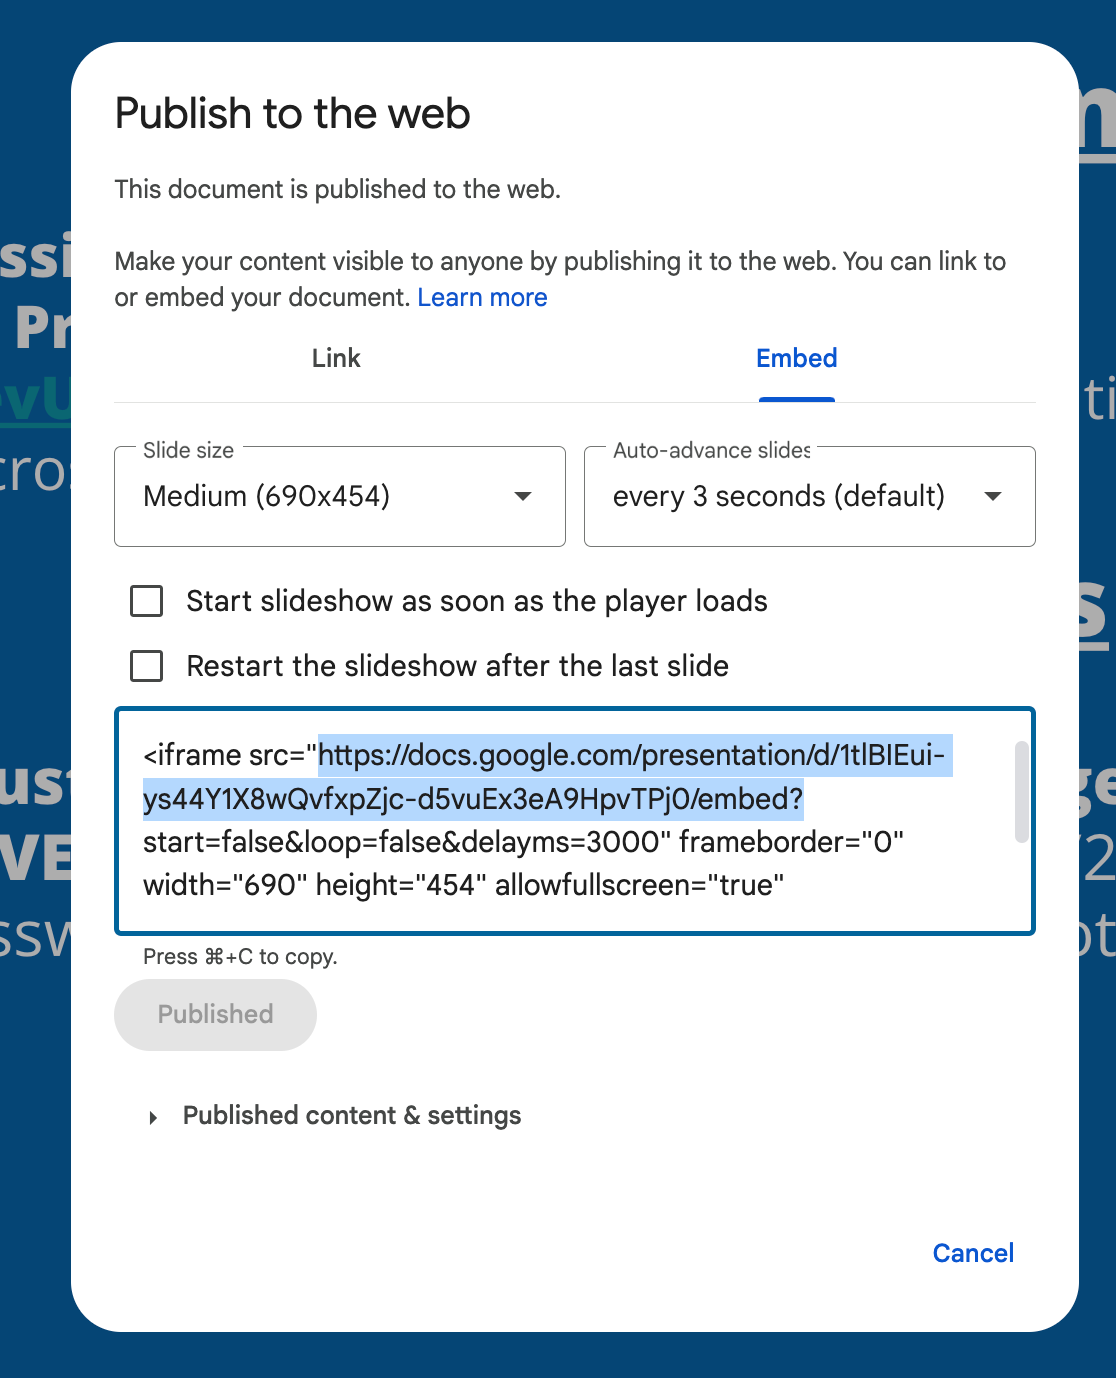
- Open your Google Slides and click on File ➡ Share ➡Publish to the web...
- Navigate to the Embed tab and click on the Publish button.
- Copy the url portion highlighted below
Step 3: Formatting the HTML Template
Below is an html template for embedding (technically we’re creating an iframe) of the google slide.
<center>
<div class="employeepageembed" style="width:660px; height:400px; overflow:hidden;">
<iframe src="[THE EMBED URL YOU GRABBED ABOVE GOES HERE -REMOVE THE BRACKETS]start=false&loop=false&delayms=3000&rm=minimal"
style="border:0px #000000 solid;"
name="myiFrame"
scrolling="no"
frameborder="1"
marginheight="0"
marginwidth="0"
height="415"
width="675"
allowfullscreen="">
</iframe>
</div>
</center>
<center>
<div class="employeepageembed" style="width:660px; height:400px; overflow:hidden;">
<iframe src="https://docs.google.com/presentation/d/1RBlRvXPEO57lrH8NVkkkCK9Gzmibvk1HtvQ6dC1Iav8/embed?start=false&loop=false&delayms=3000&rm=minimal"
style="border:0px #000000 solid;"
name="myiFrame"
scrolling="no"
frameborder="1"
marginheight="0"
marginwidth="0"
height="415"
width="675"
allowfullscreen="">
</iframe>
</div>
</center>
Step 4: Embedding in Docebo
- Log into your Docebo Learn LMS as an admin.
- Go to the Manage section and navigate to Pages.
- Select the custom page where you want to embed the Google Slide or create a new one.
- Add a new HTML Widget to your page.
- Paste the customized iframe code into the HTML editor
- Set the minimum height of the widget to 415px and save your changes.
You’ll notice that there is likely a shadow around the iframe and a background color. The following will remove both. Add this to the “Custom Styles” section of “Configure Branding Look and Feel” in your Admin menu.
🌟 Additional CSS Customizations (optional)
You’ll notice that there is likely a shadow around the iframe and a background color. The following will remove both. Add this to the “Custom Styles” section of “Configure Branding Look and Feel” in your Admin menu.
/*Removes background of HTML widget in Internal Information Page*/
#doc-widget-2276 .htmlwidget {
   background: none !important;
   box-shadow: none !important;
}
You’ll need to swap out the #doc-widget-2276 from the value in your platform. Here’s a helpful video that walks through how to find the page ID for your specific platform.
🎯 Mobile Responsive Version
The steps below will create a fixed slide with fixed dimensions. For a mobile responsive version scroll to the end.
Step 1: Adjusting the Slide Size in Google Slides
In order for the slide to fit within the two column row layout you’ll need to change the dimensions of the slide page layout.


Step 2: Obtain Google Slides Embed Code
- Open your Google Slides and click on File ➡ Share ➡Publish to the web...
- Navigate to the Embed tab and click on the Publish button.
- Copy the url portion highlighted below

Step 3: Formatting the HTML Template
Below is an html template for embedding (technically we’re creating an iframe) of the google slide.
<center>
  <div class="unique-google-slide-container">
    <div class="right-side-overlay"></div>
    <iframe
      src="[Insert Google Slide URL From Above Between the Parenthesis]"
      class="unique-google-slide-iframe"
      name="myiFrame"
      scrolling="no"
      frameborder="1"
      marginheight="0"
      marginwidth="0"
      allowfullscreen="">
    </iframe>
  </div>
</center>
<center>
<div class="unique-google-slide-container">
<div class="right-side-overlay"></div>
<iframe
src="https://docs.google.com/presentation/d/1RBlRvXPEO57lrH8NVkkkCK9Gzmibvk1HtvQ6dC1Iav8/embed?start=false&loop=false&delayms=3000&rm=minimal"
class="unique-google-slide-iframe"
name="myiFrame"
scrolling="no"
frameborder="1"
marginheight="0"
marginwidth="0"
allowfullscreen="">
</iframe>
</div>
</center>
Step 4: Embedding in Docebo
- Log into your Docebo Learn LMS as an admin.
- Go to the Manage section and navigate to Pages.
- Select the custom page where you want to embed the Google Slide or create a new one.
- Add a new HTML Widget to your page.
- Paste the customized iframe code into the HTML editor
- Set the minimum height of the widget to 415px and save your changes.
Step 5: Adding CSS
You’ll notice that there is likely a shadow around the iframe and a background color. The following will remove both. Add this to the “Custom Styles” section of “Configure Branding Look and Feel” in your Admin menu.
#doc-page-182 .htmlwidget {
   background: none;
   box-shadow: none;
}
.unique-google-slide-container {
  position: relative !important;
  width: 100% !important;
  padding-bottom: 61.59% !important; /* Aspect ratio based on 690x425 pixels */
  height: 0 !important;
  overflow: hidden !important;
}

.unique-google-slide-iframe {
  position: absolute !important;
  top: 0 !important;
  left: 0 !important;
  width: 100% !important;
  height: 100% !important;
  border: 0 !important;
  z-index: 1 !important; /* Ensure iframe is behind the overlay */
}

.right-side-overlay {
  position: absolute !important;
  top: 0 !important;
  right: 0 !important;
  width: 3px !important; /* Adjust width as needed (1-3 pixels) */
  height: 100% !important;
  background-color: #0068d9ff !important; /* Match this to your slide's background color */
  z-index: 2 !important; /* Ensure overlay is on top of the iframe */
}


#doc-widget-2581 .htmlwidget {
   background: none;
   box-shadow: none;
}


#doc-widget-2581 .htmlwidget .content.clearfix {

   overflow-y: hidden !important;
}
You’ll need to swap out the #doc-widget-2276 from the value in your platform. Here’s a helpful video that walks through how to find the page ID for your specific platform.


