

This guide is the ninth in a new series of new guides brought to you by
For those of us who manage ILT or VILT courses, you know a common request that is frustratingly difficult to fulfill is to identify users enrolled in a course that are not enrolled in a session. Fortunately there is a way to do this quickly using the API Browser.
Finding the Users
- Log into your Docebo instance’s API Browser by going to: https://<yoursubdomain.docebosaas.com>/api-browser/

- On the ‘Services’ menu, select ‘course’.
- Scroll down the left side to find and select the ‘Courses’ category.
- Select the ‘Returns enrollments associated to the given course’ option.
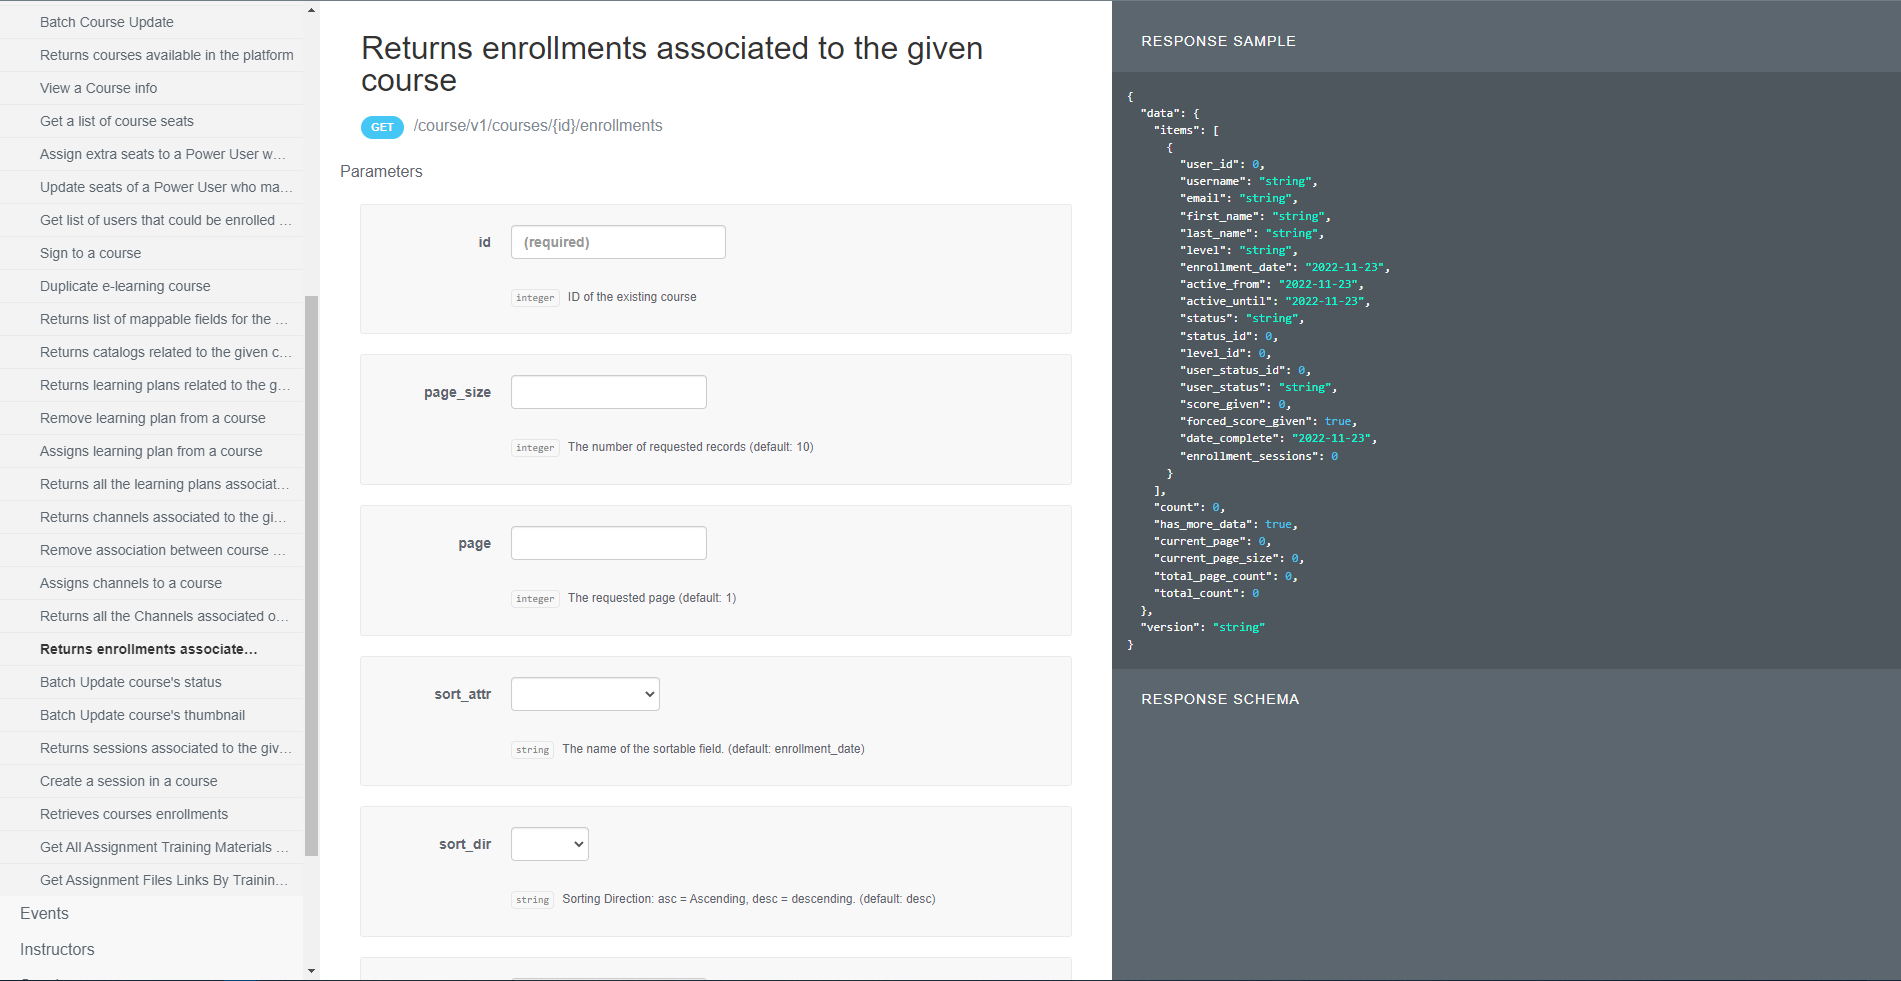
- There are 2 required fields for our task, but I’ve included optional fields that might be useful:
- id: (required) This is the ID of the course you want to pull information from. There are multiple ways to find this ID (see the appendix section at the end of this guide).
- notEnrolledInSessions: (required) Set this to 1; this is important to achieve the desired result here.
- page_size: This endpoint can return very long lists. To avoid performance issues, it will make pages of results. This lets you set how many items show up on a page. The default is 10 items; the maximum is 200 items. Enter an appropriate number for your needs here.
- page: This endpoint can return very long lists. To avoid performance issues, it will make pages of results. This field lets you choose which of those pages to retrieve. For example, if you have 50 users and the page size is set to 20, 3 pages will be generated. When you initially run the endpoint you will see items 1-20. If you put a 2 in the ‘page’ field, you will then get items 21-40. Put a 3 in this field to get 41-50.
- sort_attr: This decides what data the returned list will be sorted by. By default this is the enrollment date, but you might prefer to use something else, i.e. username or last name. Select the right option for your use case from the dropdown.
- user_status: Set to 1 to only receive active users in the results.
- id: (required) This is the ID of the course you want to pull information from. There are multiple ways to find this ID (see the appendix section at the end of this guide).
- Enter the appropriate information in the fields described above or others to filter how you would like.
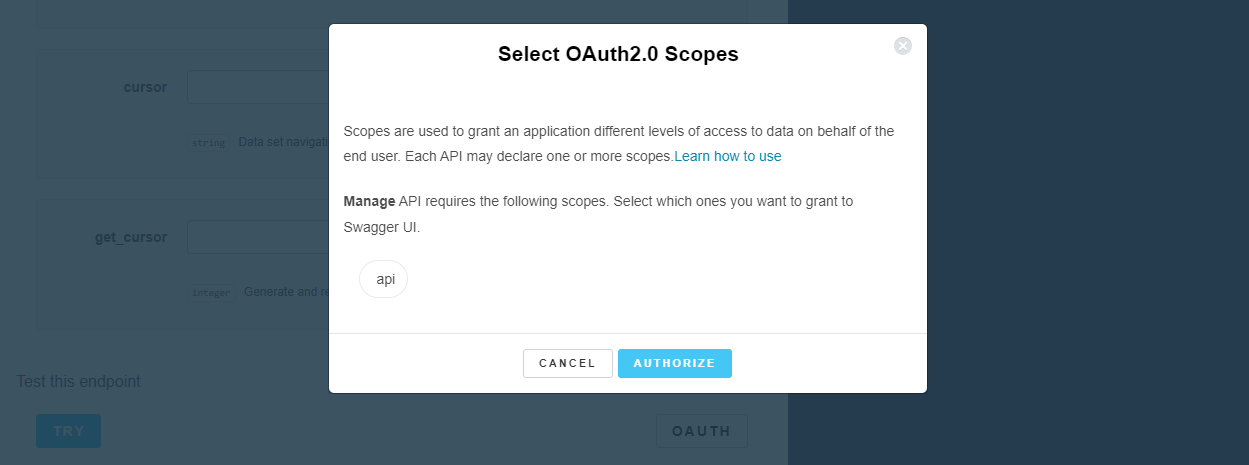
- Select the ‘OAUTH’ button underneath the options and sign in if you have not done so already.
- Select the ‘Try’ button.

- The request and response should open in the middle of your screen:
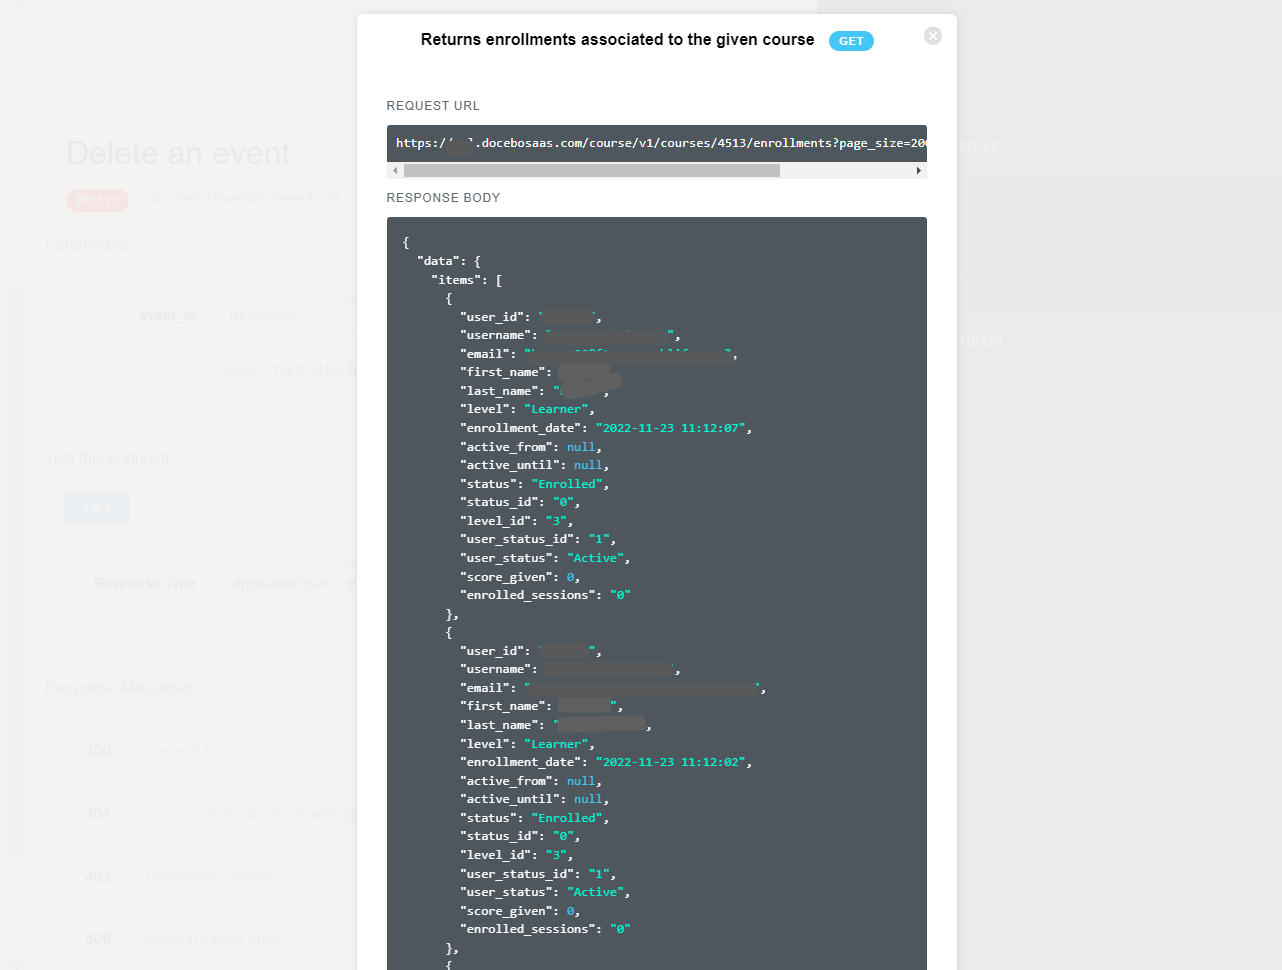
- The information about the users will be found in the ‘Response Body’ box. If you are comfortable reading or using JSON formatted data, you can simply use this box and you’re done. If you want this data in a more convenient table format, keep reading.
- Copy all the information in the ‘Response Body’ box to your clipboard.
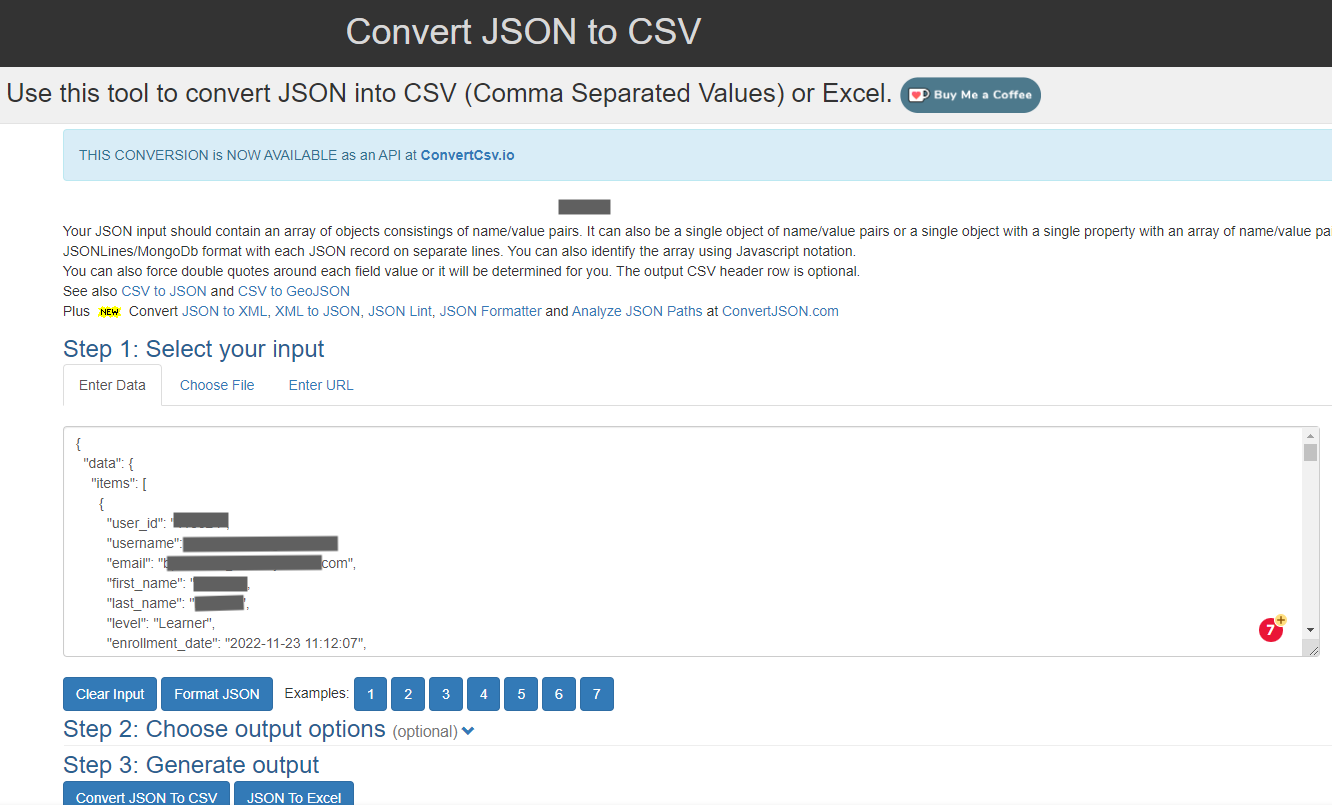
- Navigate to https://www.convertcsv.com/json-to-csv.htm
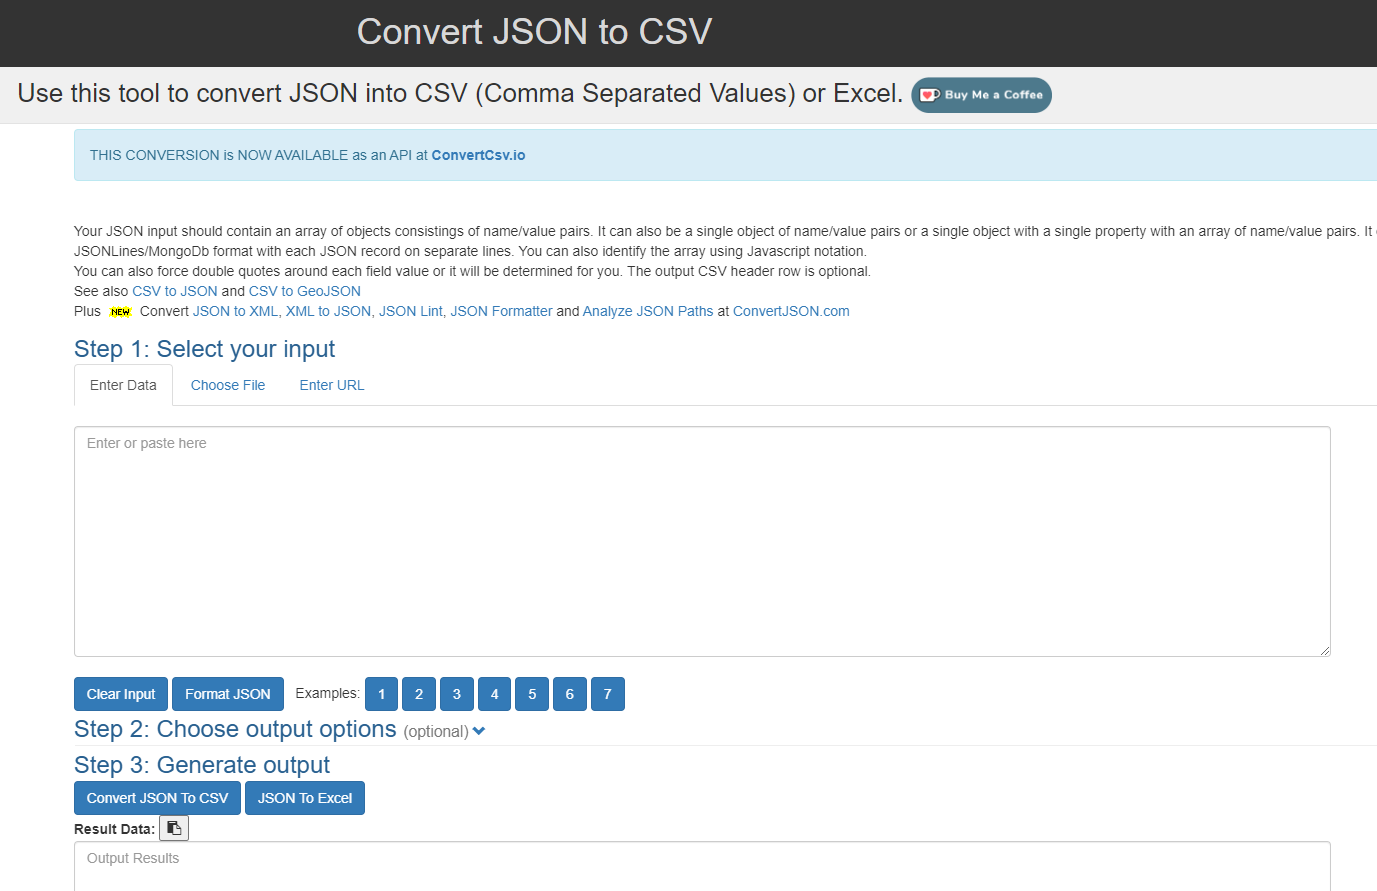
- Under ‘Step 1’ use the ‘Enter Data’ tab and paste the Response Body information into the box:
- Scroll down to ‘Step 3’. You will see a preview of your data as a comma separated block (which can be copied to your clipboard) as well as a table.
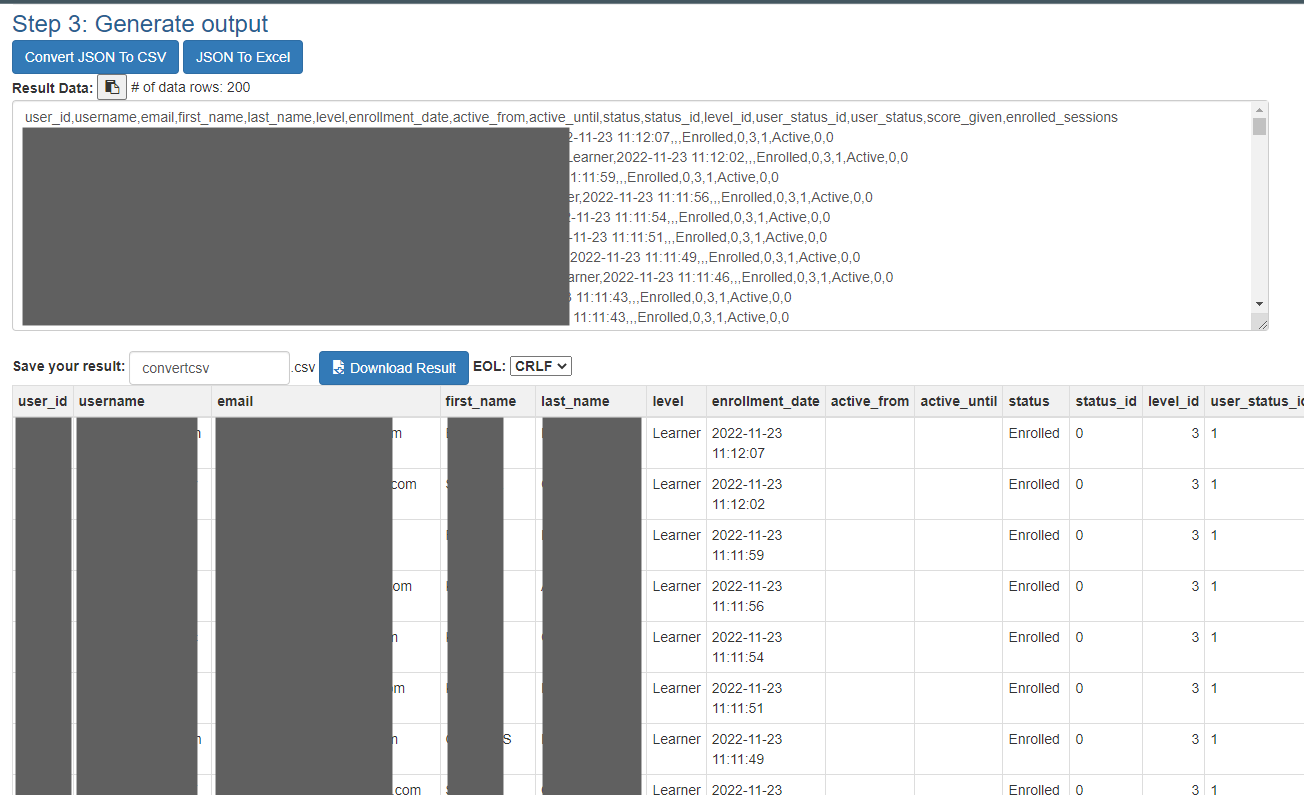
- There are two buttons to download your results—one as a CSV (Download Result) and one as an Excel file (JSON To Excel). Select either or both of these to download.
Tip: Change the name in the ‘Save your result’ box to your preference prior to downloading. This will be the file name of both the CSV and the Excel file you download.
- Open your file and manage away!
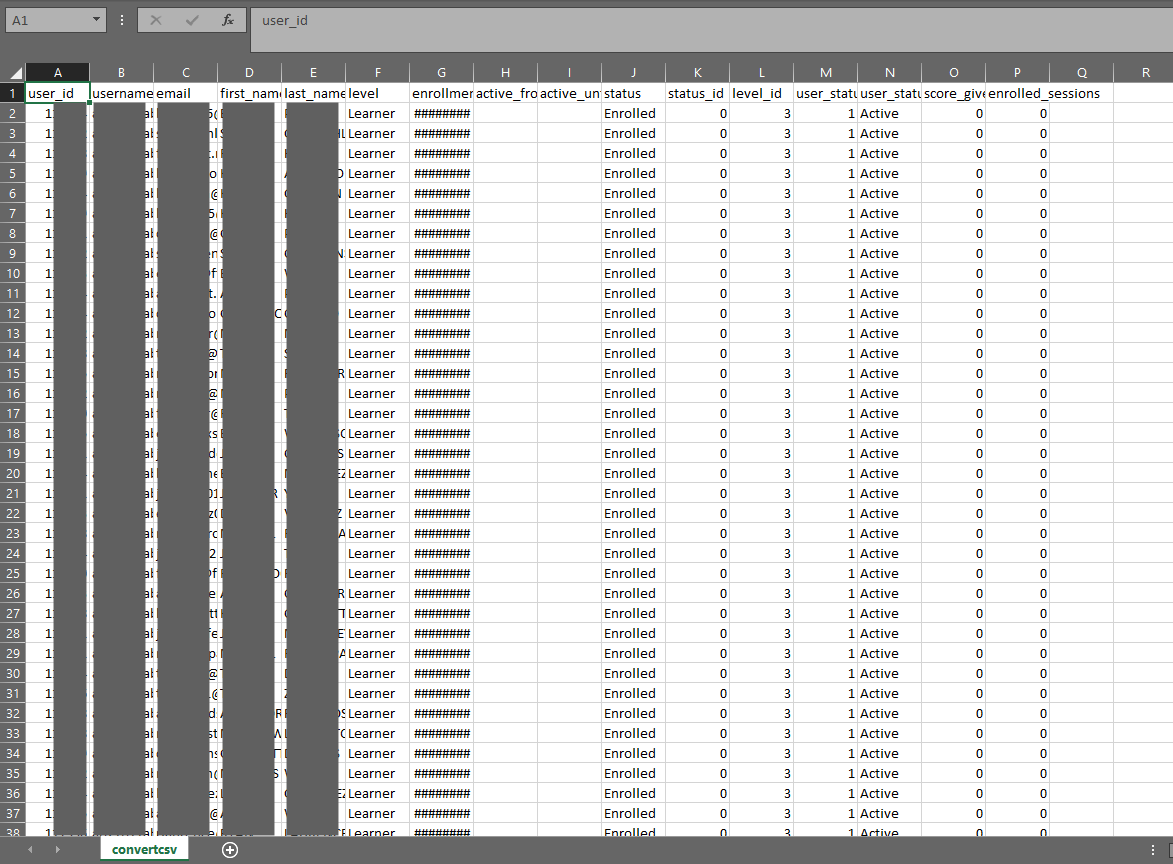
That’s it! You have a nice file of the users in this course that are not enrolled in any sessions. You can repeat the process by changing the Course ID to get other courses. (If you have someone who can program, this process can be automated pretty easily!)
Appendix: Finding Course IDs
You need to know the Docebo Course ID in order to use the above method. There are a few ways to retrieve this, they are outlined below.
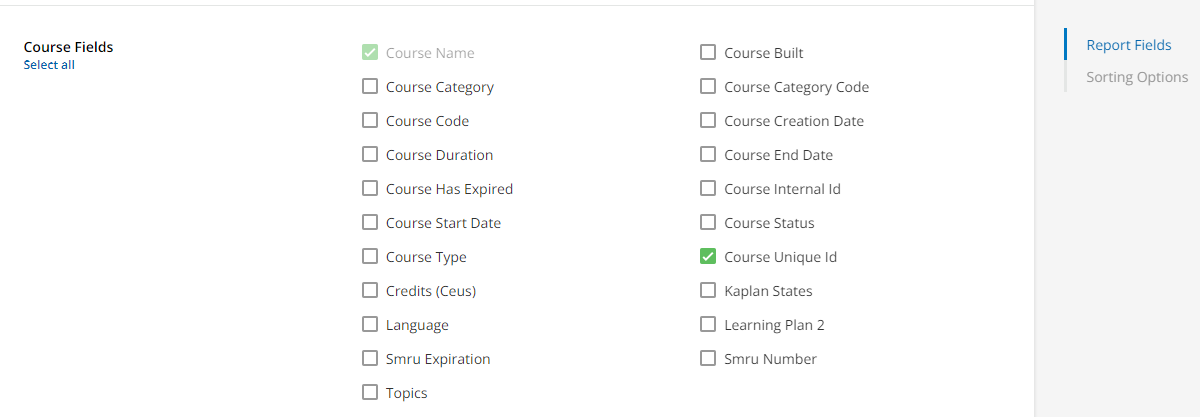
Using Reports
The Course Unique ID is available to select under the ‘Course Fields’ area. Simply make sure to select this option when crafting your report and the ID will be easily available to you:
In the Front End
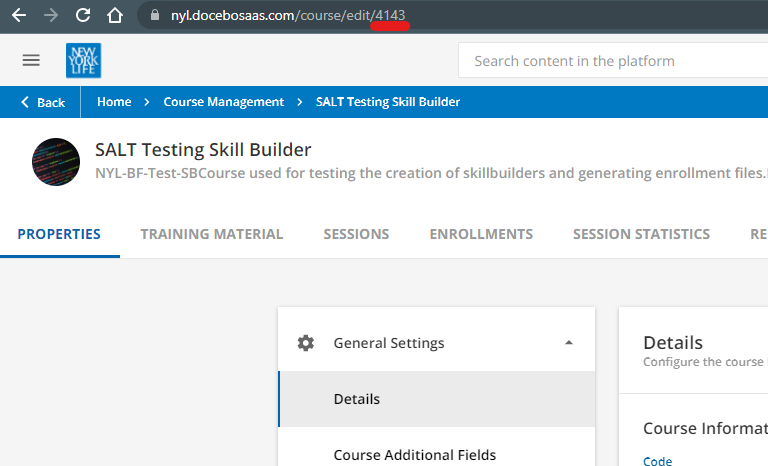
You can also identify individual course IDs directly in the course management area.
- Navigate to the ‘Course Management’ area of the Admin menu.
- Search and select the course you need the ID for.
- Look at the URL in the address bar of your browser and the course ID will be found at the end of it:
Using the API Browser
- Log into your Docebo instance’s API Browser by going to: https://<yoursubdomain.docebosaas.com>/api-browser/

- On the ‘Services’ menu, select ‘course’.
- Scroll down the left side to find and select the ‘Courses’ category.
- Select the ‘Returns courses available in the platform’ option.
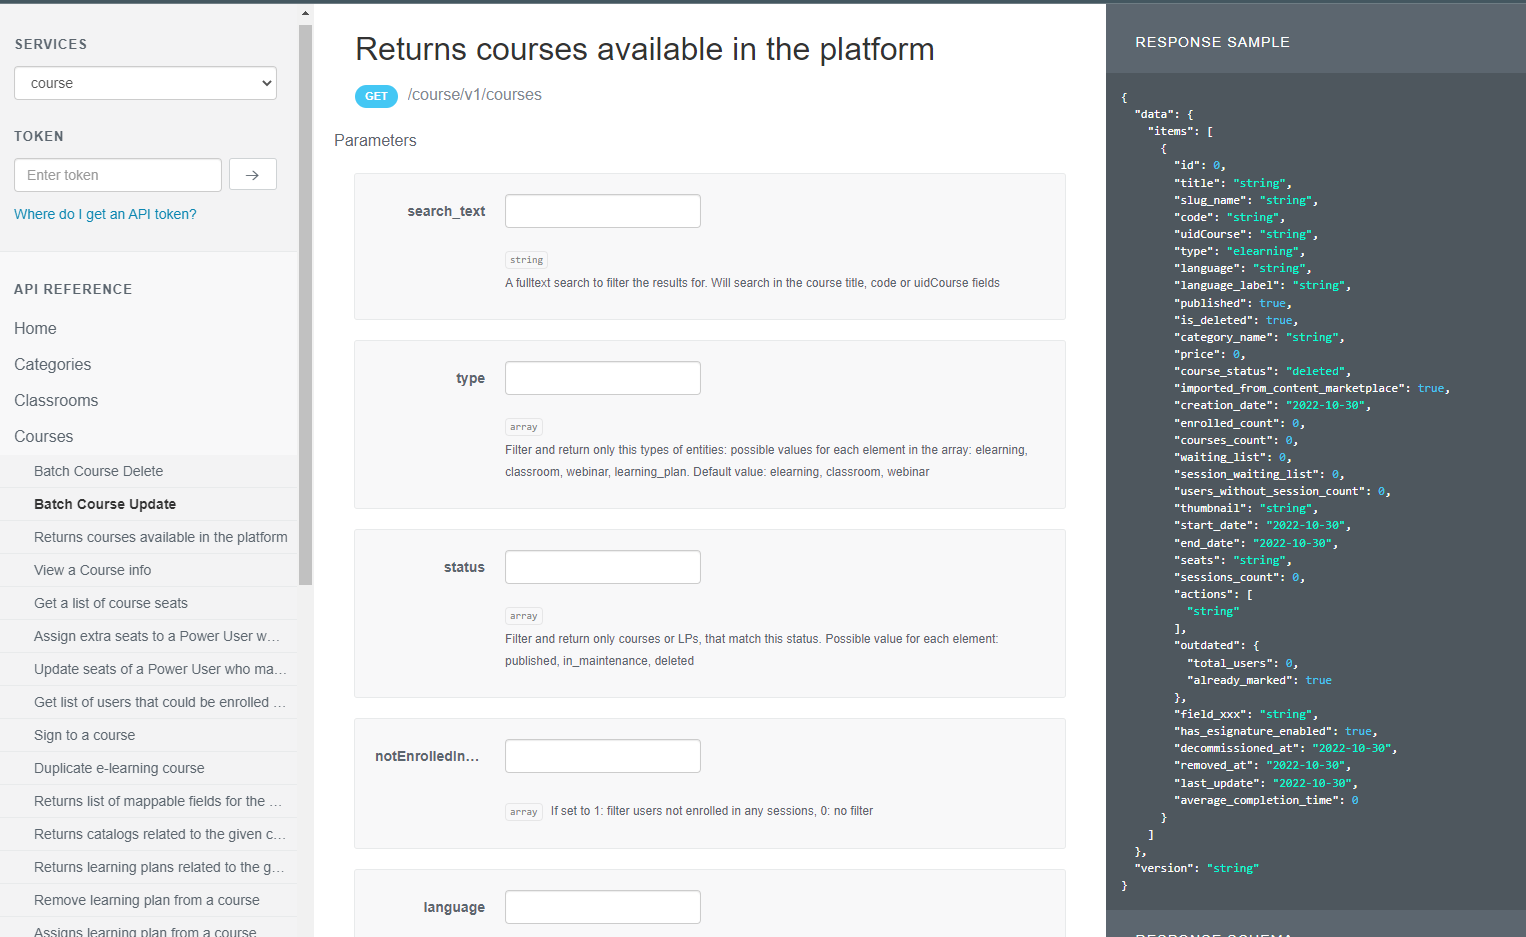
- You can adjust the parameter fields as much or as little as you want in order to help find the courses you are interested in. There are a couple I would recommend paying attention to:
- search_text: Enter text to search the course title and code fields. Only the courses that match the search text you enter will be returned. This is useful to narrow down your results.
- type: If you have courses with similar names but different types, this is useful to make sure you don’t mix them up. I typically use either ‘elearning’ or ‘classroom’ in this field to distinguish between them. (Here, ‘classroom’ means ILT.)
- status: Similar to ‘type’ above, I like to set this to ‘published’ so that only published courses are returned, but you may want to use different values to distinguish courses.
- page_size: This endpoint can return very long lists. To avoid performance issues, it will make pages of results. This lets you set how many items show up on a page. The default is 10 items; the maximum is 200 items. Enter an appropriate number for your needs here.
- page: This endpoint can return very long lists. To avoid performance issues, it will make pages of results. This field lets you choose which of those pages to retrieve. For example, if you have 50 users and the page size is set to 20, 3 pages will be generated. When you initially run the endpoint you will see items 1-20. If you put a 2 in the ‘page’ field, you will then get items 21-40. Put a 3 in this field to get 41-50.
- search_text: Enter text to search the course title and code fields. Only the courses that match the search text you enter will be returned. This is useful to narrow down your results.
- Select the ‘OAUTH’ button underneath and sign in if you have not done so already.

- Select the ‘Try’ button.
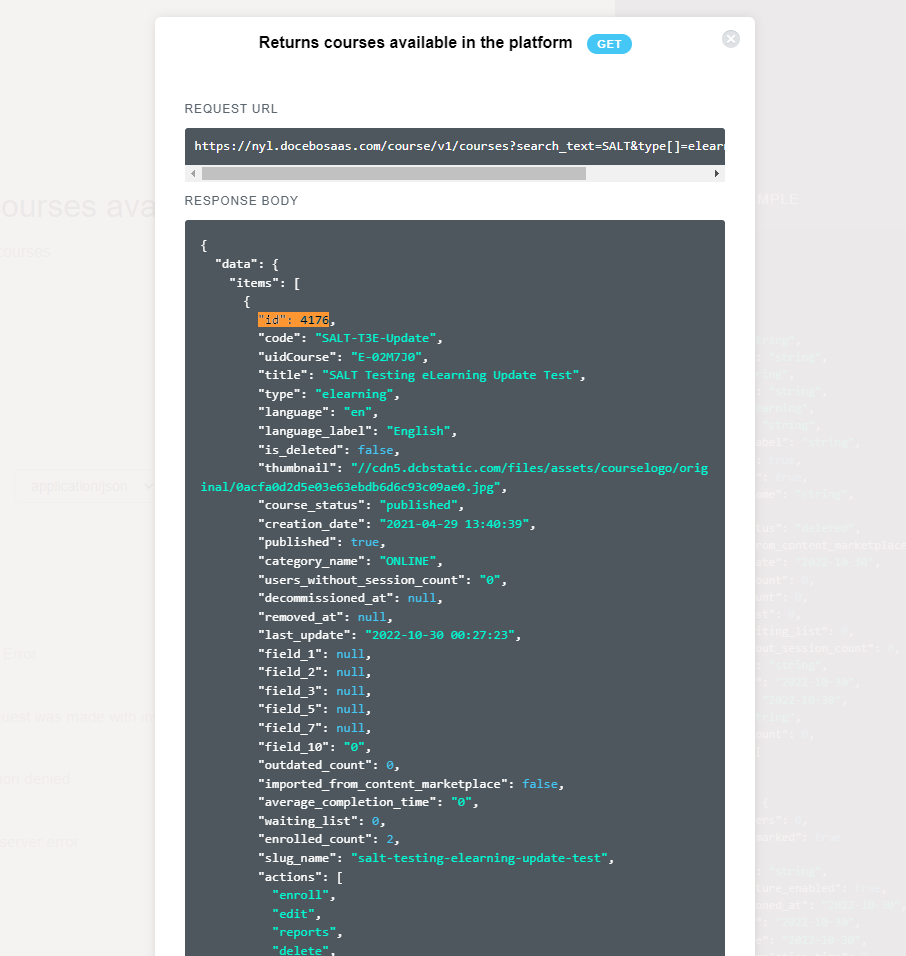
- The results will be shown in the middle of the page. The relevant information will be found in the ‘Response Body’ box. The line ‘id’ for each course shown is the id you are looking for, make a note of it:
More API Browser Quick Grabs:
Bulk Update Course information
Bulk Unenroll Users from Courses or Learning Plans
Bulk Update User’s Enrollment to a Completion
