

This guide is the second in a series of new guides brought to you by
Please note: This is Part 2 of the second guide in this series. If you missed Part 1, click here.
Guide Table of Contents
Power Automate: How to Build Quick Workflows
Ready to go a step further? Great, because this is my favorite part!
Now, I am going to do this example using Power Automate, as that is what I have access to. It is an example of how you can take your API knowledge a step further. Alternatives like Tray.io, Workato, MuleSoft, etc. all have ways to do this as well. Staying within your supported ecosystem has many advantages, so make sure to see what is supported in your organization.
For those that do not know, Power Automate is part of Office365 from Microsoft. It allows users to connect various services, both Microsoft based and others, to build workflows using a visual interface to automate actions between systems.
While there is currently not an official supported connector in Power Automate for Docebo, you can build your own custom connector using your API knowledge. Once this connector is built, you can share it with others in your organization, allowing them to work with the API without detailed knowledge of it. Cool, right?
Building the Custom Connector
Here’s how to configure the custom connector:
- Before going to Office365, go to Docebo and configure a new OAuth2 app for the custom connector, following the same steps as before.
- Log into Office365 by going to https://portal.office.com
- Using the menu, navigate to ‘Power Automate’.
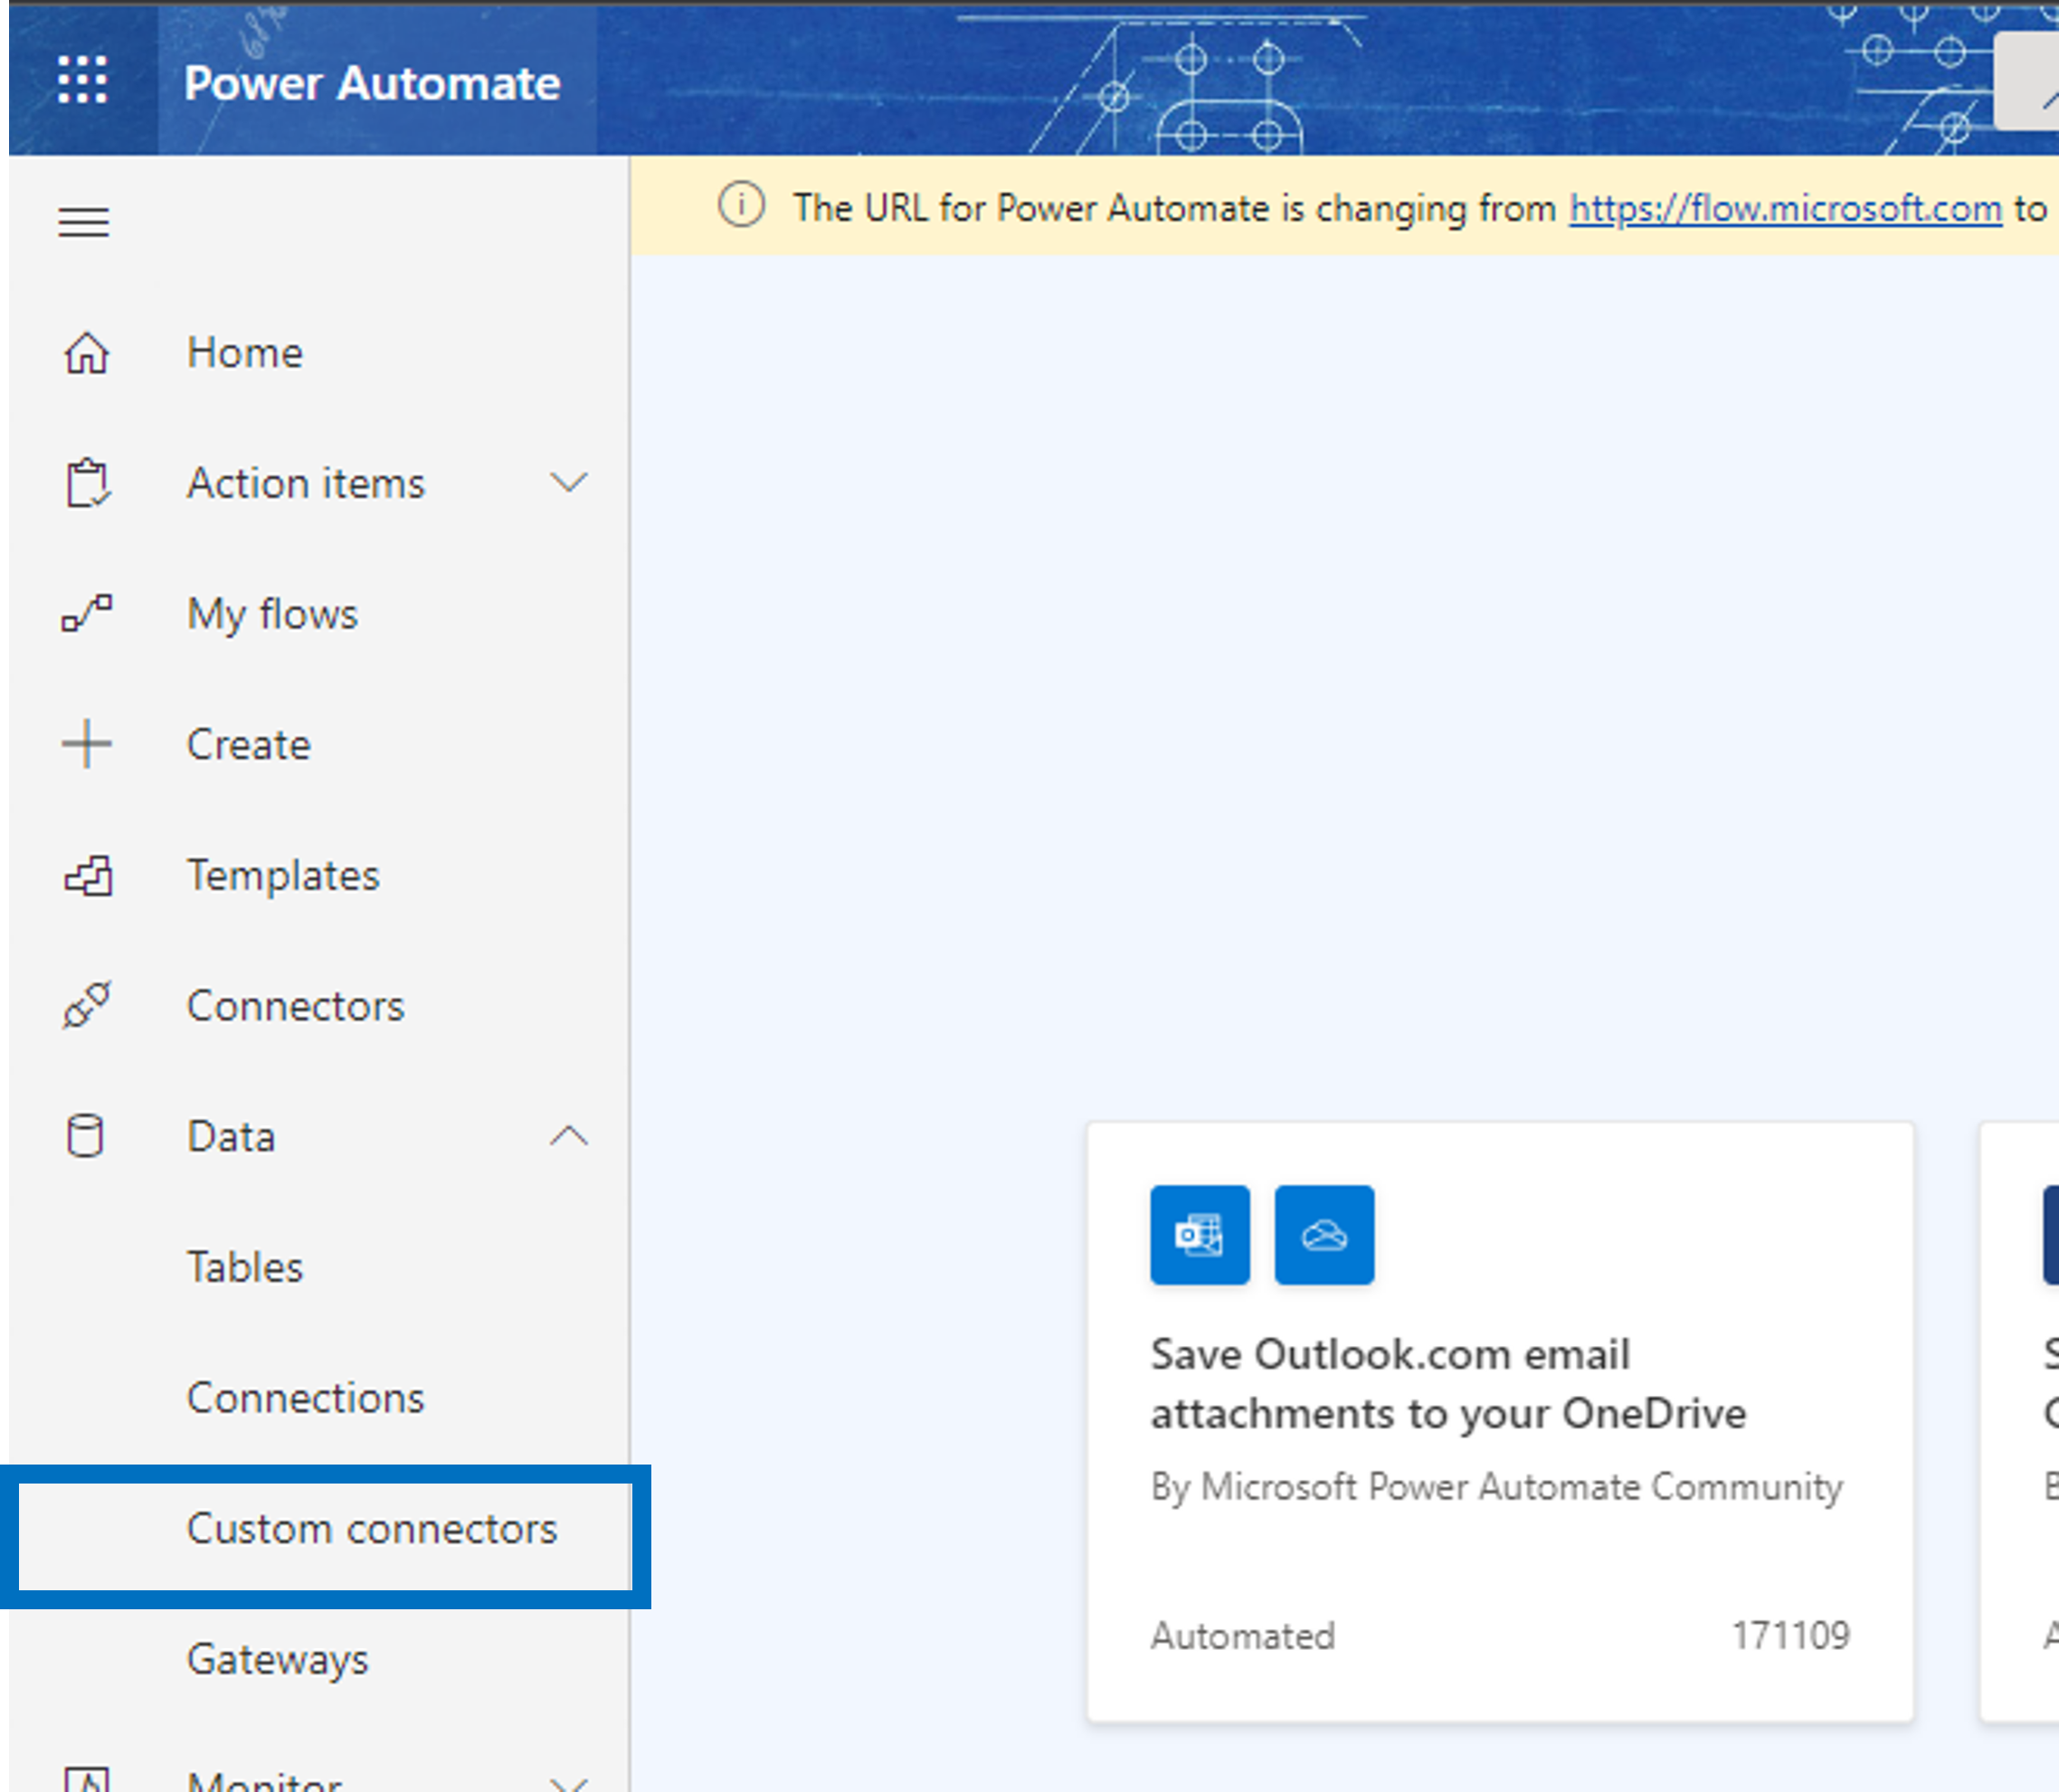
- On the left-hand side, open the ‘Data’ tab.
- Select ‘Custom Connectors’.
- Select ‘New custom connector’.
- If you built out a detailed Postman collection, you can choose that option to import. I am going to create from blank to demo the full process.
- Give the connector a descriptive and distinctive name.
- Select ‘Continue’.
- You can choose to upload an icon. I like to do this as it shows up throughout the interface and helps keep things like sandbox vs. production connectors differentiated.
- In the ‘Host’ field put <[yoursubdomain].docebosaas.com>
- In the ‘Base URL’ put a forward slash. → /
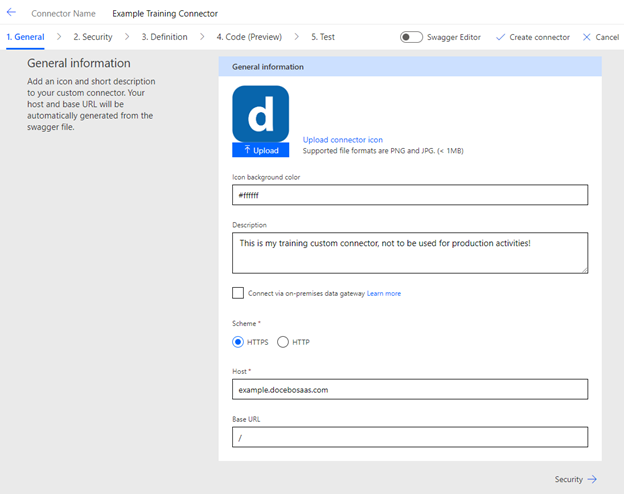
- Select ‘Security’ to move on.
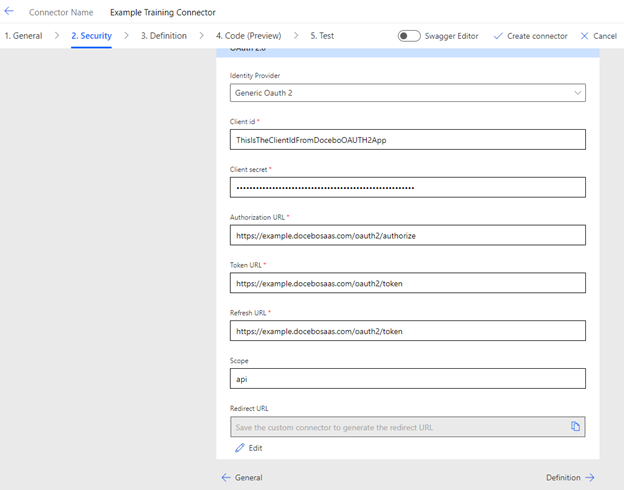
- Select ‘OAuth 2.0’ from the type dropdown menu. Fill in the information:
-
Client ID: This should match the client ID you configured in Docebo.
-
Client Secret: This is generated by Docebo when you created the OAuth2 app.
-
Authorization URL: https://<[yoursubdomain].docebosaas.com>/oauth2/authorize
-
Token URL: https://<[yoursubdomain].docebosaas.com>/oauth2/token
-
Refresh URL: https://<[yoursubdomain].docebosaas.com>/oauth2/token
-
Redirect URL: Once you save, this will generate a URL you need to copy and go update the Docebo OAuth2 app with.
- Select ‘Definition’.
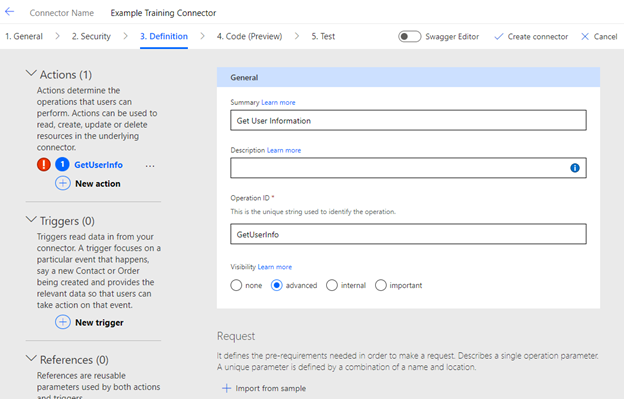
- On the right side select ‘New Action’. This is how you define the API to the connector. Let’s add our original example, looking up a user’s information:
-
Summary: Give it a distinctive and descriptive name. This is what will be shown within the application.
-
Description: Add information here that might be useful to know about this request.
-
Operation ID: I generally make this a simpler version of the ‘Summary’ without spaces as they are not allowed.
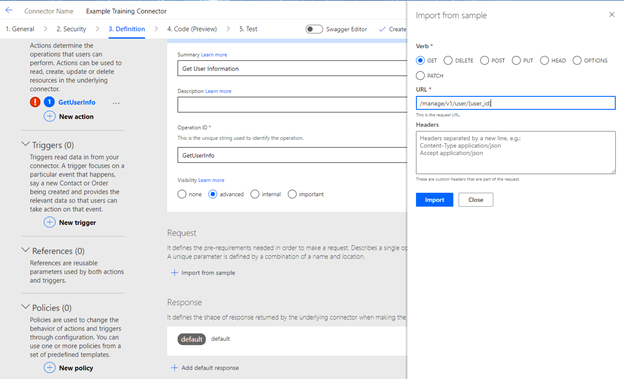
- Select ‘Import from sample’ under the ‘Request’ area.
-
Verb: Choose the appropriate action for what you want to do, in this case, ‘Get’.
-
Enter the slug of the URL for the API endpoint, in this case, /manage/v1/user/{user_id}
- Select ‘Import’.
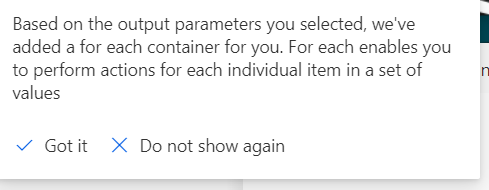
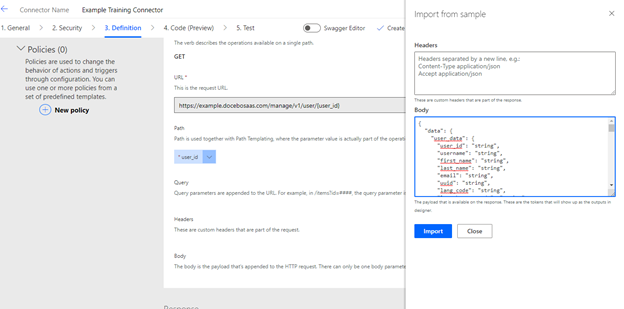
- The URL should load and the appropriate paths, queries, headers, and body details should fill in, in this case just the ‘user_id’ variable. This is important as it will allow us to define it programmatically in the workflow later.
- Notice there is a down chevron on the ‘user_id’. Select ‘edit’ from this menu. You can edit and detail as much or as little as you want here. For more complex calls, this can be incredibly useful. For instance you can define values into a dropdown so that you and others do not need to memorize the options. Select ‘Back’ to return to the definition.
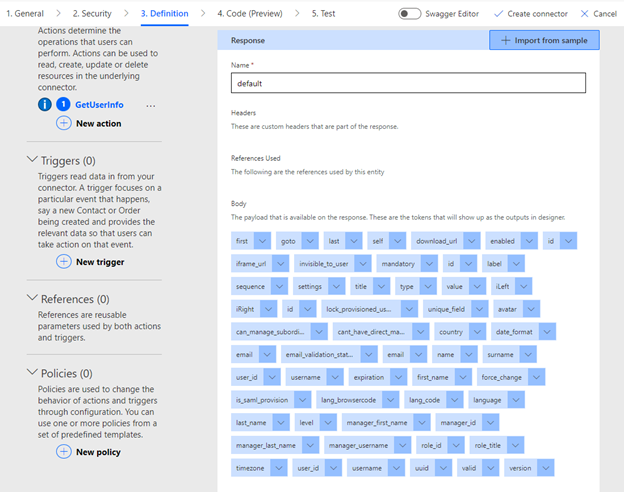
- Under ‘Response’ select ‘Add default response’.
- Copy the example response schema code from the API Browser, or if you have Postman still open, you can grab a sample response from there too. Paste it into the ‘Body’ section.
- Select ‘Import’.
- You will find a ton of new items loaded into the body area. Each one of these can also be edited. Defining these variables is important for ease of use when building within the flow later.
- Select ‘Create Connector’ or ‘Update Connector’ depending on if this is new or not.
You can repeat this process to add more API calls to the connector. I recommend starting with a few simple ones and building a few Flows to get a feel for how the system works. You might develop your own preferences along the way.
Example: Using the Connector to Look Up a User’s Information
Now that you have made a custom connector with the ability to request a user’s information, let’s look at how it works within a flow:
- Log into Office365 by going to https://portal.office.com
- Select ‘Create’.
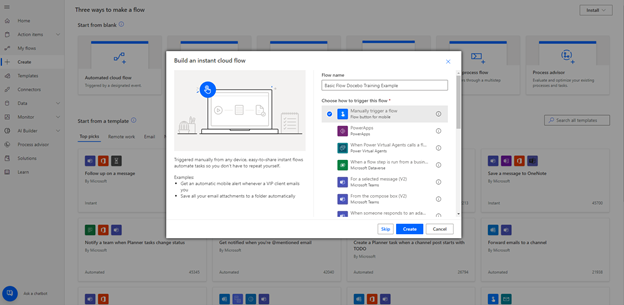
- Select ‘Instant cloud flow’.
We are making a very simple proof of concept flow here. Notice how you can schedule flows or have them start based on other events, as these will be incredibly useful later in this series.
- Give it a descriptive name.
- Select ‘Manually trigger a flow’.
- Select ‘Create’.
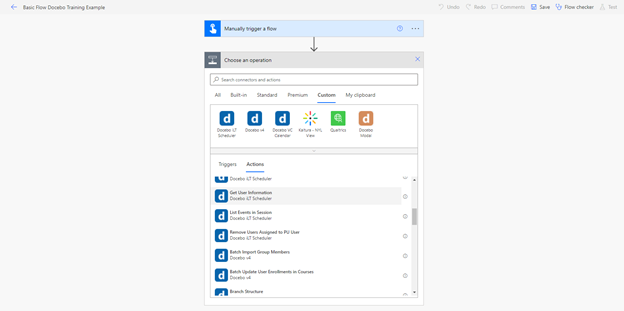
- You will see that the trigger for this flow is a manual step. To add a step, select ‘New Step’.
- Under the ‘Custom’ tab, look for your new connector and select ‘Get User Information’ or whatever you named the action.
- If it is your first time using the custom connector, you will need to sign in to authorize it with the Docebo API and follow the steps on the screen.
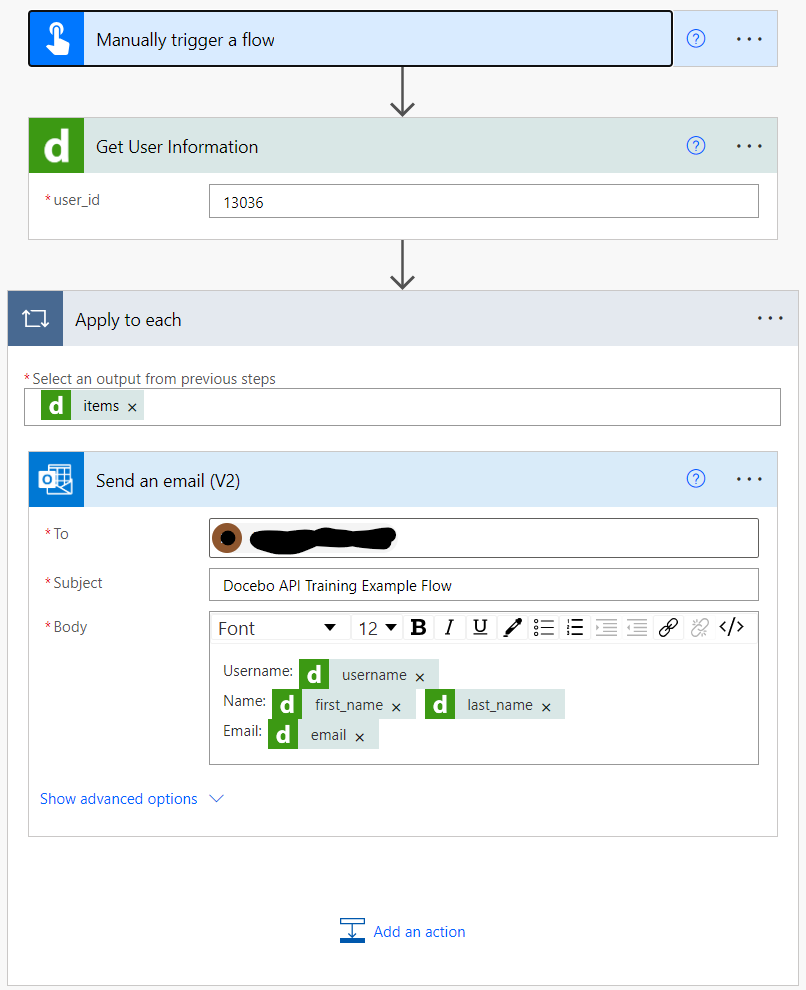
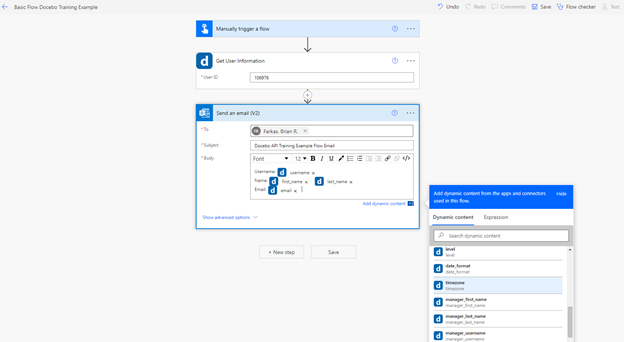
- Once you have authorized properly, you should see a spot for the ‘User ID’. For now, type in a known Docebo User ID. (In later articles, we will cover how you can use variables to fill this field).
- Select ‘New Step’.
- Search for and select ‘Send an email’.
- Fill in an email address it is okay to send this example to and add a subject.
- In the Body area, once you click into it, notice that there is a menu of ‘Dynamic Content’ which matches the response details from the user information you requested in the previous step. Select a few blocks to insert them into the email.
- Select ‘Save’.
- Select ‘Test’.
- Select ‘Manually’.
- Select ‘Test’.
- Select ‘Run Flow’.
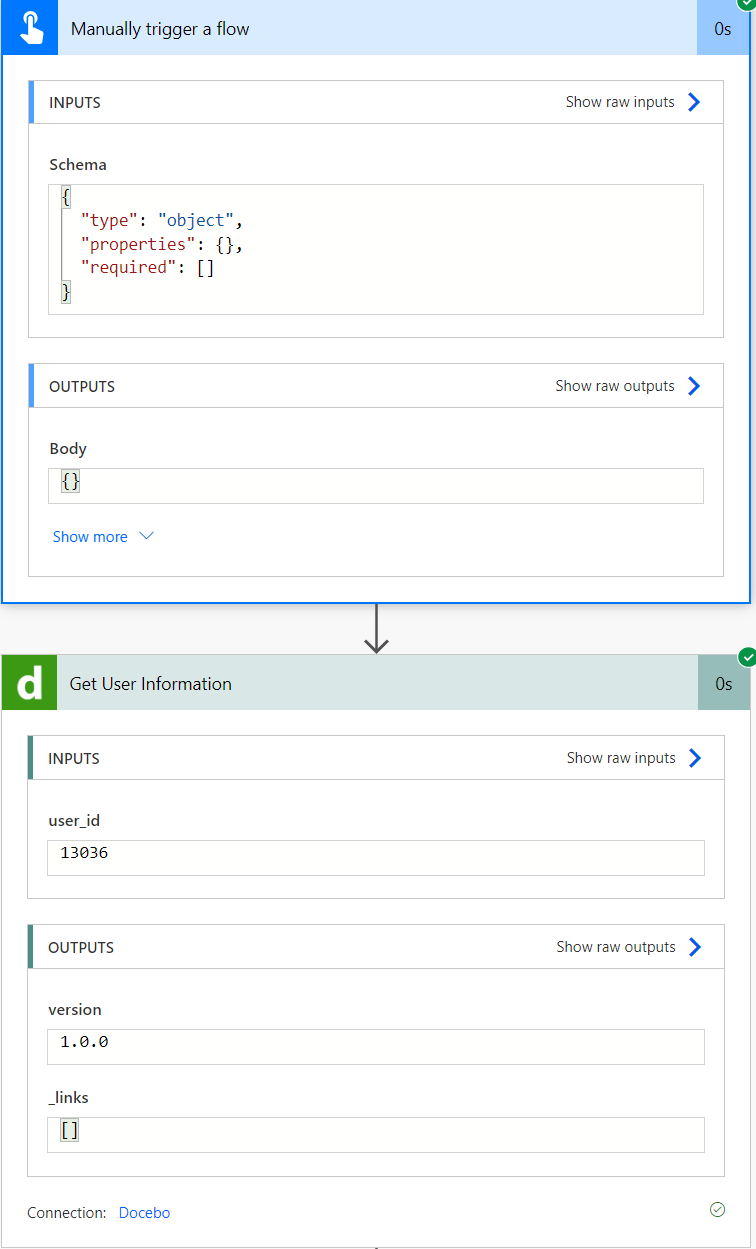
- After a few seconds, the flow should run successfully, and you should receive the email with the information on the user. Notice that you can open the blocks in the middle of the screen in Power Automate and review what happened at each step as well.
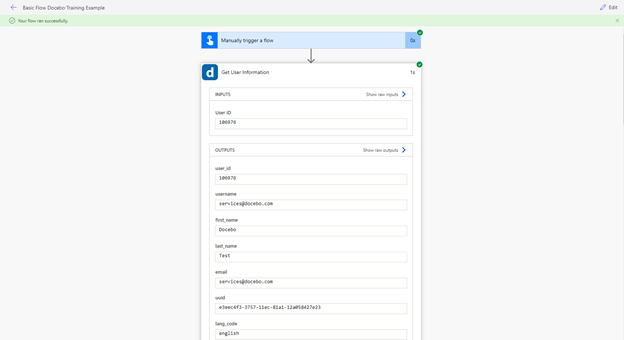

Congratulations, you have successfully created the base of your custom connector and made your first flow!

From here, your abilities are nearly limitless. It’s just a matter of time, creativity, and learning.
Monitoring, Mitigation, and Maintenance Strategies
Before we really dig in to see what we can do with all these great tools, let’s tap the brakes for just a second. It is incredibly easy to get carried away and start building solutions constantly. While there is nothing wrong with that, I strongly encourage you to balance needs and time, and make sure to factor in the cost of any long-term maintenance by producing a solution. These things will increase over time as you build more, but it is unlikely you will be given more time to manage them.
A big piece of using the Docebo API (or really any API) is that it has restrictions. In Docebo’s case this is a soft limit of 1,000 calls per IP address per hour. I know what you’re saying, I want to do so many things and that doesn’t seem like a lot. You are right. But while it is a soft limit, it is best to not blatantly ignore it. With that in mind, you may wish to develop a method to monitor how many calls you are using in any hour. While everyone will have their own solution for this, I can tell you what I do.
When I am building workflows in Power Automate that use a lot of calls regularly throughout the day, I build in two things:
- A check at the start of the flow to see if a variable I have stored in a SharePoint list shared by all of my workflows is less than 1,000. If it is not, then it waits until the next hour to run.
- At the end of any workflow, it updates that same SharePoint variable with how many calls were used.
This has been very effective, and I can rest easy that I am not abusing the service and causing issues.
Additionally, API’s change, break, get updated, and eventually get deprecated. This means it is vital to be aware of which ones you are using and where. I highly recommend some sort of tracker that shows you- at least the following:
- The endpoint URL
- The type of API (GET, DELETE, PUT)
- Where it is used (I name my workflows, so I use the names, but coming up with a method that is easy to tie back where it is used is important)
- When it is used (if scheduled, mark the hours in the day it runs)
Here is an example of a simple Excel file I use:
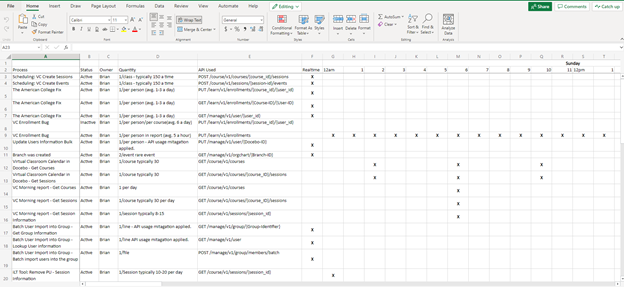
Now this is useful in multiple ways:
- It is a great document for collaboration on teams to keep an eye on everything and passing knowledge on as you move on to other positions.
- When building new workflows that you want to schedule, you can see which hours are already being used too much and find appropriate times.
- Docebo gives a list of upcoming API endpoint changes in the monthly notices. This document makes it super easy to scan for impacts of changes across everything you have built to see what you may need to change.
A Note on Tools and Ecosystems
I covered a few tools above, which happen to be my personal preference, but that is mostly because I work in an office that has and supports tools like Power Automate and SharePoint in Office365, and Postman is what most of the developers also use. These are not the only tool solutions out there. I strongly encourage you to ask around, see what is available within your organization, make friends with a couple developers and see what they use, etc.
While any tool can be used to some degree, often it is much easier to stay within your company’s ecosystem as it can open doors to interacting with other systems and existing data instead of needing to find workarounds to make it work with things just because I wrote about them here.
This is vitally important to keep in mind as we continue our journey. The goal of this series is not to give you purely repeatable steps, but to explain concepts that can be applied regardless of your precise scenario, so you can begin to think about solutions in a different way.
What’s Next?
Ok, so the car is packed, time to hit the road.
Next time we will take a look at reports, how they can often help mitigate API limitations, how to manage and edit them, and how to turn them into data feeds for excel dashboards. Get your tools together so that you can play along!
Guide Series:
The Art of Being Lazy: Leveraging the API to Take Care of Repetitive Tasks & Fill Feature Gaps
Getting Started: Building Out Your Toolbox [Part 1]
Reports: Sending, modifying, and more!
In the Room When it Happens: Act On Events with Webhooks
Bulk Scheduling ILT Sessions with a CSV File
Tag, You’re It!: Tracking and Managing Content Tags
Let Others Do It: The Power of Forms in a Workflow
And We're Back: How to Let Users have a Form as a Wizard Scheduling Tool
You Built It, They Came, Now What?: Scheduling ILT Wizard Bonus Activities